A Fresh Approach to Growing Dendrobium Orchids at Home
Walking into a room filled with graceful orchid blooms can feel like stepping into a tropical paradise. Among the many orchid varieties available to home growers, the Dendrobium genus stands out for its remarkable diversity and manageable care requirements. Successful dendrobium orchid care begins with understanding their specific needs, which differ from other popular houseplant orchids. These perennial plants, native to Asia, produce flowers in shades of white, yellow, orange, green, pink, and purple during spring, summer, and fall. With the right approach, anyone can enjoy these stunning plants indoors.
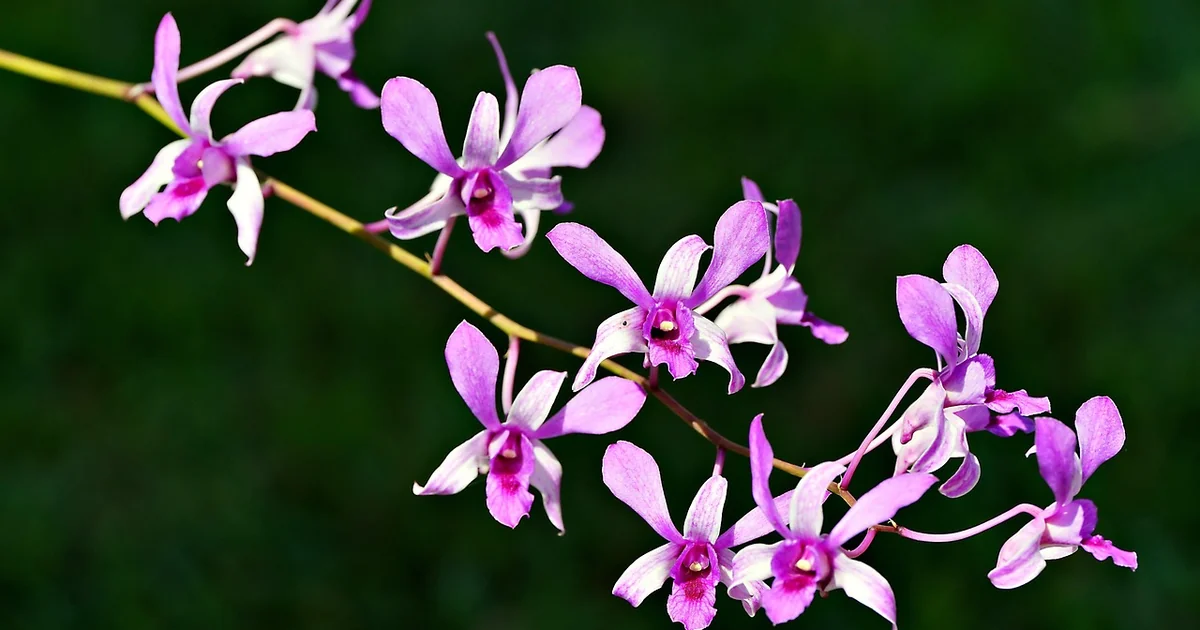
Dendrobium orchids belong to the Orchidaceae family and range in mature size from just 6 inches to a full 48 inches in both height and width. They thrive in USDA zones 9 through 12, but most growers keep them as houseplants in cooler climates. What makes these orchids particularly appealing is their ability to bloom repeatedly when given the right conditions. Many beginners struggle with getting their dendrobium to flower again after the first blooms fade, but the secret lies in five core practices that mimic their natural growing environment.
The following expert tips cover the most critical aspects of dendrobium orchid care, from lighting to winter rest periods. Each tip addresses a common problem that orchid owners face and provides a clear, actionable solution. Whether you are a first-time orchid owner or an experienced collector looking to refine your routine, these five strategies will help your dendrobium thrive.
Mastering Dendrobium Orchid Care: Five Essential Tips
Tip 1: Provide Intense Yet Indirect Light for Six Hours Daily
Light is the single most important factor in getting a dendrobium orchid to bloom. These plants need bright, indirect light for at least six hours every day. A south-facing window is ideal because it delivers the most consistent intensity throughout the day. Without enough light, the orchid will produce plenty of leaves but few flowers. The most telling sign of insufficient light is the appearance of many tiny offspring plants, called keikis, sprouting from relatively young, small canes. If you see a cluster of keikis forming, your orchid is telling you it needs more brightness.
The challenge many growers face is balancing light intensity with preventing leaf burn. Direct afternoon sun through an untreated window can scorch the leaves, causing brown patches that never heal. To solve this, place the orchid within a foot or two of a south-facing window but use a sheer curtain to diffuse the harshest rays. An east-facing window also works well, delivering gentle morning light that is less likely to burn. If you only have a north-facing window, consider supplementing with a full-spectrum grow light for several hours each day. Research from the American Orchid Society suggests that dendrobiums need about 2,000 to 3,000 foot-candles of light for optimal growth, which is roughly equivalent to the brightness of a well-lit office window on a sunny day.
A practical way to test whether your light levels are sufficient is to observe the leaf color. Healthy dendrobium leaves should be a medium green. Dark green leaves usually indicate too little light, while leaves that turn yellowish-green or develop red edges suggest the plant is getting strong light that it can tolerate. Adjust the position gradually over two to three weeks to avoid shocking the plant. Remember that seasonal changes affect light angles, so you may need to move the orchid slightly in winter when the sun sits lower in the sky.
Tip 2: Water with Precision and Adjust by Season
Watering mistakes cause more dendrobium orchid failures than any other single issue. During the active growing season, which spans spring, summer, and early fall, these orchids need consistent moisture. The goal is to keep the potting medium slightly damp but never soggy. The simplest way to check is to stick your finger about an inch into the medium. If it feels dry, it is time to water. If it still feels damp, wait another day or two before checking again.
A specific problem that many owners encounter is mineral buildup from tap water. Dendrobiums are sensitive to salts and minerals that accumulate in the potting medium over time. This buildup can cause leaf tips to turn brown and roots to decline. The solution is to use distilled water or collected rainwater for all watering. If you must use tap water, let it sit out overnight to allow some of the chlorine to evaporate, and flush the pot thoroughly with distilled water once a month to wash away accumulated salts.
During the winter months, watering frequency should decrease significantly. Many dendrobium species require a winter rest period where the plant is kept cooler and drier for several weeks to trigger reblooming. During this rest, water just often enough to keep the medium from drying out completely. Overwatering in winter is especially dangerous because the roots are less active and cannot absorb moisture quickly, leading to root rot. Root rot manifests as yellowing or wilting leaves and a foul smell from the pot. If you suspect rot, remove the orchid from its pot, trim away any black or mushy roots with sterile scissors, and repot in fresh orchid medium before resuming a careful watering schedule.
Tip 3: Maintain the Right Temperature Range with a Nighttime Drop
Temperature control is a subtle but powerful tool in dendrobium orchid care. During the growing season, daytime temperatures should stay between 70°F and 85°F. At night, the temperature should drop by about 10°F to around 60°F to 65°F. This natural fluctuation signals to the plant that it is time to grow and eventually produce flower spikes. Without this nighttime drop, many dendrobiums will refuse to bloom, even if everything else is perfect.
The winter rest period adds another layer of temperature management. Many dendrobium varieties, especially those in the Callista section, need to be kept at about 55°F for several weeks during winter to prompt reblooming in spring. This cooler period mimics their native Asian mountain environments where winters are mild but distinctly cooler. Achieving this indoors can be tricky. An unheated spare bedroom or a basement window well can provide the right conditions. Avoid placing the orchid near drafty windows where temperatures might dip below 50°F, as cold damage can kill the plant.
You may also enjoy reading: Deadhead These 7 Plants in May for Bursts.
For those growing dendrobium phalaenopsis hybrids, also known as den-phals, the winter rest is shorter. These evergreen orchids usually bloom in fall and may rebloom in spring if given a three- to four-week rest at lower temperatures with reduced watering. The key is to observe your specific orchid type and adjust accordingly. Antelope orchids, or Dendrobium spatulata, do not require a winter rest at all and can bloom multiple times per year under consistent warm conditions. Knowing which type you own makes a significant difference in your care routine.
Tip 4: Fertilize Strategically During Growth and Rest Periods
Feeding a dendrobium orchid is not complicated, but timing matters enormously. During the active growing season, apply a balanced orchid fertilizer at half strength every two weeks. A balanced formula, such as a 20-20-20 or 30-10-10 mix that is urea-free, provides the nitrogen, phosphorus, and potassium needed for leaf growth, root development, and flower production. Always follow the label instructions and dilute more rather than less to avoid fertilizer burn, which appears as crispy brown leaf edges.
The most common mistake is continuing to fertilize during the winter rest period. When the orchid slows its growth in response to shorter days and cooler temperatures, it cannot use the nutrients. Fertilizer that sits in the medium without being absorbed can build up and damage the roots. At the end of the growing season, typically around October or November for most growers, reduce fertilizer by about half. During the deepest part of winter, stop fertilizing entirely for four to six weeks. Resume feeding when you see new growth emerging in late winter or early spring.
An additional nuance involves the type of fertilizer. Some experienced orchid growers use a high-nitrogen formula in spring to support leaf and cane growth, then switch to a high-phosphorus formula in late summer to encourage flower bud formation. While this rotation can improve results for advanced growers, a single balanced orchid fertilizer used year-round with proper seasonal adjustments works perfectly well for most home enthusiasts. The most important factor is consistency and not skipping weeks during the active growth phase. Marking a calendar or setting a phone reminder can help you stay on track.
Tip 5: Choose the Right Potting Medium and Repotting Schedule
The final piece of successful dendrobium orchid care involves the physical environment around the roots. Dendrobiums prefer to be slightly cramped in their pots. A container that is too large leaves the medium wet for too long, increasing the risk of rot. When planting, choose a pot that is just large enough to hold the root system with about an inch of space around the edges. Clay pots are often preferred because they breathe and dry out more evenly than plastic pots.
The potting medium is equally critical. Standard potting soil will suffocate orchid roots, which need air circulation around them. Use a commercial orchid potting mixture that contains bark, perlite, charcoal, or sphagnum moss. These ingredients create a well-draining, aerated environment that mimics the tree bark on which dendrobiums grow in the wild. A mix that drains quickly and dries out between waterings prevents the roots from sitting in moisture for extended periods, which is the primary cause of root rot.
Repotting should happen every two to three years, or when the medium breaks down and begins to hold too much water. Old bark decomposes into a dense, soggy mass that lacks air pockets. Signs that repotting is needed include water pooling on the surface, slow drainage, or roots growing out of the drainage holes. When repotting, gently remove the old medium from the roots, trim any dead or rotted roots with sterile scissors, and place the orchid in a fresh pot with new medium. Do not cut off old canes, even if they look dried out or leafless. Those old canes store nutrients and water that support new growth and future blooms. Only remove a cane if it is completely shriveled and black, indicating it is dead.