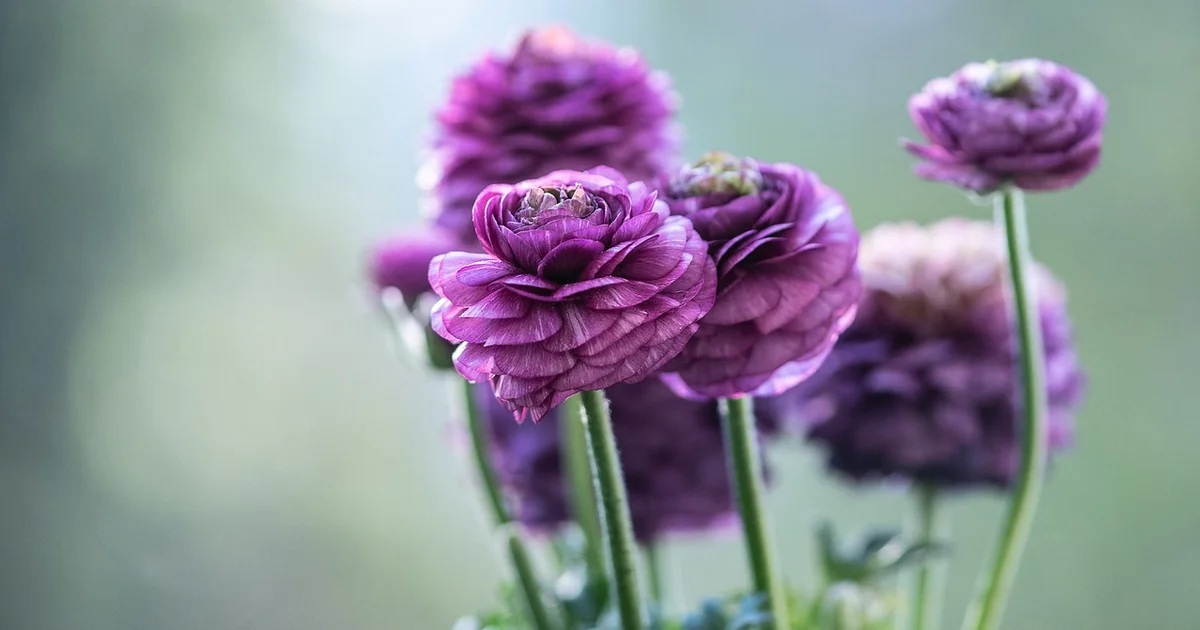
Ranunculus flowers look almost too perfect to be real. Their layered, tissue-thin petals resemble origami creations more than something that grows from a humble corm buried in dirt. Yet beneath that delicate beauty lies a surprisingly resilient plant—one that rewards a bit of know-how with weeks of spectacular color. The catch? A few missteps can turn your dream patch into a soggy mess or a no-show bloomer. These seven secrets will help you sidestep the common pitfalls and coax the best possible performance from your ranunculus, whether you’re a first-time planter or a seasoned gardener looking to refine your technique.
The 7 Secrets to Mastering Ranunculus Care
Secret #1: Pre-Sprout Your Corms for a Head Start
Most ranunculus failures happen before the corm ever hits the soil. These odd-looking, claw-shaped storage organs need a specific wake-up call, and simply burying them dry is a gamble. The secret begins four weeks before your last spring frost. Soak the corms in room-temperature water—keep it below 55°F—for exactly four hours. Change the water every hour, or better yet, drop in a small aquarium pump to aerate it continuously. Why the fuss? Stagnant water encourages bacteria that can rot the corm from the inside out. After soaking, place the corms (tuberous fingers pointing down) in a shallow tray filled with lightly moistened seed-starting mix. Cover them with another inch of damp mix, then stash the tray in a cool, dark spot—your basement or garage works well if temperatures stay between 50°F and 60°F. Check daily for mold and remove any corms that feel mushy. Roots will appear in roughly two weeks, followed by tiny green sprouts. At that point, your corms are ready for the garden. This pre-sprouting step is the single most effective way to guarantee a strong start, especially for gardeners in zones 4 through 6.
Secret #2: Time Your Planting to Your Hardiness Zone
Ranunculus care demands zone-specific timing, and getting this wrong means you miss the bloom window entirely. In USDA zones 7 through 10, plant corms in the fall—October or November works well. These fall-planted corms will establish roots through the winter and burst into flower by late winter or early spring, often a full month ahead of spring-planted stock. Protect them from hard freezes with a low tunnel or frost cloth if temperatures dip below 25°F. For gardeners in zones 4 through 6, fall planting is too risky because the corms will rot over a wet, cold winter. Instead, plant pre-sprouted corms in early spring, about two to four weeks before your last frost date. The soil should be workable but not soggy. In both scenarios, the goal is to let the plants experience their preferred cool spring temperatures (60s to low 70s°F) during the main growth and flowering phase. Once summer heat arrives, ranunculus naturally shuts down—so timing the planting to maximize cool weather is everything.
Secret #3: Give Them the Sun They Crave
Ranunculus is a full-sun plant through and through. It needs six to eight hours of direct sunlight daily to produce those dense, multi-petaled blooms and sturdy stems that stand upright without staking. Skimp on light, and you’ll get fewer flowers, weaker stems that flop over, and a leggy, sparse look. The reason is physiological: photosynthesis fuels the energy-intensive process of building those layered petals. A ranunculus in partial shade simply cannot store enough reserves. Choose a planting site that faces south or west, away from tall trees or buildings that cast afternoon shade. If your garden has limited sun, consider growing ranunculus in containers that you can move to follow the light. One more nuance: morning sun is slightly preferable to harsh afternoon rays in hotter climates, as it dries dew from the leaves quickly and reduces the risk of powdery mildew.
Secret #4: Nail the Soil—It’s All About Drainage
Clay soil is the nemesis of ranunculus care. Those tuberous corms will rot in waterlogged ground within days. The ideal medium is a rich, loamy soil that holds moisture yet drains freely. Before planting, amend your bed with compost or aged manure to improve both texture and fertility. Aim for a soil pH between 6.0 and 7.0—slightly acidic to neutral. If you’re stuck with heavy clay, build a raised bed at least 8 inches tall or use containers with drainage holes. A 50-50 blend of quality potting mix and coarse sand or perlite works beautifully. There is one exception: native species like Ranunculus repens (creeping buttercup) can tolerate wetter, heavier soils along pond edges, but the florist hybrids you buy from nurseries are far less forgiving. Test your drainage by digging a 12-inch hole, filling it with water, and timing how long it takes to drain. If it’s still standing after 30 minutes, you need to amend the soil or switch to raised beds.
Secret #5: Water with Precision—Not Guesswork
Ranunculus likes consistent moisture, but it despises wet feet. The sweet spot is soil that feels like a wrung-out sponge: damp to the touch but not dripping. After planting pre-sprouted corms, water them in thoroughly, then let the top inch of soil dry before watering again. As foliage emerges and buds form, increase frequency to keep the root zone evenly moist. A soaker hose or drip irrigation is ideal because it delivers water directly to the roots without wetting the leaves—wet foliage invites fungal diseases, especially in cool, humid spring weather. When flowers fade and the foliage starts yellowing (a sign the plant is entering dormancy), gradually cut back on watering. This step is crucial if you plan to lift and store the corms after the growing season. Overwatering at this stage can cause the corms to rot in storage. In the hottest part of summer, allow the soil to go almost dry to encourage the plant to finish its cycle naturally.
Secret #6: Feed Bimonthly for Extended Blooms
Ranunculus are heavy feeders during their active growth and flowering phase. A bulb-specific fertilizer with a balanced N-P-K ratio (such as 10-10-10 or a bloom booster like 5-10-10) applied every two weeks keeps the show going. Start fertilizing when the first leaves appear, and continue until the blooms begin to fade. Avoid high-nitrogen fertilizers, which push leafy growth at the expense of flowers. For an organic option, work bone meal and a kelp-based liquid feed into your regimen. A simple schedule: mix a granular bulb fertilizer into the soil at planting time, then switch to a water-soluble formula for the biweekly feeds. This consistent supply of phosphorus and potassium supports strong stem development and a longer bloom period. In my experience, a fertilized ranunculus patch can keep throwing flowers for six to eight weeks, while an unfed one may fizzle out after four.
Secret #7: Deadhead, Divide, and Watch for Invasive Spread
The final secret ties together maintenance and next-season success. Deadheading—removing spent flowers before they set seed—encourages the plant to redirect energy into producing more blooms instead of seeds. Snip off faded flowers at the base of the stem using clean pruners. Once all flowers have finished and the foliage turns completely yellow, cut the plant down to soil level. At this point, you have a choice: leave the corms in the ground if you’re in zones 7-11 and they’re well mulched, or dig them up for storage. To store, gently lift the corms, brush off soil, and let them cure in a warm, dry, shaded spot for a week. Then pack them in a paper bag filled with dry peat moss or vermiculite and store in a cool (40-50°F), dark place until next season. Division is simple—separate the offsets (small corms that have formed around the parent) and replant them the following year. Also keep an eye on weedy species like Ranunculus repens (creeping buttercup). This aggressive perennial spreads by stolons and can quickly colonize a garden bed, smothering delicate neighbors. A single plant can expand to a 36-inch-wide mat in one season. Regular division and removal of runners keeps it in check. If you’re growing the florist-type hybrids (Ranunculus asiaticus), invasive spread is not an issue—they behave themselves beautifully.
Common Pitfalls and How to Avoid Them
Even with the best intentions, a few issues trip up gardeners. Here’s how to recognize and solve them before they ruin your ranunculus care efforts.
You may also enjoy reading: 7 Bat Secrets Pest Pros Reveal for Your Garden After Dark.
Yellowing leaves before bloom time: This usually signals overwatering or poor drainage. Check the soil moisture. If it’s soggy, stop watering until the top inch dries. If the problem persists, dig up a corm and inspect it—if it’s soft and brown, root rot has set in. Improve drainage or replant in a raised bed.
No flowers despite healthy foliage: The most common culprit is insufficient sunlight. Ranunculus needs a bare minimum of six hours of direct sun. Too much nitrogen fertilizer also causes lush leaves at the expense of blooms. Switch to a bloom-booster formula with higher phosphorus.
Stems flopping over: This can result from too little light (stems stretch to reach the sun) or from heavy rain that beats down the flowers. Stake tall varieties with thin bamboo canes and soft ties, or grow them in a spot sheltered from strong winds.
Powdery mildew on leaves: Poor air circulation and high humidity create the perfect environment for this white, powdery fungus. Space plants 9 inches apart to allow airflow. Water at the base, not overhead. If mildew appears, treat with a baking soda solution (1 teaspoon per quart of water) or a sulfur-based fungicide labeled for ornamentals.
Corms rotting in storage: This happens when corms are stored damp or in unventilated containers. Always cure them thoroughly before storage, and never seal them in plastic. A paper bag with dry peat is your best bet. Check periodically over winter and discard any that show signs of mold.
A Note on Toxicity
It’s important to know that all parts of ranunculus plants are toxic to humans and pets if ingested. The sap contains protoanemonin, a compound that causes burning of the mouth, vomiting, and skin irritation upon contact. Keep children and curious animals away from the planting area. Wear gloves when handling cut flowers or during deadheading, especially if you have sensitive skin. This toxicity is one reason why some gardeners hesitate to plant ranunculus—but with a little caution, the beauty far outweighs the risk. Simply wash your hands after handling, and don’t let pets chew on the foliage. The flowers themselves are not likely to be eaten because of their bitter taste.