Bringing Your Succulent Family to Full Bloom: A Guide to Easy Repotting
The quiet beauty of succulents – their architectural forms, intriguing textures, and remarkable resilience – has made them hugely popular houseplants. But even these seemingly low-maintenance plants require a little care to thrive. One of the most crucial aspects of succulent care is understanding when and how to repot them. Neglecting this simple step can lead to root-bound conditions, stunted growth, and a decline in overall health. Let’s delve into the art of repotting succulents, transforming a potentially stressful task into a rewarding experience that will ensure your little green friends continue to flourish for years to come. This isn’t just about giving them a bigger pot; it’s about providing the ideal environment for sustained growth and vibrant beauty.
When Do Succulents Need Repotting? Recognizing the Signs
The key to successful repotting lies in recognizing the signs that your succulent is ready for a new home. It’s not about a rigid schedule; it’s about observing your plants and responding to their needs. Several indicators will tell you when it’s time to intervene. Firstly, and perhaps most obviously, is when the roots begin to fill the existing pot. This is a clear sign that your succulent is struggling to access enough nutrients and water, leading to stunted growth and a generally unhappy plant. Secondly, you’ll notice roots emerging from the drainage holes – a rather dramatic visual cue! This indicates that the roots have completely encircled the pot, effectively creating a dense, root-bound mass. Beyond the visual, consider the plant’s overall health. A succulent that’s leaning excessively, toppling over despite not being particularly large, is a strong signal that it’s root-bound and seeking stability. Also, observe the soil – if it’s consistently soggy, even after watering, this suggests poor drainage and an inability for the roots to breathe. Finally, if your succulent is noticeably smaller than it once was, or if it’s stopped producing offsets (those adorable baby succulents), it could be a sign that it’s time for a fresh start. Newly purchased plants in small plastic containers also need immediate attention. The typical nursery pot is far too small, and the roots will quickly become root-bound. Don’t delay – repot them as soon as you bring them home. The average succulent needs repotting about every two years, but this is a guideline, not a rule. Monitor your plants closely and adjust the schedule based on their individual needs and growth rate. A slow-growing succulent might only require a repot every three to four years, while a faster-growing variety might benefit from a change of scenery annually.
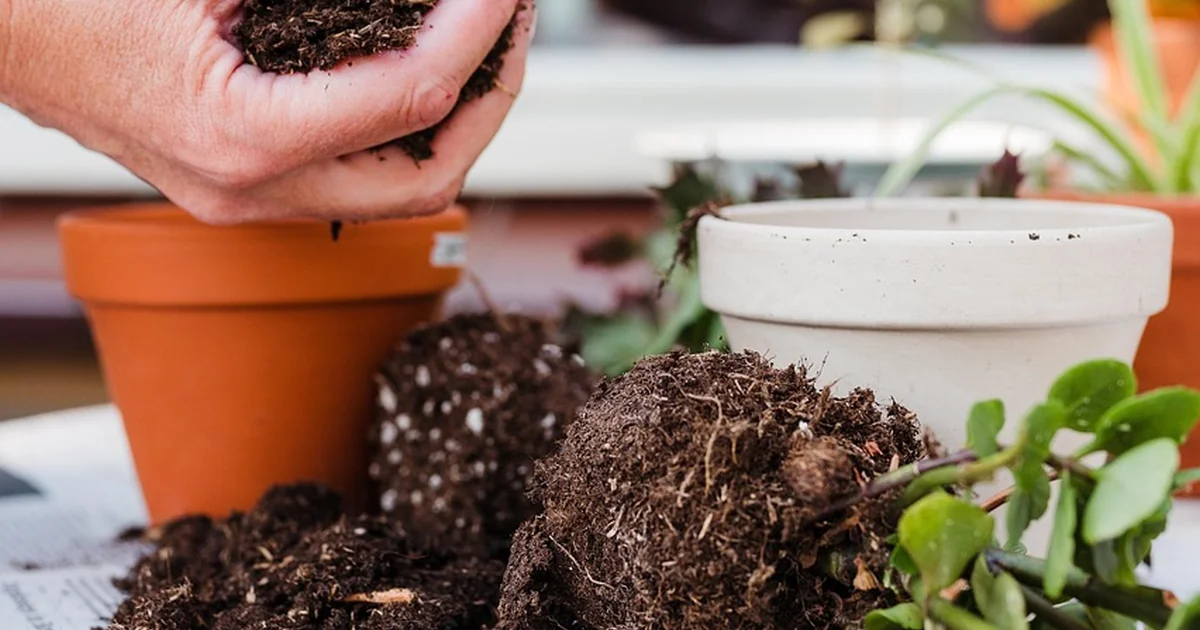
How to Repot Succulents: A Step-by-Step Guide
Repotting succulents doesn’t have to be daunting. With a little patience and the right techniques, you can transform this task into a simple and rewarding experience. Here’s a detailed breakdown of the process:
- Gather Your Supplies: You’ll need a new pot with ample drainage holes (a larger diameter pot is generally preferable, about 10% larger in height and width for slow-growing succulents, and 2 inches wider for faster-growing varieties), a succulent and cactus potting mix (crucial for proper drainage – avoid regular potting soil), a small trowel or spoon, gloves (to protect your hands from thorns and sap), and a watering can.
- Prepare the New Pot: Add a thin layer of succulent potting mix to the bottom of the new pot. This will help prevent the roots from sitting directly on the bottom, which can lead to rot.
- Remove the Succulent from its Old Pot: Gently loosen the soil around the edges of the old pot. If the succulent is stuck, tap the bottom of the pot or gently wiggle it to loosen the roots. If necessary, use a stick to carefully tease the roots loose.
- Loosen the Roots: This is a critical step. Carefully tease the roots apart with your fingers. “Tickle” the roots to encourage them to grow outward, rather than circling the pot. For particularly stubborn root balls, you might need to gently cut some of the roots with a sharp knife to encourage outward growth.
- Plant the Succulent: Place the succulent in the center of the new pot, ensuring that the top of the root ball is level with the soil surface.
- Fill in with Soil: Gently fill in the remaining space around the roots with succulent potting mix, pressing lightly to secure the plant.
- Top Dressing (Optional): Adding a layer of decorative gravel or pebbles to the top of the soil can help retain moisture and add a polished look.
- Water Sparingly: After repotting, water the succulent lightly and allow the soil to dry out completely before watering again.
How Often Should Succulents Be Repotted? – A Balanced Approach
As mentioned earlier, there isn’t a fixed timetable for repotting succulents. It’s more about responding to their individual needs. While every two years is a good general guideline, factors like growth rate, pot size, and overall health play a significant role. A slow-growing succulent might be perfectly content in the same pot for three to four years, while a more vigorous variety may benefit from a change of scenery annually. Don’t be afraid to err on the side of caution – if you notice any of the signs we discussed earlier (root-bound conditions, stunted growth, soil saturation), it’s time to repot, regardless of the time of year. Furthermore, consider the type of pot you’re using. Terracotta pots, with their porous nature, allow for better airflow and drainage, reducing the risk of root rot. Plastic pots retain more moisture, so you’ll need to be extra careful not to overwater. The frequency of repotting also depends on whether you’re repotting succulent arrangements. As previously mentioned, repotting succulent arrangements is challenging because the roots are often entangled. If you are simply repotting the same arrangement of plants to a larger pot, choose one that is 10 percent taller and wider than the old one. If you omit or add succulents to the mix, scale the pot size up or down as needed. Removing the entire arrangement from the pot instead of prying out each plant individually. If the roots are entangled, try to loosen them with your fingers first. Removing the potting mix in-between the roots often helps separating the roots. Tearing, breaking, and even cutting some roots may be inevitable to separate the plants. Try to be as gentle as possible. Carefully inspect each plant and its roots. Leave any plants that are visibly damaged or diseased out of the repotting process.
Repotting Succulent Arrangements: A Delicate Process
You may also enjoy reading: 7 Ways to Grow Your Own Flaxseeds at Home.
Repotting succulent arrangements presents a unique challenge due to the intricate network of roots often intertwined within the container. The key is to approach this task with patience and a gentle touch. Instead of attempting to pry individual plants from the pot, which can cause significant root damage, it’s generally best to remove the entire arrangement at once. If the roots are tightly bound, gently loosen them with your fingers, carefully teasing them apart without causing excessive breakage. You may need to trim some of the roots to encourage outward growth and prevent them from circling the pot. Be mindful of the delicate nature of the plants and handle them with care. When placing the arrangement in the new pot, ensure that the soil level is consistent with the original arrangement. After repotting, allow the plants to acclimate to their new surroundings before watering.
Caring for Succulents After Repotting: Transitioning to Success
Repotting is just the first step in ensuring your succulent’s continued health and vitality. During the initial weeks after repotting, it’s crucial to provide a little extra care. Avoid watering immediately after repotting. Allow the soil to dry out completely – this can take anywhere from 3 to 7 days, depending on the environment. Overwatering is a common cause of succulent death, so err on the side of caution. Provide bright, indirect sunlight. Succulents thrive in bright light, but direct sunlight can scorch their leaves. Monitor your succulent closely for signs of stress, such as yellowing or wilting leaves. If you notice any issues, adjust your care accordingly. Finally, remember that repotting can be a slightly stressful experience for your succulent. Give it time to recover and adjust to its new surroundings. With proper care and attention, your succulent will bounce back and continue to flourish for years to come.
Interesting Fact: Did you know that succulents store water in their leaves, stems, and roots, allowing them to survive in arid environments? This remarkable adaptation is why they’re so well-suited to dry conditions and why they’re relatively low-maintenance houseplants. Historical Note: Succulents have been cultivated for centuries, with evidence of their use in ancient civilizations for medicinal purposes and as ornamental plants. They’ve been a cherished part of human culture for millennia, showcasing their enduring appeal.


