There is something almost addictive about hydrangeas. Once you see those enormous, fluffy blossoms swaying in the summer breeze, it is hard to stop at just one plant. The problem is that buying multiple mature hydrangeas from a nursery can quickly drain your wallet. Fortunately, there is a clever, budget-friendly workaround that lets you multiply your collection without spending a fortune. This method allows you to turn one beloved shrub into many, saving money and preserving your favorite varieties for years to come.
Why Bother With Hydrangea Propagation?
Before diving into the step-by-step process, it helps to understand why this technique is so valuable. Taking hydrangea propagation cuttings is not just a fun gardening experiment. It is a practical solution to several common problems.
First, it is incredibly cost-effective. A single cutting can grow into a full-sized plant that would cost twenty or thirty dollars at a garden center. Second, it allows you to preserve a special plant that may no longer be available commercially. Perhaps your grandmother grew a particular variety, or you found an unusual color at a local park. Propagation lets you clone that exact plant. Third, it is a wonderful way to share your garden with friends and family. Instead of buying gifts, you can give them a rooted cutting that will remind them of you every time it blooms. Finally, if you have an older hydrangea that is looking tired or damaged, you can take cuttings from its healthiest parts and start fresh, essentially saving the plant from decline.
A is for Assess and Select the Right Growth
The very first step in successful propagation is choosing the correct material from the mother plant. You cannot just snip any old branch and expect it to root. You need to assess the plant carefully.
Look for stems that are healthy, stocky, and have leaves spaced relatively close together. Avoid any parts of the plant that show signs of disease, insect damage, or wilting. The ideal candidate is a growing tip that has not yet produced a flower bud. If you see a stem with a bloom on it, skip it. Flowering stems put their energy into the blossom, not into root development.
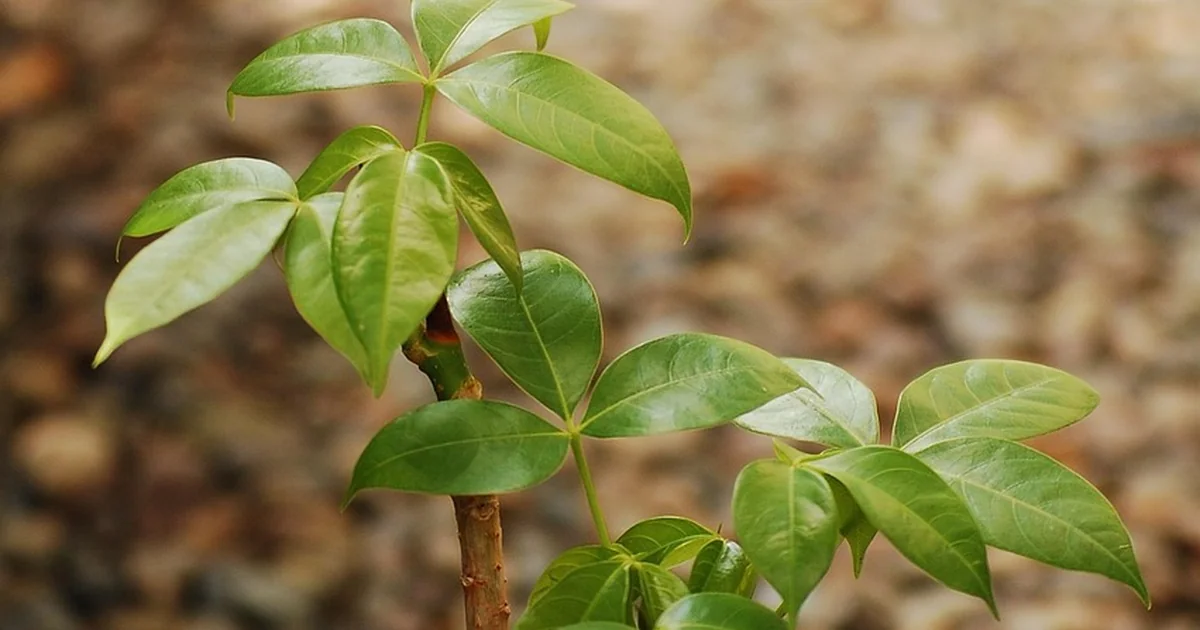
For hydrangeas, you want to use what is called a softwood cutting. This means you are taking the newest, freshest growth from the current season. Softwood cuttings are taken during the active growing period, which for hydrangeas runs from late spring through late summer. The stems should be flexible but not too floppy. If you bend a stem and it snaps cleanly, it is likely too woody. If it bends without breaking and feels firm, it is just right. This timing is critical because the cuttings need enough time to develop roots before the plant goes dormant for the winter. Aim to take your cuttings at least six to eight weeks before your first expected frost date.
B is for Best Timing and Tool Preparation
Timing is everything when it comes to hydrangea propagation cuttings. The window between spring and late summer is your golden opportunity. Early morning is the best time of day to take cuttings because the plant is fully hydrated from the night before. The leaves are turgid and full of moisture, which gives your cutting a strong start.
Before you head outside, prepare your tools. You will need a sharp pair of pruning shears or a clean knife. Dull blades can crush the stem tissue, making it harder for the cutting to absorb water and root. Disinfect your tool thoroughly before use. Wash it with soapy water, then wipe the blades down with rubbing alcohol. This simple step prevents the spread of diseases from one plant to another. A clean cut heals faster and reduces the risk of rot.
You should also have a clean container of water or a damp paper towel ready to receive the cuttings the moment they are taken. Hydrangea cuttings are surprisingly delicate. They can wilt within minutes if left exposed to the air and sun. Having your supplies ready before you make the first cut will dramatically improve your success rate.
C is for Cutting and Preparing the Stem
Making the Perfect Cut
Once you have identified a healthy stem, it is time to make the cut. Using your disinfected pruners, cut a branch tip that is about six inches long. Make the cut at a 45-degree angle, just below a leaf node. A leaf node is the small bump on the stem where a leaf attaches. This area is rich in natural growth hormones and is where roots are most likely to emerge.
Stripping and Trimming Leaves
Now you need to prepare the cutting for planting. Hold the stem upright and gently strip away the leaves from the lower four inches of the cutting. You can do this by pinching them off with your fingers or using your pruners. The goal is to leave only the top two or three leaves on the cutting. If those remaining leaves are large, cut them in half horizontally with your scissors. This sounds drastic, but it is a crucial step. Large leaves lose a lot of moisture through transpiration. By reducing their size, you help the cutting conserve water while it has no roots to drink with. The cutting can then focus its energy on growing new roots instead of trying to keep its big leaves alive.
Storing Cuttings Immediately
As soon as you finish trimming the leaves, wrap the bottom of the cutting in a moist paper towel. Place the wrapped cuttings in a plastic bag and keep them in a cool, shaded spot. Do not let them sit in direct sunlight or in a hot car. Ideally, you should plant them within 24 hours. The longer they sit, the lower your chances of success. If you absolutely cannot plant them the same day, you can store them in the refrigerator for a day or two, but do not let them freeze.
D is for Dipping in Rooting Hormone
This step is optional, but it dramatically increases the odds of success. Rooting hormone is a powder or gel that contains synthetic auxins, which are plant hormones that stimulate root growth. It is widely available at garden centers and online.
To apply it, pour a small amount of the powder onto a clean plate or into a shallow dish. Never dip your cutting directly into the original container, as this can contaminate the entire batch. Moisten the bottom four inches of your cutting with a little water, then roll it in the powder. Tap off any excess. You want a thin, even coating, not a thick clump. Too much hormone can actually inhibit rooting.
Rooting hormone is especially helpful for hydrangeas because they can be a bit stubborn about rooting compared to some other shrubs. Studies have shown that using a rooting hormone can increase the percentage of successful cuttings by about 30 to 40 percent. It also speeds up the process, meaning you will see roots in two to three weeks instead of four to six. For anyone serious about hydrangea propagation cuttings, this is a small investment that pays big dividends.
E is for Environment and Planting Medium
Choosing the Right Potting Mix
Hydrangeas are not picky, but they do have preferences. The best medium for rooting cuttings is a light, well-draining mix that holds moisture without becoming waterlogged. A standard seed-starting mix works beautifully. You can also make your own by combining equal parts peat moss and perlite or vermiculite. Avoid using heavy garden soil or potting mixes that contain large chunks of bark or compost. These can harbor fungal spores that cause rot.
Filling the Containers
Fill small pots or cell trays with your chosen mix. Water the mix thoroughly before inserting the cuttings. This ensures that the medium is evenly moist and settles around the stem. Use a pencil or a chopstick to poke a hole in the center of the pot. This hole should be deep enough to accommodate the bottom four inches of the cutting. Inserting the cutting directly into dry soil can scrape off the rooting hormone and damage the stem.
Planting the Cutting
Gently place the cutting into the pre-made hole. Firm the soil around the stem with your fingers to ensure good contact. The leaves should not touch the soil surface, as this can lead to rot. Water the pot again lightly to settle everything in place. Now your cutting is ready for its humidity tent.
F is for Fostering Humidity and Moisture
This is perhaps the most critical factor for success. A freshly cut hydrangea stem has no roots to absorb water. It relies entirely on the moisture in its leaves and stem. If the air around it is dry, the cutting will wilt and die within hours. Creating a humid microclimate is essential.
You may also enjoy reading: 7 Best Container Plants That Actually Thrive on Neglect.
The easiest way to do this is to cover the pot with a clear plastic bag. Place the bag over the pot like a tent, making sure it does not touch the leaves. You can use sticks or small stakes to hold the plastic away from the foliage. Secure the bag around the pot with a rubber band or twist tie. This creates a miniature greenhouse where the humidity stays near 100 percent. You can also use a clear plastic dome or a recycled soda bottle with the bottom cut off.
Place the covered pots in a warm location with bright, indirect light. A windowsill that gets morning sun but is shaded in the afternoon is ideal. Avoid direct, hot sunlight, which will cook the cuttings inside the bag. The ideal temperature for rooting is between 65 and 75 degrees Fahrenheit. If your home is cooler, you can place the pots on a heat mat designed for seedlings. This gentle bottom heat can speed up rooting significantly.
Open the bag every two or three days to let in fresh air and check the moisture level. If the soil feels dry, mist it lightly. If you see condensation inside the bag, that is a good sign. If the bag is dripping wet, open it for a few hours to let some moisture escape. Too much moisture can lead to fungal diseases like gray mold.
G is for Gradual Transition and Growing On
Checking for Roots
After about two to three weeks, your cutting should have started developing roots. You can check by giving the stem a very gentle tug. If you feel resistance, roots have formed. Do not pull hard enough to damage them. Another way to check is to gently tilt the pot and look at the drainage holes. If you see tiny white roots poking out, congratulations, your propagation was successful.
Hardening Off
Once roots are established, you cannot just rip off the plastic bag and leave the cutting in a dry room. That would shock and likely kill it. You need to harden it off gradually. Over the course of a week, open the bag for longer periods each day. Start with an hour on the first day, then two hours the next, and so on. After a week, you can remove the bag entirely. The cutting is now a small plant that can handle normal household humidity.
Pinching for Bushier Growth
During the first year or two, you have an important job to do. Hydrangeas naturally want to grow tall and lanky. To encourage a bushy, compact shape with more flower stems, you need to pinch the tips. Once your new plant has several sets of leaves, use your fingers to pinch off the very top growing point. This forces the plant to send out side branches. Do this two or three times during the growing season. The result will be a much fuller, more floriferous plant in its second or third year.
Transplanting Time
When you see new leaves emerging from the top of the cutting, it is ready for a bigger home. Transplant it into a pot that is about four to six inches in diameter, using a standard potting mix. Keep the plant in a sheltered spot for its first winter. If you live in a cold climate, you can overwinter the pot in an unheated garage or bury it in the ground up to the rim for insulation. Come spring, you can plant it in its permanent garden location.
Hydrangea Propagation Frequently Asked Questions
Can You Root Hydrangea Cuttings in Water?
Technically, yes, you can place a hydrangea stem in a glass of water and watch roots form. However, this method has a much lower success rate. Water roots are different from soil roots. They are more fragile and often fail to transition to soil. For reliable results, stick with the soil method described above. It mimics the natural environment and produces stronger, more resilient roots.
How Long Does It Take Hydrangea Cuttings to Root?
Under ideal conditions of warmth and humidity, you can expect roots to appear in two to three weeks. Cooler temperatures or lower humidity will slow the process. Be patient. If you see no roots after four weeks, do not give up immediately. Some varieties root slower than others. Check that the stem is still firm and green. If it is mushy or black, it has rotted and you need to start over. If it is still firm, give it more time.
Can You Pinch Out Hydrangea Cuttings?
Yes, and you should. Pinching is not just for established plants. Once your rooted cutting has grown several sets of leaves, pinching the tip encourages branching. This is especially important if you want a plant that produces many flower heads rather than one tall stem. Start pinching early in the first growing season and continue through the second year.
How Do You Make Hydrangeas Blue?
This is a common question, and the answer lies in soil chemistry. Hydrangeas are unique in that their flower color can change based on the pH of the soil. Acidic soil (pH below 6.0) produces blue flowers. Alkaline soil (pH above 7.0) produces pink flowers. To turn a pink hydrangea blue, you need to lower the soil pH. You can do this by adding aluminum sulfate or sulfur to the soil according to package directions. It is easier to control the color if you grow your hydrangea in a container, where you can manage the soil mix precisely. Keep in mind that not all varieties change color. White hydrangeas, for example, stay white regardless of pH.
When Can I Transplant My Hydrangea Cuttings?
Wait until you see new growth emerging from the top of the cutting. This is a clear sign that the root system is established enough to support the plant. Typically, this happens about four to six weeks after you first took the cutting. If you started your cuttings in late summer, it may be best to keep them in pots through the winter and transplant them into the garden the following spring. This gives them a full season to grow strong before facing the elements.
Mastering the seven ABCs of hydrangea propagation turns a casual gardener into a plant multiplier. With a little patience and the right technique, you can fill your yard with stunning hydrangeas without spending a dime. The satisfaction of watching a tiny cutting grow into a magnificent blooming shrub is one of the greatest joys of gardening.