Why Container Gardening Works Wonders in Tight Spots
A tiny patio, a narrow balcony, or a postage-stamp yard does not mean you have to give up on gardening. In fact, small space container gardening opens up creative possibilities that larger landscapes simply cannot match. You can rearrange your entire green scene in an afternoon. You can move sun-loving plants into the light and shade lovers out of the heat within minutes. The best part is that you get to change the whole mood of your outdoor area whenever the urge strikes, without digging up a single bed.
Growing plants in pots also gives you precise control over soil quality, drainage, and moisture. This means even finicky specimens often thrive when they would struggle in open ground. And planters themselves become design elements. They can hide ugly corners, frame a doorway, or add a splash of color where nothing else will grow. So if your outdoor square footage is limited, do not think of it as a disadvantage. Think of it as an invitation to get clever with containers.
Raise Pots on Bricks for an Instant Multi-Level Display
One of the simplest ways to add visual punch to a compact garden is to vary the heights of your planters. Placing pots at different levels immediately draws the eye upward and creates depth. The flat surface of larger containers set behind can act as a backdrop, highlighting the flowers and foliage of the plants placed in front.
To achieve this look, gather a few reclaimed bricks or concrete blocks. Stack them in stable piles of two or three, then set smaller pots on top. You can also use overturned terracotta saucers, wooden crates, or even sturdy old books wrapped in waterproof fabric. The goal is to create a stepping-stone effect across your patio or balcony.
Where to Find Reclaimed Bricks
New bricks cost money and look too uniform. Reclaimed bricks have character. They show age, moss stains, and subtle color variations that blend naturally into a garden setting. Check online marketplaces such as Facebook Marketplace or Craigslist for people giving away bricks from demolished structures. The global Salvo directory also lists salvage yards in many countries where you can pick up architectural remnants for pennies.
Why This Tricks the Eye
Landscape designers use staggered planting to make small spaces feel larger. When you soften the boundary edge between different pot heights, the brain reads the area as more expansive than it really is. A single row of identical pots on the ground creates a flat line that stops the eye cold. But a cascading arrangement of varied heights encourages the gaze to wander, giving the illusion of a bigger, more layered garden.
Rotate a Table-Top Centerpiece Planter for Year-Round Color
An always-abundant pot overflowing with flowers on a patio table brings joy every single day. But no single plant produces blooms in every season. The trick is to rotate four matching containers, each planted with a different seasonal star, so you always have one at its peak.
Choosing the Right Pots
Select four planters that match the style and material of your table. For a metal table, consider upcycled metal containers such as old enamel pails or copper pots. For a wooden table, terracotta or glazed ceramic works beautifully. The containers should be identical in size and shape so that swapping them feels seamless.
How to Drill Drainage Holes Without Cracking the Pot
Many beautiful containers meant for indoor use lack drainage holes. You can drill your own with the correct technique. Place the pot upside down on a towel or a piece of cardboard. Stick a cross of masking tape over the spot you want to drill. This prevents the drill bit from skidding across the glazed surface and reduces chipping. Use a drill bit suited to the material. For ceramic or porcelain, a dry diamond drill bit used for tiles works well. For metal, use a metal drill bit. Let the weight of the drill do the work. Do not press down hard. Apply steady, gentle pressure and let the bit cut at its own pace. Water is not always necessary if you go slowly, but a light spray can keep the bit cool.
Sample Rotation Plan
In early spring, plant a pot with pansies or violas. As they fade in late spring, swap in a pot of summer annuals like petunias or zinnias. Come autumn, bring out a pot with chrysanthemums or ornamental kale. For winter, a small evergreen shrub or a cluster of hellebores keeps the table alive. Having an always-abundant centerpiece changes the entire feel of your outdoor dining area throughout the year.
Plant Summer-Flowering Bulbs for Exotic Fireworks
Many gardeners assume that by May it is too late to plant bulbs. This is not true. Summer-flowering bulbs such as Oriental lilies, pineapple lilies (Eucomis), and calla lilies (Zantedeschia) can still go into containers in late spring. These plants produce dramatic, eye-catching blooms that feel tropical and luxurious. Yet they are surprisingly easy to grow, especially in the well-drained environment of a pot.
Why Containers Are Ideal for These Bulbs
Most summer-flowering bulbs do not survive freezing winter ground. Growing them in planters means you can dig them up effortlessly at the end of the season and store them indoors during cold months. Simply lift the bulbs, shake off excess soil, let them dry in a cool place for a few days, then pack them in dry peat or newspaper and keep them in a dark spot at around 10°C until spring.
Three Stunning Choices for Small Spaces
Oriental lilies produce huge, fragrant flowers in shades of white, pink, and deep red. They reach about 60-90 cm tall, so they work well as a focal point in a medium-sized pot. Pineapple lilies offer a quirky, spiky flower head that looks like a miniature pineapple. They grow to about 45 cm and add unusual texture. Calla lilies bring elegant, trumpet-shaped blooms in white, yellow, pink, or near-black. They stay compact at around 30-40 cm, making them perfect for smaller containers.
Plant bulbs about 10 cm deep with the pointed end facing upward. Use a high-quality potting mix with added grit for drainage. Water well after planting and place the pot in a sunny spot. Within a few weeks you will see vigorous growth, followed by some of the most impressive flowers your small garden has ever seen.
Craft a Pot Wreath for Vertical Impact
When ground space is at a premium, look up. A pot wreath is a circular frame filled with small planted pots that hangs on a wall, fence, or door. It turns a blank vertical surface into a living artwork and takes up zero floor space.
What You Need and How to Build It
Start with a sturdy flat wreath frame made of wire or metal. Avoid lightweight foam frames, as they cannot support the weight of damp potting soil. If your wire frame feels flimsy, double it up by wiring two identical frames together. Next, select small plastic or terracotta pots that have drainage holes. Thread strong wire or garden twine through the drainage holes and attach each pot to the wreath frame, spacing them evenly around the circle.
Fill each pot with potting mix and plant resilient specimens that can handle the exposed, sometimes harsh conditions of a vertical wall. Pelargoniums, also known as zonal geraniums, are a top choice. They tolerate wind, some drought, and fluctuating temperatures. Other good options include trailing lobelia, bacopa, or small succulents like sedums. Water the wreath often, as vertical pots dry out faster than ground-level containers. A light misting every day during hot weather keeps the plants happy.
Seasonal Refresh
One of the best features of a pot wreath is that you can swap individual pots as plants fade. Simply unhook the tired pot and replace it with a fresh one. This keeps the wreath looking vibrant from spring through autumn without requiring a complete rebuild.
Use Baskets as Pot Covers for Cottagecore Charm
Baskets bring a soft, rustic warmth that plastic or ceramic pots sometimes lack. They evoke countryside cottages and lazy summer afternoons. You can introduce this aesthetic to even the smallest balcony or patio by using baskets as decorative sleeves for your ordinary nursery pots.
You may also enjoy reading: Ways Mother and Daughter Make Old Garden New in BC.
Do Not Plant Directly Into the Basket
Baskets are porous. Soil dries out too fast inside them, and water can rot the basket material. The smarter approach is to stand a standard plastic pot inside the basket. If the basket is deep, place a saucer at the bottom first to catch any drips. You can also line the basket with a heavy-duty plastic bag, poke a few drainage holes in the bottom, then place the pot inside. This method keeps the basket dry and extends its life while giving you the charming look of woven texture.
Where to Find Affordable Baskets
Thrift stores often sell baskets for a dollar or two. Look for sturdy willow, seagrass, or bamboo designs that have intact handles and no broken weaves. You can also find inexpensive baskets at discount home goods stores. Spray them with a clear outdoor sealer to protect them from rain if you plan to leave them outside permanently.
Styling Ideas for Tiny Spaces
Group two or three baskets of different sizes together on a small table or step. Use one basket as a cover for a tall, narrow pot holding a dwarf citrus tree. Place a smaller basket around a pot of trailing ivy on a shelf. The baskets unify the look and make mismatched nursery pots disappear. This approach brings cottagecore style to even the most compact urban balcony without requiring a single renovation.
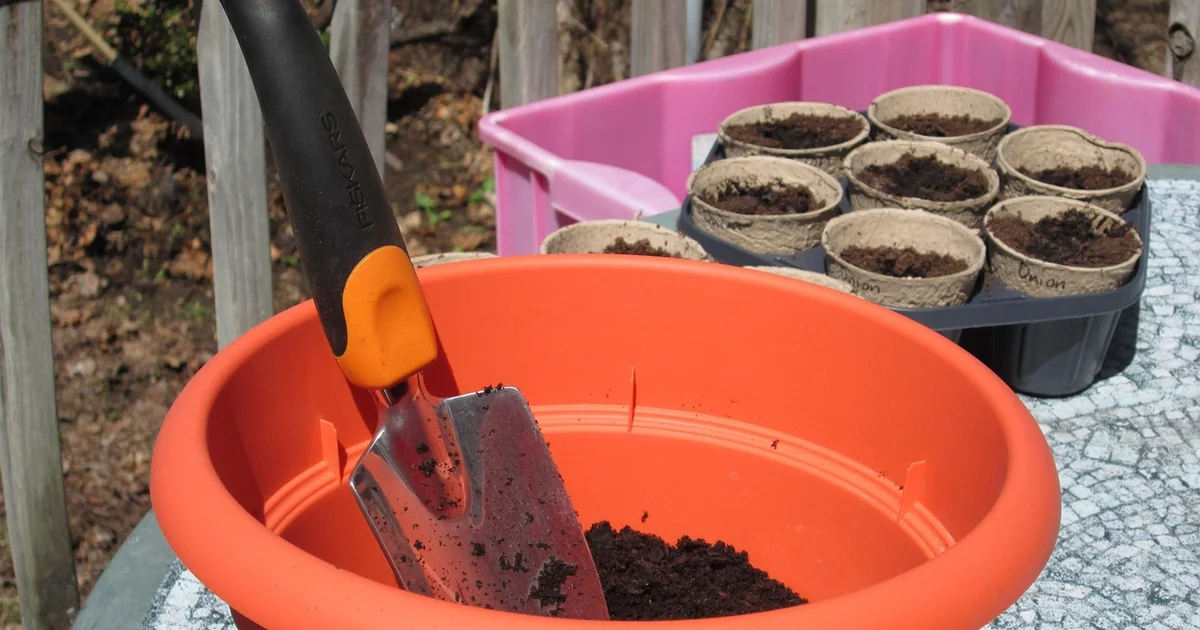
Start a Patio Veg Patch in Containers
Growing your own food in a small space is not only possible, it is deeply satisfying. Many vegetables adapt beautifully to container life, especially compact or dwarf varieties bred specifically for pots. With just a few large planters, you can raise a productive mini vegetable garden on a patio, deck, or fire escape.
Best Vegetables for Containers
Bush tomatoes are a top choice. They stay compact, often reaching only 45-60 cm tall, and produce prolific yields of sweet fruit. Choose determinate varieties like “Patio Princess” or “Tumbling Tom.” Bush beans grow well in pots too, needing only a small trellis or stake for support. Summer squash, such as “Bush Baby” or “Pattypan,” thrive in large containers about 30 cm deep. Sweetcorn, surprisingly, can also grow in a container if you use a generous pot about 45 cm deep and plant in a block of at least four plants to ensure pollination.
Soil and Feeding
Use a premium vegetable potting mix that includes slow-release fertilizer. Vegetables are heavy feeders, so supplement with a liquid feed every two weeks during the growing season. A balanced 10-10-10 fertilizer works well, or use a tomato-specific feed for fruiting crops. Ensure the container has excellent drainage, as waterlogged roots lead to disease.
A Three-Pot Starter Setup
If you have room for just three large containers, here is a simple plan. Pot one: two bush tomato plants with a small cage. Pot two: three bush bean plants around a central stake. Pot three: one summer squash plant, which will sprawl a bit but produce prolifically. Place the pots in a spot that gets at least six hours of direct sun daily. Water deeply every morning during hot spells. Within eight to ten weeks you will harvest enough for salads, stir-fries, and side dishes.
Season Extension
Containers warm up faster than garden soil in spring. You can start your veg patch two to three weeks earlier than in-ground gardens by covering pots with a cloche or frost fabric on cold nights. In autumn, move pots to a sheltered spot against a south-facing wall to extend the harvest by several weeks.
Push Spinners Into Planters for Moving Sparkle
A still garden can feel flat. Adding motion brings a new dimension to a small space. Wind spinners, those lightweight metal or plastic sculptures that rotate in the breeze, create constant gentle movement that catches the eye and adds life. Pushing a spinner directly into a planter is a zero-effort upgrade that pays dividends in visual interest.
Choose the Right Spinner
Look for spinners made from weather-resistant materials such as stainless steel, anodized aluminum, or UV-stabilized plastic. Avoid cheap painted versions that fade or rust within a season. A diameter of 20-30 cm works well for most containers. Reflective or iridescent finishes catch sunlight and throw sparkles across the garden. Some spinners feature bird or butterfly shapes, which add a playful element.
Placement Tips
Push the spinner’s stake into the soil near the edge of the planter so it does not disturb the plant roots. Angle it slightly toward the prevailing wind direction for maximum rotation. Place the planter in an open spot where wind can reach it, not tucked into a corner behind a wall. Even a gentle breeze of about 5 km/h gets most spinners turning. On still days, the spinner remains still, but the moment a puff of air arrives, it springs to life and transforms the whole garden’s energy.
Why Movement Matters
Psychologically, moving elements in a garden hold attention longer than static ones. A spinning shape draws the eye upward and outward, making a small courtyard feel more dynamic. It also masks the feeling of enclosure that sometimes comes with tiny outdoor spaces. The constant subtle motion tricks the brain into perceiving a larger, more open environment. Movement adds another dimension to any small space.
Seven Ideas, One Bigger Garden Feel
Each of these seven strategies works on its own. Combine two or three of them, and your small outdoor area transforms into a layered, ever-changing retreat. Raising pots on bricks gives depth. Rotating centerpiece planters keeps color alive through the seasons. Summer bulbs bring exotic drama. A pot wreath uses empty wall space. Baskets soften hard edges. A patio veg patch feeds both body and soul. And a simple spinner introduces movement that makes the whole space breathe. Small space container gardening is not about compromise. It is about focusing your effort where it matters most. Every pot you place, every height you vary, every seasonal swap you make turns a tiny garden into a place of endless possibility.


