There is something deeply touching about giving a gift that continues to grow long after the wrapping paper is gone. Their questions were unexpected, their laughter contagious, and their fresh perspectives reminded me why gardening with the next generation matters so much. Whether you are a seasoned gardener or someone who has never touched a trowel, this project is simple, meaningful, and produces a blooming surprise for any mother figure in your life. Let me walk you through everything I learned that night and show you how to plant lily bulbs in pots for a truly memorable gift.
Why a Growing Gift Beats a Store-Bought One
Mother’s Day gifts often fall into predictable categories: flowers that wilt, candles that burn out, or boxes of chocolates that vanish in an afternoon. A potted lily, on the other hand, keeps giving. The bulb sits dormant at first, then sends up green shoots, and eventually unfurls into dramatic, fragrant blooms. The act of watching something emerge from the soil mirrors the nurturing role mothers play every day. It is a living metaphor.
During my evening with the Girl Guides, each girl carefully tucked her bulb into a container, patted down the soil, and wrote a note to her mother. The pride on their faces was unmistakable. One girl, about eight years old, whispered, “I hope my mom loves it more than the store flowers.” That moment captured the entire spirit of the project. When you plant lily bulbs with intention, you are not just placing a bulb in dirt — you are planting a memory, a lesson, and a promise of beauty to come.
Getting Started: What You Need to Plant Lily Bulbs in Pots
Before you dive in, gather your supplies. The list is short, and most items are easy to find at garden centers or online. For the event, Flowerbulb.eu sponsored the bulbs, but you can source them from any reputable supplier. Here is what you will need:
- li>A medium-sized pot (at least 6–8 inches deep) with drainage holes
>li>High-quality potting mix (not garden soil, which can compact in containers)
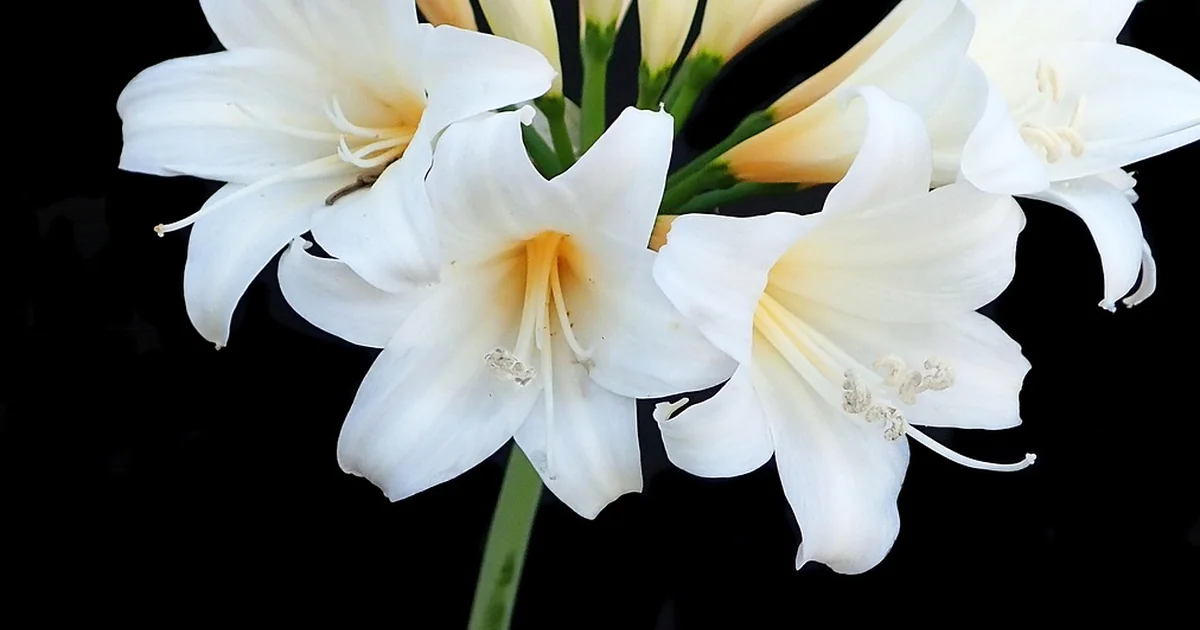
>li>Lily bulbs — choose summer-flowering varieties such as Asiatic, Oriental, or LA hybrids
>li>A trowel or just your hands
>li>Watering can or spray bottle
>li>Optional: decorative stones, plant labels, or a ribbon for the pot
One detail that surprised the Girl Guides was the appearance of the bulbs themselves. “It looks like a potato!” one girl exclaimed. She was not wrong. Lily bulbs are composed of overlapping scales, and they often have two sets of roots: older, dry, papery roots on the outside, and newer, thicker, fleshy roots emerging from the base. The dry roots are a clue about how deep to place the bulb — they mark the previous soil line. The fleshy roots are the ones that will absorb water and nutrients once the bulb wakes up from dormancy.
Choosing the Right Pot
Container selection matters more than you might think. A pot that is too small will restrict root growth, while one without drainage will drown the bulb. Lily bulbs rot quickly rot in soggy conditions. I recommend terra cotta or ceramic pots because they allow air circulation, but plastic works fine if you are careful not to overwater. The Girl Guides decorated their pots with markers and stickers, turning a simple plastic container into a personalized masterpiece.
Picking the Perfect Lily Bulb
Not all lily bulbs are created equal. Look for bulbs that are firm, plump, and free of mold or soft spots. Some bulbs in our batch were still fully dormant, while others had already pushed out a tiny green shoot. One girl found a bulb with two shoots — a “double-header,” I called it. “Lucky gal!” I said, and she beamed. Double shoots mean more stems and more flowers. If you find such a bulb, grab it.
Summer-flowering lilies are ideal for Mother’s Day planting because they will bloom in mid-to-late June through August, depending on the variety. That timing means the gift arrives just as summer begins, a second wave of gratitude weeks after the holiday itself.
Step-by-Step: How to Plant Lily Bulbs in Pots
Now for the hands-on part. Follow these steps, and you will set your bulb up for success. I have included the lessons I learned from the Girl Guides, because their questions actually improved my technique.
Step 1: Fill the Pot with Potting Mix
Add a layer of potting mix to the bottom of the pot, about 2–3 inches deep. Do not pack it down — bulbs prefer loose soil that allows roots to spread. One girl asked, “Why do we need dirt at the bottom if the bulb goes on top?” Fair question. The roots grow downward, so they need room to explore. I explained that the bottom layer acts like a soft mattress for the roots.
Step 2: Place the Bulb Correctly
Position the bulb with the pointed end facing up. The roots, whether dry or fleshy, should point down. If you cannot tell which end is up, look for the basal plate — the flat, slightly rough area where roots emerge. That goes down. The tip (often with a small green nub) goes up. The dry roots from last season can be left in place; they will eventually decompose. The fleshy roots should be spread gently over the soil surface beneath the bulb.
“Why do the roots look like this?” another girl asked, holding up a bulb with both types. I explained that the old dry roots are like a map — they show where the plant was before. The new fleshy roots are the workers, gathering water and food. She nodded seriously, then asked if her pet fish could eat the roots. I laughed and said probably not, but it was a great question.
Step 3: Cover and Water
Add more potting mix until the bulb is buried about 2–3 inches deep. The general rule for lilies is to plant them at a depth equal to three times the height of the bulb. Water gently until the soil is moist but not soaked. Overwatering is the most common mistake. The Girl Guides were so enthusiastic with their watering cans that I had to intervene. “Just a little drink,” I said. “Too much and the bulb will drown.”
Step 4: Find the Right Spot
Place the pot in a location that receives at least six hours of direct sunlight per day. A sunny windowsill, a balcony, or a patio works well. Lilies love warmth and light. If you are giving the pot as a gift, include a note with care instructions: water when the top inch of soil feels dry, and fertilize every two weeks once growth appears.
What the Kids Taught Me About Planting Lily Bulbs
As the adult and professional gardener in the room, I walked in expecting to teach. But I left having learned just as much. Children approach gardening with zero assumptions. They do not know that roots are supposed to look a certain way, or that bulbs should be planted at a specific depth. They just ask, “Why?” And that question forces you to think deeper about things you have taken for granted for years.
One girl noticed that some of the bulbs in our batch had already started to sprout, while others were still completely dormant. “Why are some shoots sprouting and some not?” she asked. I explained that bulbs are living things, and like people, they wake up on their own schedule. Temperature, storage conditions, and the bulb’s individual energy reserves all play a role. That answer made her smile. “So my bulb might be a slow starter,” she said. “That’s okay. My mom is a slow starter in the morning too.”
Another child asked if the lily would grow faster if she talked to it. I told her that while science is mixed on whether plants respond to voices, the carbon dioxide we spend with our plants certainly helps us notice their needs earlier. She decided to name her bulb “Sunny” and promised to serenade it every day.
Kids Say the Best Things
If you have ever spent time with young children, you know that half the time they raise their hands, it is not to ask a question but to make a statement. “I have a fish named Bubbles,” one girl announced while planting. “Do fish like lilies?” I admitted I had never considered that, but I appreciated the connection she was connecting her two interests. Another girl said, “My mom loves purple, so I hope my lily is purple.” I had to explain that the flower color is determined by the variety we chose, not by her mother’s preference. She shrugged and said, “Then I’ll paint the pot purple.” Problem solved.
These moments reminded me that gardening with kids is not about perfect technique. It is about curiosity, connection, and a little bit of chaos. The best part of the night was seeing each girl fully engaged, their minds spinning with possibilities. Most importantly, they were learning patience and responsibility. As one Guide put it, “I have to water it every day, or it will die. That’s a big job.” Yes, it is. And she was ready for it.
Why Gardening With Kids Matters
My own child calls himself the “Mini Master Gardener.” He has been digging in the dirt since before he could walk, and I have watched him develop a sense of pride and accomplishment that rivals any trophy or award. When a plant thrives because of his care, his chest puffs out. When a plant wilts because he forgot to water, he learns consequences. Gardening teaches responsibility in a gentle, tangible way.
You may also enjoy reading: 7 Steps to Grow Your Own Food This Summer.
It also connects children with nature. In an age of screens and indoor activities, putting hands in soil is a grounding experience. Kids begin to understand that they are one small piece in a vast, interconnected ecosystem. They see worms, insects, and fungi doing their jobs. They learn that growth takes time. They discover that failure is part of the process — not every bulb will bloom, and that is okay.
From gardening while pregnant with him to being a toddler playing with vegetables, I instilled the love of plants from day one. That love is now spreading to other children. The Girl Guides event was a reminder that we need to pass on these skills. The world will always need more people who know how to grow things.
Practical Tips for a Successful Mother’s Day Lily Planter
Whether you are doing this project with kids, friends, or on your own, here are a few insider tips that will help your lily thrive.
Plant Summer Flowering Bulbs Now for a Beautiful Display
Mother’s Day falls in early to mid-May in most countries. That timing is perfect for planting summer-flowering lilies. If you wait too long, the bulbs may not have enough time to establish roots before the heat of summer. Plant them as soon as you receive them. If you are giving the pot as a gift, you can plant it a week or two before Mother’s Day and let the recipient enjoy the emerging shoots.
Understand the Two Types of Roots
As I mentioned earlier, lily bulbs have both old dry roots and new fleshy roots. Do not remove the old roots — they serve as a natural depth marker. When you place the bulb in the pot, the point where the dry roots meet the bulb is the original soil line. Bury the bulb so that point is about 2–3 inches below the surface. The fleshy roots will grow downward; they will grow into the soil below. This dual-root system is unique to lilies and some other bulbous plants, and it is one reason they are so resilient.
Water Wisely
Overwatering is the number one killer of potted lilies. The soil should be moist but never soggy. Check by sticking your finger about an inch into the soil. If it feels dry, water. If it feels damp, wait. During the dormancy period (right after planting), the bulb does not need much moisture. Once green shoots appear, increase watering slightly. In the heat of summer, you may need to water every other day.
Fertilize for Better Blooms
Lilies are heavy feeders. Once the shoots are about 4–6 inches tall, start applying a balanced liquid fertilizer (such as 10-10-10) every two weeks. Continue until the flowers open. This extra nutrition will produce larger, more vibrant blooms. Stop fertilizing after the flowers fade; the bulb will then store energy for next year.
What to Do After the Blooms Fade
After the lily finishes flowering, do not throw the plant away. Cut back the flower stalk, but leave the foliage intact. The leaves will continue to photosynthesize and send energy back into the bulb for next season’s growth. Keep watering until the leaves turn yellow and die back naturally. Then you can store the pot in a cool, dry place over winter, or if you live in a mild climate, leave it outside. The bulb will go dormant and re-sprout next spring.
One of the Girl Guides asked, “Will my mom have to plant it in the ground later?” That is a great question. Lilies can live in pots for several years if you refresh the soil every year or two. However, they will eventually need more space. After the first bloom, you can transplant the bulb into a garden bed or a larger container. It is a gift that keeps evolving.
Bringing It All Together: A Thoughtful Mother’s Day Project
The evening with the Girl Guides ended with each girl holding a pot containing a bulb she had planted herself. Some pots were lopsided, some had too much soil, one had a handprint pressed into the surface. They were perfect. The girls wrote cards, wrapped the pots in cellophane, and carried them home like treasures. I watched them leave and thought, Let’s hope it’s the small seed of a lifelong passion!
If you are looking for a Mother’s Day activity that is hands-on, educational, and deeply meaningful, gather a few supplies, invite a child (or a friend), and plant lily bulbs together. You will create more than a gift — you will create a shared memory, a lesson in patience, and a beautiful reminder that love, like a lily, takes time to bloom.
For more inspiration and tips on flower bulbs, visit Flowerbulb.eu. They offer a wealth of information on planting, caring for, and enjoying bulbs throughout the year. Summer flowering bulbs should be planted now for a beautiful display of color. Go ahead — make this Mother’s Day one that grows.


