Tomato plants have a reputation for needing sprawling garden beds, rich soil, and endless summer sun. That reputation is misleading. With a little creativity, anyone with a balcony, patio, or even a single sunny window can harvest sweet, vine-ripened fruit. You absolutely can grow tomatoes without garden space. The secret lies in choosing the right method for your living situation. Here are seven proven techniques that will have you slicing homegrown tomatoes by midsummer.
Why Traditional Garden Space Is Not a Requirement
Many people assume tomato plants are too demanding for small spaces. The truth is that tomatoes are remarkably adaptable. They respond well to container life as long as their basic needs are met. Those needs are sunlight, consistent moisture, nutrients, and support. A traditional in-ground bed is just one way to meet those requirements. Balconies, patios, driveways, and even fire escapes can all become productive growing zones.
The key shift is mindset. Instead of thinking about land, think about volume. A five-gallon container filled with quality potting mix holds as much root room as a small garden plot. You simply manage that space differently. Once you understand that, the possibilities open up dramatically.
Method One: Hanging Baskets for Tumbling Tomatoes
A hanging basket is one of the most space-efficient ways to grow tomatoes without garden beds. It uses vertical airspace that would otherwise remain empty. The trick is choosing the correct variety. Standard tomato plants grow upright and heavy. In a basket, they would topple over and snap under the fruit’s weight.
Selecting the Right Variety
Look for trailing or cascading tomato varieties bred specifically for hanging baskets. Tiny Tim, Tumbler, and Micro Tom are excellent choices. These plants produce small fruit on vines that naturally drape over the container’s edge. They support their own harvest without breaking.
Placement and Watering Demands
Hang the basket where it receives at least six hours of direct sunlight daily. Southern or western exposures work best. Baskets dry out faster than any other container because air circulates around the entire pot. During peak summer heat, you may need to water twice a day. Check soil moisture each morning by pushing your finger an inch into the mix. If it feels dry, water thoroughly until liquid runs from the drainage holes.
A self-watering hanging basket insert can reduce this chore significantly. These inserts hold a reservoir below the soil that the plant draws from as needed. They are worth the small investment if you travel or have a busy schedule.
Method Two: Containers and Pots on Any Surface
Growing tomatoes in pots is the most common alternative to a garden bed. It is also the most versatile. You can place pots on a balcony floor, a patio, a stoop, or even a sturdy windowsill. Almost any container that holds at least five gallons of soil will work. Larger is better. A ten-gallon pot supports a bigger root system and requires less frequent watering.
Choosing Determinate Bush Varieties
For container success, stick with determinate or bush-type tomatoes. These plants grow to a compact size, set fruit all at once, and stop growing. Popular choices include Celebrity, Bush Early Girl, and Patio Princess. Cherry tomatoes like Sweet 100 and Sun Gold also thrive in pots because their vines remain manageable with pruning.
Support Systems Are Non-Negotiable
Even bush varieties benefit from support. A tomato cage placed at planting time prevents the plant from sprawling. Push the cage into the soil when you transplant the seedling. Adding a cage later risks damaging roots. For taller determinate varieties, a single sturdy stake driven deep into the pot works well. Tie the main stem loosely to the stake with soft garden twine every six inches as it grows.
Container plants dry out more quickly than in-ground plants. Self-watering pots, which hold a reservoir in the base, are excellent for busy growers. They buffer against missed watering days and keep the root zone consistently moist. Consistent moisture prevents blossom end rot, a common disorder caused by irregular watering.
Method Three: Grow Bags for Mobility and Root Health
Grow bags are fabric pots that have become popular among small-space gardeners. They are lightweight, collapsible, and easy to move. For heat-loving tomatoes, grow bags offer a distinct advantage. Fabric sides allow air to reach the root zone, which prevents the soil from overheating. The bags also promote air pruning of roots, which encourages a dense, healthy root system.
How to Plant in a Grow Bag
Fill the bag about halfway with high-quality potting mix. Remove the tomato seedling from its nursery pot and plant it deeply, burying the stem up to the first set of true leaves. Roots will form along the buried stem, creating a stronger plant. As the tomato grows, add more soil around the stem. Keep topping up the bag throughout the season until it is full. This technique deepens the root system and improves drought tolerance.
Mobility and Sun Chasing
Grow bags often have handles, making it simple to move plants to follow the sun. If your balcony receives morning light but afternoon shade, you can shift the bag to a sunnier spot midday. This flexibility is a huge advantage when you grow tomatoes without garden space that is fixed. Just be careful when moving a fully grown plant to avoid stem damage.
One drawback is that fabric bags dry out faster than plastic pots. Expect to water daily, sometimes twice in hot weather. A saucer under the bag catches runoff and gives the plant a small reservoir to draw from.
Method Four: Upside-Down Planters
Upside-down tomato planters hang the plant from a hook with the roots inside a container and the stem dangling below. This method eliminates the need for staking or caging. The plant grows downward naturally, and the fruit hangs free, making harvest easy. It also keeps the fruit off the ground, reducing pest and disease issues.
Setting Up an Upside-Down Planter
You can buy commercial upside-down planters or make your own from a five-gallon bucket. Drill a two-inch hole in the bucket’s bottom. Thread the tomato seedling through the hole so that the root ball rests inside the bucket and the stem hangs below. Fill the bucket with lightweight potting mix, pack it gently, and hang the assembly from a strong hook. Choose a location that receives eight to twelve hours of direct sun daily. These planters need maximum light because the downward growth limits leaf exposure.
Adding Support for Stability
Even in an upside-down planter, heavy fruit can stress the stem. Insert a small stake into the bucket’s soil and let it extend downward alongside the stem. Tie the stem loosely to the stake. This prevents wind from snapping the plant and keeps it growing straight. Water the planter by pouring water into the top, just as you would a standard pot. The water saturates the soil and drips out the bottom hole. Expect to water daily in summer.
Method Five: Direct Planting in a Bag of Potting Soil
This is the ultimate no-fuss method. You take a standard bag of potting soil, lay it flat, and plant tomatoes directly through the plastic. No pots, no containers, no preparation. It sounds unconventional, but it works remarkably well. The bag holds moisture, insulates roots, and provides a clean growing environment.
Step-by-Step Instructions
Choose a large bag of potting soil, at least one cubic foot. Lay it flat on a sunny surface. Shake the bag gently to settle the soil evenly. Using a utility knife, cut several X-shaped slits in the top side of the bag. Space the slits about twelve inches apart. Dig a small hole through each slit and plant a tomato seedling directly into the soil beneath. Water the bag through the slits. The plastic acts as a weed barrier and a moisture retainer. You can add a stake by pushing it into the bag next to each plant.
Why This Method Works
The bag prevents soil from spilling and keeps the root zone warm. It also stops evaporation from the sides, meaning you water less frequently than with pots. When the season ends, simply cut the bag open and compost the spent soil. This technique is perfect for renters or anyone who wants a temporary garden that leaves no trace. It is one of the simplest ways to grow tomatoes without garden preparation at all.
Method Six: Window Boxes for Sill-Length Harvests
Window boxes are not just for flowers. A window box filled with compact tomato varieties turns an ordinary window into a productive mini farm. These boxes attach to railings or sit on wide sills. They use horizontal space that would otherwise be wasted.
You may also enjoy reading: 7 Tips to Grow a Perennial Garden in Pots & Containers.
Choosing a Box That Fits
Select a window box at least eight inches deep and twelve inches wide. Longer boxes give you room for multiple plants. Drill drainage holes if the box does not have them. Use a lightweight potting mix rather than garden soil. Garden soil compacts in shallow containers and suffocates roots. Add a slow-release tomato fertilizer at planting time to provide steady nutrition.
Planting and Care Tips
Plant dwarf or micro dwarf tomato varieties in window boxes. Red Robin, Orange Pixie, and Tiny Tim stay under twelve inches tall and produce full-size fruit. Space plants about ten inches apart. Water the box daily in warm weather because shallow soil dries fast. A drip tray underneath protects your sill from water damage. Pinch off any suckers that form to keep the plants compact and productive.
Method Seven: Indoor Hydroponic Systems for Year-Round Tomatoes
Hydroponic growing systems have become affordable and user-friendly. These tabletop units circulate nutrient-rich water to plant roots without any soil. They are ideal for apartments with no outdoor space at all. A hydroponic system placed near a sunny window can produce tomatoes even in winter.
Setting Up a Small System
Countertop hydroponic kits designed for herbs can also grow dwarf tomato varieties. Look for systems with a grow light if natural sunlight is limited. LED grow lights consume little electricity and produce the right spectrum for fruiting. Fill the reservoir with water and liquid nutrient solution as directed. Plant tomato seedlings in the provided net pots with growing medium such as clay pebbles. The pump cycles water continuously, delivering oxygen and nutrients directly to the roots.
Managing Pollination Indoors
Without wind or insects, indoor tomato flowers need help to pollinate. Gently shake the plants each day or use a small electric toothbrush to vibrate the flower clusters. This mimics the buzz of a bee and triggers fruit set. Dwarf varieties bred for indoor growing, such as Micro Tom and Tiny Tim, respond well to this treatment. Expect your first harvest in about seventy days from transplanting.
Hydroponic systems eliminate soil mess, reduce pest problems, and allow precise control over nutrients. The initial investment is higher than pots, but the ability to grow tomatoes without garden space of any kind makes it worthwhile for dedicated growers.
Common Challenges and How to Overcome Them
Growing tomatoes in containers presents distinct challenges. Understanding them ahead of time saves frustration. The most frequent issue is inconsistent watering. Containers dry out faster than garden beds. A moisture meter is a cheap tool that takes the guesswork out of watering. Stick it into the soil; if the needle reads dry, it is time to water.
Blossom end rot appears as a dark, sunken spot on the bottom of the fruit. It is caused by a calcium deficiency that results from uneven watering. The remedy is simple. Keep the soil consistently moist but not soggy. Adding a layer of mulch on top of the container helps retain moisture and stabilize soil temperature.
Nutrient depletion happens faster in containers because frequent watering flushes nutrients out. Feed your plants every two weeks with a balanced liquid fertilizer formulated for tomatoes. Look for a ratio close to 5-10-10, which supports fruit development without excessive leafy growth. Stop fertilizing once fruit begins to ripen to avoid splitting.
Pests such as aphids, whiteflies, and spider mites can still find your container tomatoes. Inspect leaves weekly. A strong spray of water from a hose knocks off most pests. Neem oil spray works as a natural deterrent. Always treat infestations early before they spread to other plants.
Making the Most of Your Non-Garden Harvest
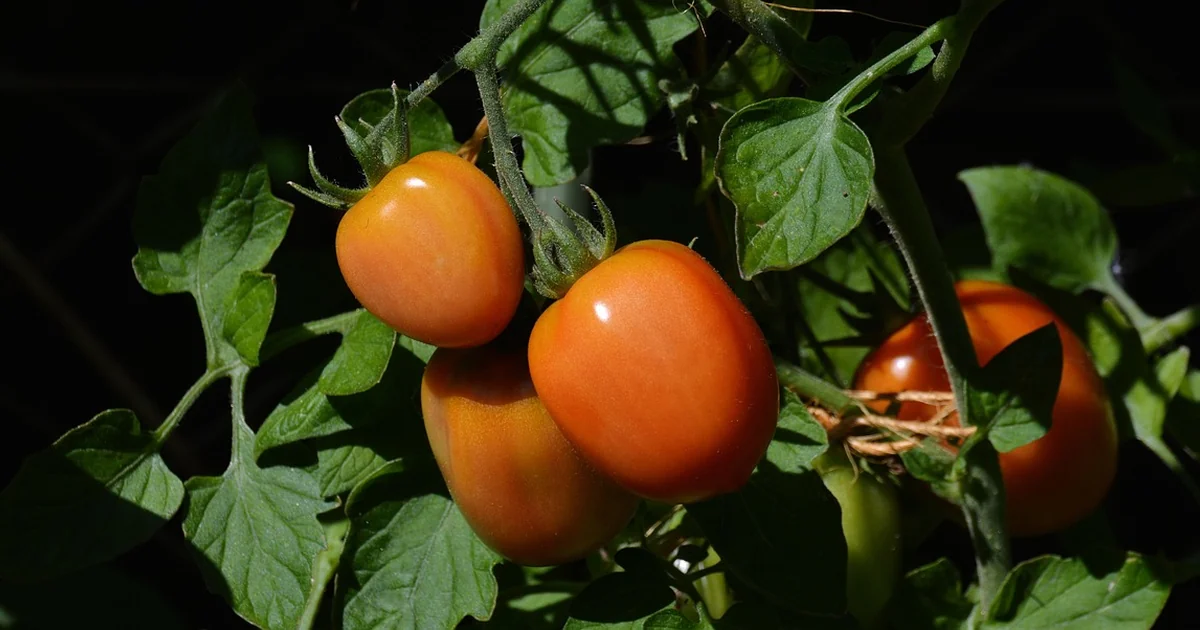
Even a single tomato plant grown in a container can yield dozens of fruit over a season. Cherry tomato varieties are especially generous. One plant in a hanging basket or grow bag can produce several pounds of tomatoes. That is enough for salads, sauces, and snacks for weeks.
Harvest fruit when it is fully colored and slightly soft to the touch. Tomatoes ripened on the vine taste markedly sweeter than store-bought alternatives. If frost threatens, pick any green fruit and let them ripen indoors on a windowsill. They will continue to mature off the vine.
Container-grown tomatoes also make wonderful gifts. A single ripe tomato picked from a plant you nurtured yourself carries a story. Share that story with neighbors who doubted you could grow anything without a garden.
The methods described here prove that fresh tomatoes are not reserved for people with acreage. Whether you choose a hanging basket, a grow bag, or a hydroponic unit, the reward is the same. You get the incomparable taste of a sun-warmed tomato straight from the vine. That taste is available to anyone willing to try. All you need is a little sunlight, a container, and the determination to grow tomatoes without garden restrictions holding you back.