You might know Dear Dot as the go-to source for gardening wisdom, but even the most seasoned advice columnists have off days. Dot’s own attempts at growing vegetables were, by her own admission, dismal. So when copyeditor Laura stepped in with her practical know-how, her insights became a must-read for anyone dreaming of a small vegetable garden that actually produces. With careful planning and the right techniques, a modest plot can yield an abundant harvest.
These five tips cover site selection, raised beds, fencing, plant choice, and soil maintenance — the pillars of a thriving beginner vegetable garden. Whether you are new to small space gardening or want to refine your plot planning, Laura’s advice is both practical and encouraging.
Tip 1: Choose the Sunniest Spot for Your Small Vegetable Garden
Let’s start putting that practical advice into motion with the very first decision you will make: where to place your small vegetable garden. The success of a small garden hinges on sunlight — without enough, even the best soil won’t save your crops. Most vegetables need at least 6–8 hours of direct sun daily to thrive. This makes sun exposure the single most important factor when scouting your garden location. So, before you break ground, take some time to observe your yard throughout the day. Walk around and note where the light falls, tracking how shadows shift from morning to evening.
You will want to avoid spots shaded by buildings, trees, or fences, as these can significantly reduce the light your plants receive. Think of your garden as a sun-seeking creature; it needs an open, unobstructed patch of earth. If you are unsure about the light levels in a potential spot, you can try a simple exercise. Mark the area and check it every hour on a sunny day. This will give you a clear picture of its sun exposure. By prioritizing a location that offers full sun conditions, you are setting up your small vegetable garden for a season of strong growth and a bountiful harvest. Remember, you can always adjust soil, but you cannot create more sunlight.
Tip 2: Build a Raised Bed with the Right Soil and Materials
Once you have secured that sunny spot, it is time to give your plants the perfect foundation. For a small vegetable garden, a raised bed is a practical solution because it lets you control the soil quality and drainage completely. When you build your frame, choose untreated lumber such as cedar, redwood, or fir. Using untreated lumber protects your plants from the harmful chemicals found in treated wood. For the raised bed dimensions, make sure the frame is at least 12 inches deep. This gives root vegetables plenty of room to grow and helps the soil stay at a healthier temperature.
Filling the bed with the right ingredients makes all the difference. A simple soil mix recipe uses about 60% topsoil and 40% compost. This blend creates a fluffy, nutrient-rich organic garden soil that holds moisture without becoming too heavy. Boosting soil nutrients with plenty of compost and quality topsoil gives your plants the strength they need to produce a generous harvest. By taking the time to build a proper raised bed and filling it with a balanced mix, your small vegetable garden will have a strong and productive season.
Tip 3: Protect Your Garden with the Right Fence
All that careful soil preparation and planting can vanish in a single night if a hungry animal finds your small vegetable garden. A fence is not just a boundary; it is your garden’s first and most reliable defense. Before you buy materials, take a good look at your local wildlife. The right fence height makes all the difference. A low barrier of 2 to 3 feet works well for rabbits and skunks, but if deer are common in your area, you will need a deer fence that stands a full 8 feet tall. Choosing the right material matters just as much as the height. Use galvanized hardware cloth or sturdy bird netting, and be sure to bury the bottom edge a few inches underground. This simple step stops diggers like groundhogs from tunneling underneath.
For a practical, low-maintenance setup, include a gate for easy access to your raised beds and use metal posts for long-term stability. Wood posts can rot over time, but metal ones will hold your garden fencing upright season after season. Step-by-Step Fence Installation for a Small Garden starts with mapping out your perimeter, then setting your posts at even intervals. Attach your chosen material securely, leaving no gaps where a clever animal could squeeze through. A well-built fence keeps your small vegetable garden safe and lets you sleep soundly, knowing your harvest is protected.
Tip 4: Pick Space-Efficient Plants You Love to Eat
Now that your garden is safe from critters, it is time to think about what will fill those raised beds. In a small vegetable garden, every square inch truly counts. The trick is to choose crops that yield heavily without sprawling all over the place. Stick with space-efficient plants that you actually enjoy eating — there is no point growing something no one in your family likes. Leafy greens like lettuce, spinach, and kale are perfect for tight spaces because you can harvest the outer leaves and let the plant keep producing. Root vegetables such as carrots, radishes, and beets also fit neatly into small patches. For a truly low-maintenance addition, plant perennial herbs like chives, thyme, and sage. These come back year after year, giving you fresh flavor with zero replanting effort.
You can read more on this topic in 7 Patio Plants That Thrive in Pots and Containers.
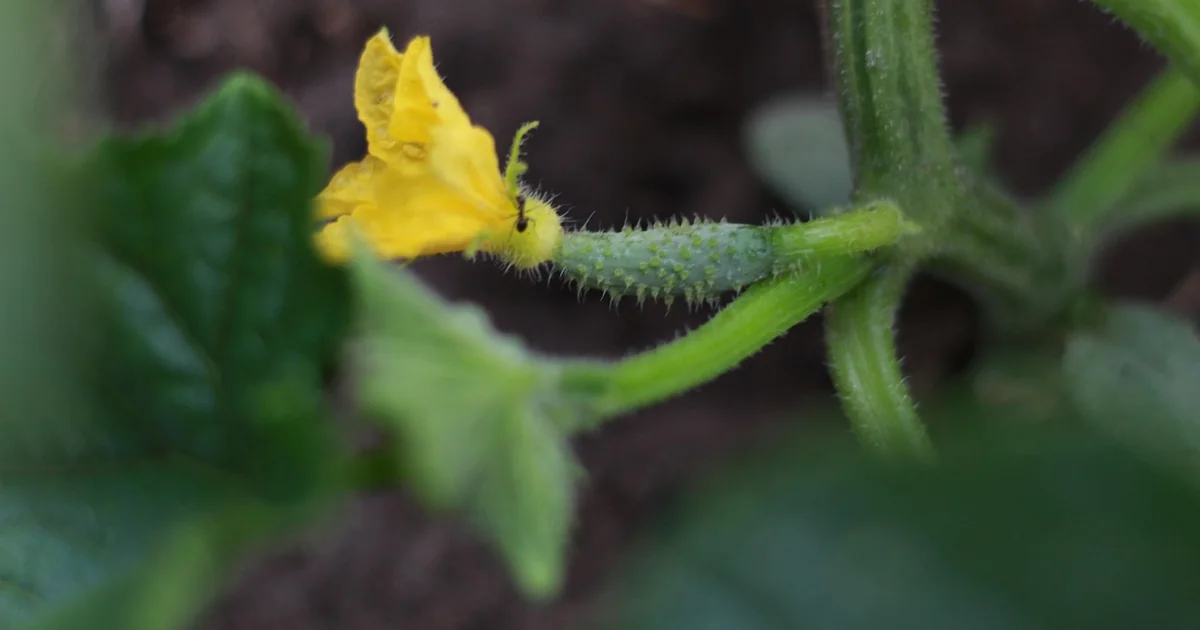
To make the most of your vertical space, try vertical gardening with trellises. Climbing plants like cucumbers, pole beans, and tomatoes grow upward instead of outward, freeing up ground room for more compact vegetables. On the other hand, avoid sprawling crops like squash and melons — they take up too much room for the yield you get. Backyard corn is simply not feasible in a small plot. When you choose the right plants, you can practice intensive planting, which means placing vegetables closer together to maximize every inch. Consider starting seeds indoors for a head start on the growing season, or direct sow the hardiest crops once the soil warms. Either way, a thoughtful selection of compact vegetables makes your garden both productive and a joy to tend.
Tip 5: Keep Your Soil Healthy Year After Year
Even if you’ve chosen the perfect small vegetable garden spot and picked compact crops, nothing matters more than what lies beneath their roots. Good soil is the foundation of a productive garden — and it gets better with regular care. The secret is simple: treat your soil as a living system that needs feeding just like your plants do. Start by adding a 1–2 inch layer of compost each spring or fall. This gentle soil amendment replenishes nutrients, improves drainage, and encourages beneficial organisms. If you’re new to composting basics, a simple bin or pile in a shady corner will turn kitchen scraps and yard waste into gold for your garden.
For an extra boost, use organic fertilizer according to package directions — fish emulsion and kelp meal are gentle options that won’t burn roots. Water deeply once or twice a week, adjusting for rainfall, and always mulch to hold moisture in and weeds out. If space allows, practice crop rotation by moving related vegetables to different beds each year. This simple habit prevents nutrient depletion and keeps soil-borne diseases at bay. Remember, home-grown vegetables taste better and are more nutritious because they break down after picking — and that superior flavor starts with healthy soil. With annual attention to these basics, your garden will keep giving back season after season.
Executive Summary: Key Takeaways for Dear Dot’s 5 Tips
Mastering Dear Dot’s 5 Tips requires harmonizing botanical soil biology, moisture retention, and seasonal crop cycles. Key pillars of this guide include:
- Soil Ecosystem Architecture: Incorporating biologically active finished compost and perlite to maintain an optimal 6.2–6.8 pH range.
- Hydration Efficiency: Transitioning from shallow daily spraying to deep, bi-weekly root-zone soaking to build extensive vascular drought resistance.
- Organic Companion Defense: Cultivating beneficial insectary plants that naturally eliminate aphids and foliage pests without synthetic chemicals.
- Succession Planning: Staggering sowing cycles every 14 to 21 days to ensure sustained harvest yields throughout the entire growing season.
Comprehensive Horticultural Matrix: Dear Dot’s 5 Tips
Achieving consistent, high-yield vitality with Dear Dot’s 5 Tips requires understanding how environmental parameters intersect across different growth stages. The structured matrix below provides an operational framework for modern home gardeners:
| Operational Stage | Horticultural Objective | Essential Soil & Tool Inputs | Optimal Timing Cadence | Primary Health Metric |
|---|---|---|---|---|
| 1. Soil Inoculation & Aeration | Establish rich mycorrhizal fungi networks and pore structure. | Broadfork, organic aged manure, worm castings, coarse horticultural sand. | Early Spring / 3 weeks before planting | High crumb structure & water permeability |
| 2. Transplanting & Root Anchorage | Prevent transplant shock and encourage downward vertical root growth. | Liquid kelp root stimulator, clean trowel, untreated cedar bark mulch. | Overcast mornings or late afternoons | Zero stem wilting; active leaf turgor |
| 3. Vegetative Canopy Development | Maximize photosynthetic surface area while ensuring internal air circulation. | Organic fish emulsion, balanced 5-5-5 organic granular food, pruning snips. | Mid-vegetative growth spurt | Deep green foliage without fungal blemishes |
| 4. Reproductive & Fruit Set | Direct energy from foliage development toward robust flower and fruit production. | Bone meal, phosphorus-rich rock dust, calcium-magnesium foliar spray. | First sign of flowering buds | High blossom retention; vigorous pollination |
| 5. Post-Harvest Bed Renewal | Replenish depleted micro-nutrients and protect bare soil from erosion. | Cover crop seed (crimson clover/winter rye), shredded deciduous leaves. | Immediately following final seasonal harvest | Protected winter biology; zero topsoil runoff |
Advanced 5-Stage Implementation Roadmap for Dear Dot’s 5 Tips
To successfully transition theoretical horticultural knowledge into thriving, disease-resistant plant life, implement the following rigorous five-stage roadmap developed by seasoned master gardeners:
Stage 1: Conducting Detailed Micro-Site Diagnostics
Residential landscapes are not uniform environments; they are dynamic mosaics of localized temperature, wind, and moisture fluctuations. Before planting or reorganizing around Dear Dot’s 5 Tips, spend several days mapping your garden space. Note where morning condensation lingers longest—an indicator of reduced airflow that may predispose plants to fungal blight. Verify sunlight trajectories at 9:00 AM, 1:00 PM, and 5:00 PM to distinguish between intense full-sun exposure and gentler dappled light. Dig test pits 12 inches deep to evaluate subsoil compaction; if water takes longer than 30 minutes to drain from a filled hole, install raised beds or integrate coarse organic compost to prevent root rot.
Stage 2: Precision Nutrient Profiling and Microbiome Health
Healthy plants are the natural byproduct of thriving soil biology. Rather than relying on synthetic quick-release fertilizers that provide a temporary nitrogen surge followed by mineral leaching, focus on feeding the subterranean soil web. Apply well-composted organic matter alongside mycorrhizal inoculants during planting. Mycorrhizae form symbiotic relationships with plant root systems, effectively expanding their root surface area up to one hundredfold, which dramatically improves phosphorus absorption and water uptake during midsummer dry spells.
Stage 3: Hydro-Zoning and Moisture Optimization
Water management is the single most critical factor determining garden health. Implement hydro-zoning by clustering species with identical moisture requirements together, preventing the common trap of overwatering drought-tolerant herbs while dehydrating thirsty vegetables. Install low-pressure drip irrigation tubing equipped with pressure-compensating emitters directly adjacent to root crowns. Cover all exposed soil with a 2-to-3 inch blanket of shredded organic mulch, leaving a clear two-inch buffer around plant stems to deter collar rot and burrowing insect pests.
Stage 4: Integrated Ecological Pest Stewardship
Rather than declaring war on all insects, establish an ecological balance. Pests like aphids and spider mites flourish when natural predator balances are disrupted. By intentionally cultivating companion flowering herbs—including sweet alyssum, French marigolds, dill, and coriander—you provide nectar reserves that sustain beneficial predatory insects like hoverflies, green lacewings, and minute pirate bugs. When pest outbreaks do occur, employ mechanical controls (such as a forceful jet of water) or mild potassium-salt insecticidal soaps applied at dusk before escalating to stronger treatments.
Stage 5: Seasonal Pruning, Sanitization, and Crop Rotation
Sustained botanical vigor requires diligent garden hygiene. Deadhead spent blossoms promptly to stimulate continuous flower production and channel energy away from unwanted seed production. When pruning, always use bypass pruners sterilized in a 70% isopropyl alcohol solution between distinct plants to prevent cross-contamination of bacterial wilts. Practice a strict 3-to-4 year crop rotation for heavy feeders (such as nightshades and brassicas), ensuring that soil-borne pathogens naturally diminish over successive growing seasons.
Common Gardening Pitfalls to Avoid
- Over-Fertilizing with Nitrogen: Excessive nitrogen stimulates lush, tender vegetative foliage at the expense of floral development, rendering stems highly attractive to sap-sucking pests.
- Shallow Overhead Evening Sprinkling: Wetting foliage right before dark creates prolonged leaf wetness, providing optimal conditions for powdery mildew and anthracnose to germinate.
- Planting Too Deeply: Burying root flares or root crowns below surrounding soil levels suffocates roots and causes stem decay. Always align root flares flush with ground level.
- Ignoring Seasonal Soil Compaction: Walking on damp garden beds compresses soil pore spaces, starving roots of vital oxygen. Always work from designated stepping stones or access paths.
Frequently Asked Questions About Dear Dot’s 5 Tips
What is the single most effective way to start with Dear Dot’s 5 Tips?
Begin with rigorous soil testing and site preparation. Amending native soil with finished organic compost and ensuring 6+ hours of unobstructed sun exposure eliminates over 80% of common gardening frustrations before seedlings even enter the ground.
How do I identify whether my garden is overwatered or underwatered?
Both conditions cause leaf discoloration, but underwatered foliage feels dry, brittle, and crisp, whereas overwatered plants exhibit yellowing lower leaves that feel soft and limp, accompanied by damp, oxygen-deprived soil at root level.
Can I apply these gardening principles to container gardens and raised beds?
Absolutely. In fact, raised beds and containers offer superior soil drainage and faster spring warming. Use a high-quality soilless potting blend enriched with perlite and organic worm castings, and increase watering frequency during midsummer heat.
What organic fertilizers yield the best results for long-term soil health?
Opt for slow-release organic amendments such as composted chicken manure, alfalfa meal, kelp meal, and bone meal. These feed beneficial soil microbes steadily rather than causing volatile chemical spikes.
How do I protect my garden from late spring or early autumn frosts?
Erect lightweight floating row covers or frost blankets suspended over wire hoops. Water the soil thoroughly the afternoon prior to a predicted frost, as moist soil holds and radiates thermal heat significantly better than dry earth.