
Fixing an outdoor water spigot involves diagnosing the leak source. If water leaks when turned on, tighten the handle retaining nut. If leaking from spout when off, replace the washer on the stem.
A dribbling vacuum breaker needs cleaning. Severe leaks may require replacing the entire frost-proof faucet. An outdoor water spigot, also known as a frost-proof faucet, is a plumbing fixture that supplies water outside a home and includes a long stem to shut off water inside to prevent freezing. This checklist from Family Handyman helps you save a plumber’s bill by matching the symptom to the exact fix, whether it’s a simple tightening or a full fixture swap.
How to Diagnose Three Common Outdoor Spigot Leaks
Pinpointing the leak’s location tells you exactly which part failed. Check where the water appears when you operate the handle.
- Leak around the handle when water is on: If a frost-proof faucet leaks around the handle when water is on, the stem packing is failing. You’ll see water bubbling or seeping from under the handle during use. This points to a loose retaining nut or a worn packing gasket.
- Leak from the spout when water is off: A bad washer causes a frost-proof faucet to leak out of the spout when turned off. A steady drip or trickle after you shut the handle confirms the washer assembly is not sealing against the valve seat.
- Water dribbling from under the vacuum breaker cap while water is running: This indicates a vacuum breaker leak. The dribble suggests debris or a damaged internal part inside the vacuum breaker assembly on top of the faucet.
How to Fix a Leak That Occurs When Water Is On
A leak at the handle when the water runs usually resolves with a simple adjustment. Try the least invasive step first.
- Turn off the water supply. Locate the inside shut-off valve for the exterior faucet and close it. If no dedicated valve exists, shut off the main water valve. Open the outdoor spigot to drain any remaining pressure.
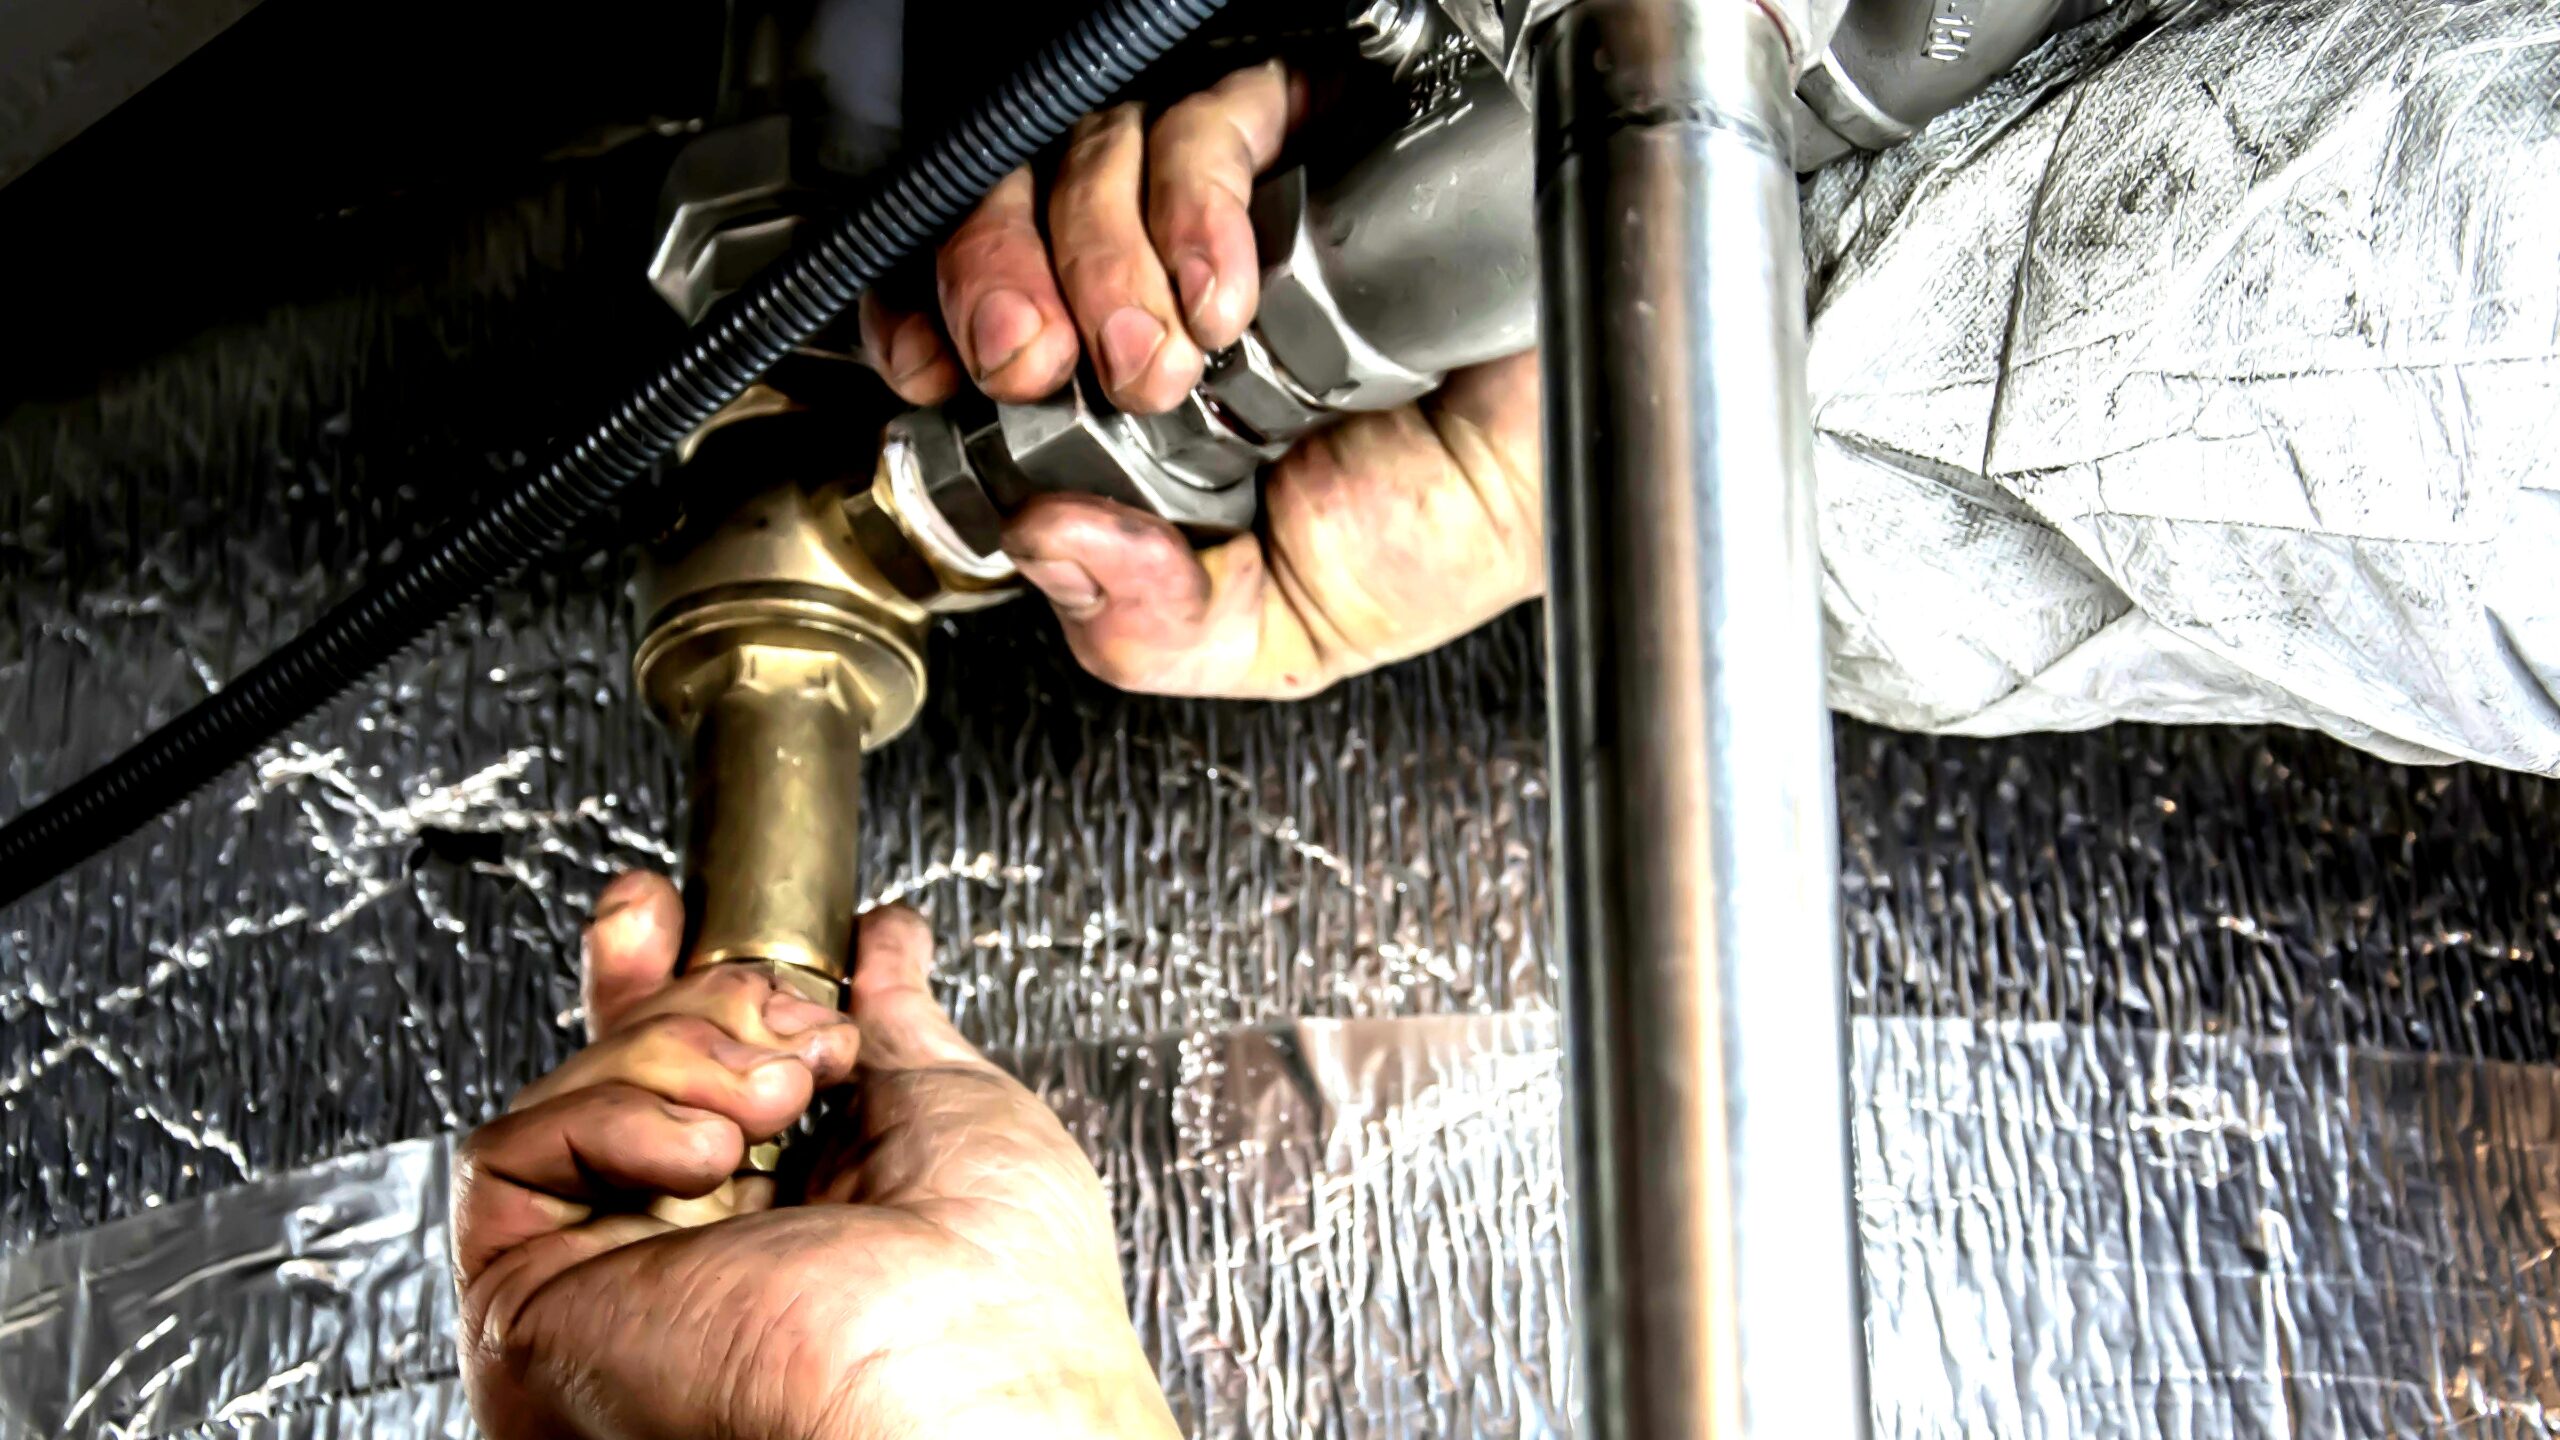
- Tighten the retaining nut. The retaining nut sits directly under the handle. Use an adjustable wrench. Tightening the retaining nut under the handle can fix a leak that occurs only when water is turned on. Some frost-proof faucets have reversed threads, so test by turning the nut counterclockwise.
- Replace the packing gasket if needed. If tightening does not stop the leak, shut the water off again. Remove the handle and unscrew the retaining nut fully. Pull out the old packing gasket or string wrapped around the stem. A packing gasket must be replaced if tightening the retaining nut does not stop a leak around the handle. Install a new matching gasket and reassemble.
- Swap the whole faucet if the leak persists. The entire faucet should be replaced if it continues to leak after the packing gasket is replaced. A persistent handle leak despite a new gasket signals internal corrosion or a scratched stem.
How to Fix a Leak That Appears When Water Is Off
A drip from the spout after shutting off the water means the washer assembly is failing. The water to the exterior faucet must be turned off via the inside valve or main water valve before removing the faucet stem.
- Shut off the water and remove the handle. Close the inside water supply valve. Loosen the handle screw and pull the handle off.
- Extract the long faucet stem. Unscrew the large packing nut that secures the stem into the valve body. Pull the entire long stem out of the faucet. The washer in a frost-proof faucet is located on the end of the long faucet stem, retained by a small brass screw.
- Inspect the valve seat. Peer inside the faucet body with a flashlight after removing the stem. Look for pits or rough grooves in the brass seat. A worn valve seat requires replacement of the entire frost-proof faucet if the faucet leaks again shortly after washer replacement. If the seat is badly scored, a new washer will fail fast.
- Replace the washer assembly. Remove the old washer screw and washer. The washer assembly must be replaced if the faucet leaks from the spout when turned off. Attach a new heat-resistant flat washer of identical size. Reassemble the stem, thread it back in, and tighten the packing nut securely.
How to Repair a Leaking Vacuum Breaker
A dribble from the cap on top of the faucet means the vacuum breaker needs cleaning. Vacuum breakers on frost-proof faucets are typically located on top of the faucet.
- Remove the vacuum breaker cap. Access the vacuum breaker by prying off the cap with two flathead screwdrivers. Insert them on opposite sides and gently rock the cap free.
- Unscrew the retainer. Pull the loosened cap straight up. A vacuum breaker is removed by unscrewing the retainer and pulling out the breaker. Use pliers to break the retainer free if it sticks.
- Clean the parts. Flush the internal components with clean water. Scrub away mineral deposits or rubber debris from the plunger and spring assembly. Cleaning and reinstalling vacuum breaker parts may fix a vacuum breaker leak. Reinsert the parts and screw the retainer back in place.
- Test or replace. Snap the cap back on and turn the water on. If the dribble continues, bring the old breaker to a hardware store to match a new replacement unit.
What Tools and Materials Do You Need?
You need just a few standard tools to tackle most spigot repairs. Gather everything before you start to avoid a mid-repair trip to the store.
- A 4-in-1 screwdriver, adjustable wrench, and slip joint pliers are required tools to fix a leaking frost-proof faucet. The multi-bit driver handles handle screws and packing nuts, while the pliers secure the stem during washer replacement.
- Replacement vacuum breaker parts and washer assembly are required materials to fix a leaking frost-proof faucet. Buy a heat-resistant flat washer and a vacuum breaker kit sized for your specific faucet brand. A tube of plumber’s grease helps the new stem reassembly.
When to Replace the Entire Frost-Proof Faucet
Some leaks signal that patching parts won’t restore a reliable seal. A heavily worn valve seat pushes you toward a full swap. Replacing the faucet also becomes necessary if the soldered pipe connection fails or physical cracks develop in the brass body.
Threaded frost-proof faucets are replaced by turning off the water and unscrewing the faucet. Grip the pipe with a wrench while spinning the faucet to avoid twisting the copper inside the wall. Soldered frost-proof faucets require a torch and soldering tools for replacement. These demand a specific skill set; call a plumber if you lack torch experience.
The new valve should be installed with a little slope to drain to prevent freezing. Pitch the pipe slightly toward the outside so gravity works in your favor.
Prevention avoids a costly replacement next season. No winterizing as such needed, but do not leave a hose connected in the fall. A connected hose traps water in the valve’s cold zone.
You must remove any hoses so water left in the outer part of the valve can drain completely. A disconnected sink hose adapter or quick-connect fitting also blocks draining; pull it off before hard freezes hit.
Conclusion
Diagnosing the leak’s location eliminates guesswork from outdoor faucet repair. Tighten the nut for handle drips, swap the washer for spout leaks, and clean the vacuum breaker for cap dribbles. You don’t need a plumber for most fixes.
When the valve seat inside the body is trashed, a full faucet replacement becomes the surest remedy. Work through the checklist, and you’ll restore a tight, drip-free spigot with basic tools in under an hour.
FAQ
Q: Can I fix an outdoor spigot leak without calling a plumber?
A: Yes, many spigot leaks can be fixed with basic tools. Tightening the handle nut or replacing a washer often solves the problem. Follow the diagnosis steps in this guide to tackle the repair yourself.
Q: How do I know if my outdoor faucet needs a new washer?
A: If the faucet drips from the spout after you turn it off, the washer on the stem is likely worn. Replacing the washer assembly should stop the leak.
Q: Why does my outdoor water spigot leak when the hose is attached?
A: Leaking with a hose attached may indicate a vacuum breaker issue or water trapped in the hose. Always disconnect hoses in fall and check the vacuum breaker if dribbling occurs.
Related Post: How to Detect an Outdoor Leak and Choose the Right Repair


