Once you start gardening, the urge to multiply your collection becomes nearly irresistible. Fortunately, you do not need to spend a fortune at the nursery every season. Understanding plant propagation basics allows you to turn one plant into many, rescue a struggling specimen, or share your favorite varieties with friends. Propagation simply means taking a part of an existing plant and encouraging it to form its own root system and grow into a new independent plant. There are two broad categories: sexual (using seeds or spores) and asexual (cloning from vegetative parts). In this guide, we will explore five proven methods that will help you master the art of making more plants.
Five Essential Techniques to Expand Your Garden
Whether you are a beginner or an experienced gardener, these five approaches cover the most reliable ways to propagate a wide range of plants. Each method has its own strengths and ideal plant types. Let us dive into the details so you can choose the right technique for your green friends.
1. Taking Stem and Leaf Cuttings – The Most Popular Method
Cuttings earn their reputation as the go‑to technique for good reason. They work beautifully on both woody shrubs and soft‑stemmed annuals. The basic idea is to remove a portion of a stem or leaf, place it in a rooting medium, and wait for roots to form. For plant propagation basics, this is often the first method beginners try, and success rates can be high with the right care.
There are four main types of stem cuttings, each suited to different growth stages of the parent plant. Herbaceous cuttings come from non‑woody plants like coleus, dahlias, or basil. Softwood cuttings are taken from the fresh, green growth of woody plants in spring — they are tender and need frequent misting to avoid wilting. Semi‑hardwood cuttings come from partially mature wood, usually collected from early summer to early fall. Hardwood cuttings use fully dormant, mature stems gathered in late fall, winter, or early spring.
How to succeed with cuttings:
Always cut just below a node (the bump where leaves attach). Remove lower leaves so no foliage is buried. Use a clean, sharp pair of pruners or scissors to avoid crushing the stem. Dip the cut end into rooting hormone powder — studies show it can increase rooting success by up to 30% for many species. Then insert the cutting into moistened perlite, vermiculite, or a sterile seed‑starting mix. Keep the medium damp but not soggy, and cover the container with a clear plastic bag or dome to maintain humidity. Check for roots after two to four weeks by gently tugging — if you feel resistance, roots have formed.
A common challenge is rot caused by overwatering. To prevent this, ensure your pot has drainage holes and do not let the cutting sit in standing water. If you are propagating succulents, allow the cut end to callus over for a day or two before planting — this drastically reduces rot. Leaf cuttings work well for plants like African violets and snake plants; simply insert the leaf petiole into moist soil or place a leaf segment flat on the surface.
2. Dividing Overcrowded Clumps – Instant Multiples
Division is one of the quickest ways to get new plants, especially for perennials that form clumps or produce offshoots. Many gardeners notice their hostas, irises, or daylilies becoming congested after three or four years. Instead of buying replacements, you can split the root ball into several pieces and replant each one. This technique also invigorates the original plant by relieving crowding.
When to divide:
Early spring (just as new growth appears) or early fall (when temperatures cool) are ideal. For most perennials, dividing every three to five years keeps them healthy. To divide, dig up the entire clump with a spade or garden fork. Shake off excess soil so you can see the natural divisions. Using your hands or a sharp knife, separate the clump into sections. Each section should have at least two or three growing points (crowns) and a healthy set of roots. Trim away any dead or mushy portions.
Succulents often produce small offshoots called pups around the base of the mother plant. Gently twist or cut these off and pot them up individually — they root quickly in well‑draining soil. For plants with a dense, matted root system (like ornamental grasses), you may need to use two pitchforks back‑to‑back or saw through the root ball. After dividing, water the new transplants well and keep them in shade for a few days to reduce transplant shock. Within a season, each division will become a full‑sized plant, effectively multiplying your garden at no cost.
3. Layering – Rooting While Still Attached
Layering is a low‑stress propagation method that works wonderfully for shrubs like hydrangeas, roses, rhododendrons, and magnolias. Instead of cutting a stem first, you encourage roots to form while the branch is still connected to the mother plant. This ensures a steady supply of water and nutrients during the rooting process, which leads to a very high success rate — often above 90% for suitable species.
Simple ground layering steps:
Select a low‑growing, flexible branch that can reach the ground. Remove leaves from a 15‑ to 20‑cm section near the midpoint of the branch. Using a knife, lightly wound the bark on the underside of that section (scrape away a thin layer). Bend the branch down so the wounded area touches the soil. Cover it with 5 to 8 cm of soil and place a rock or landscape pin on top to hold it in place. The tip of the branch should stick out above the soil. Water the area regularly. After several weeks to a few months, roots will develop at the buried node. You can check by gently digging around — when you see a network of roots, sever the new plant from the mother with clean pruners and transplant it.
Air layering is an advanced variation used for plants with stiff stems that cannot bend to the ground, such as fiddle‑leaf figs or rubber trees. You make an upward slanting cut about one‑third through the stem, wedge it open with a toothpick, and pack moist sphagnum moss around the wound. Wrap the moss in clear plastic and seal both ends with tape. Within a month or two, roots will appear through the moss. Then you can cut below the rooted section and pot it up. Air layering requires patience but rewards you with a sizable new plant almost instantly.
Common pitfalls: The layered branch may dry out if the soil covering it is not kept consistently moist. Also, some branches are too brittle — choose ones that are still flexible. Label the spot so you do not accidentally disturb the developing roots.
You may also enjoy reading: Does Gardening Zone Even Matter? 5 Myths.
4. Grafting – Combining Two Plants for Better Results
Grafting is not just for commercial orchards; home gardeners can use it to propagate fruit trees, roses, and even tomatoes. The technique involves attaching a cutting (called a scion) from the desired plant onto a rootstock of a related species or variety. The rootstock provides a strong root system, disease resistance, or controlled size, while the scion supplies the flowers or fruit you want.
Why graft instead of taking cuttings?
Some plants are difficult to root from cuttings alone, especially many fruit trees. Grafting also allows you to change the variety of an existing tree without replanting, or to create a multi‑grafted tree that bears several types of fruit on one trunk. For plant propagation basics, grafting is an intermediate skill, but with practice it becomes very satisfying.
Essential steps for a simple whip‑and‑tongue graft:
Collect a dormant scion (a pencil‑thick branch with two or three buds) in late winter. Choose a rootstock that is the same diameter as the scion. Make a sloping cut about 2.5 cm long on both the rootstock and the scion. On each cut surface, make a second small downward slit to create a tongue. Fit the tongues together so the cambium layers (the green layer just under the bark) align on at least one side. Wrap the union tightly with grafting tape or parafilm to hold it in place and seal it from moisture. Cover the top of the scion with pruning paint or wax to prevent drying. Place the grafted plant in a protected area (like a cold frame) until growth begins in spring.
The most common mistake is poor cambium alignment — if the layers do not touch, the graft will fail. Also, keep the rootstock’s own buds below the graft removed so all energy goes to the scion. Success rates for beginners can be around 50–70% with practice, but once you master alignment, you can propagate trees that would otherwise be impossible from cuttings.
5. Starting from Seed – The Original (Sexual) Propagation
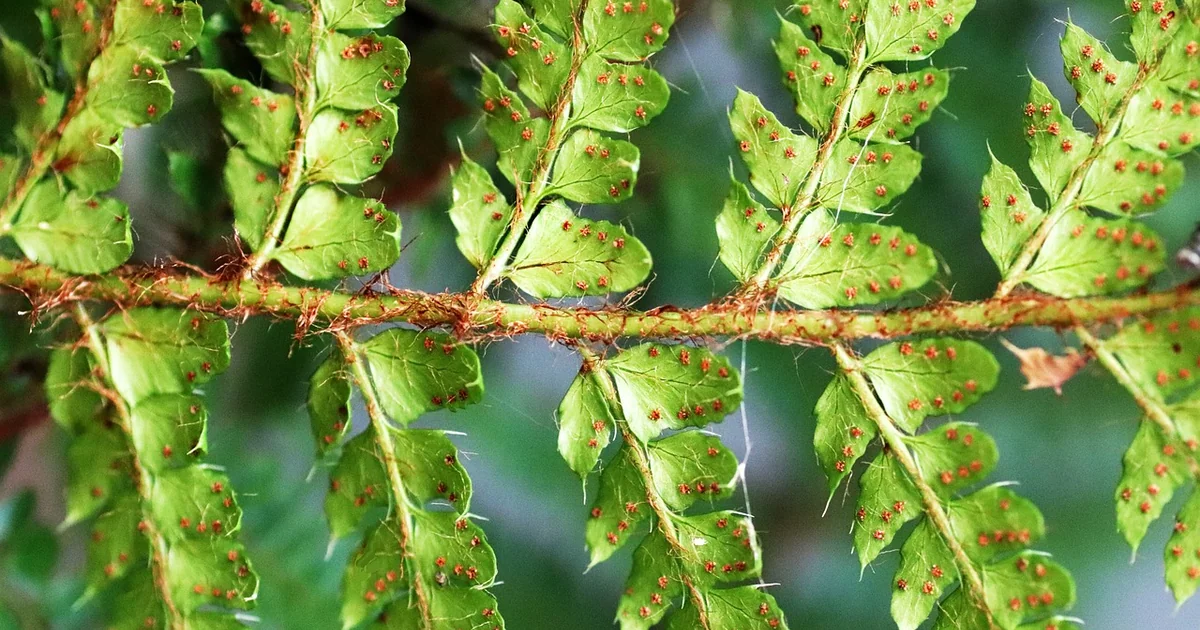
Though this article focuses mainly on asexual methods, seeds remain the most natural and diverse way to propagate plants. Seed propagation uses the reproductive parts of a plant and combines genetic material from two parents, which can lead to exciting new variations. It is particularly popular for annual flowers and vegetables, where you can collect seeds from your best‑performing plants.
Seed starting essentials:
Timing matters greatly. Most seeds benefit from being started indoors 6 to 12 weeks before the last frost date. Use a sterile seed‑starting mix (not garden soil) and plant seeds at a depth roughly twice their diameter. Keep the medium consistently warm and moist — a heat mat and humidity dome improve germination rates significantly. Provide bright light once seedlings emerge, either from a sunny windowsill or grow lights placed a few inches above the leaves.
One challenge with seeds is genetic variation. Unlike cuttings, which produce exact clones, seedlings may differ from the parent plant. This is why many perennials, shrubs, and trees are seldom grown from seed by serious gardeners — they prefer the predictability of asexual methods. However, if you want to try something new or save money on annuals, seeds are your best friend.
Collecting your own seeds:
Let flowers fade and develop seed heads or pods. Harvest them when they turn brown and dry. Store seeds in a cool, dark, dry place in paper envelopes. Many vegetable seeds remain viable for three to five years if stored properly. A simple trick to test viability: place ten seeds on a damp paper towel inside a sealed plastic bag. After a week, count how many have sprouted — that percentage tells you what to expect from the whole batch.
By understanding these five core methods — cuttings, division, layering, grafting, and seeds — you now have a complete toolkit to propagate almost any plant you encounter. Each technique requires a little patience and practice, but the reward of watching a new plant take root from something you started yourself is deeply satisfying. Start with one or two methods that match the plants you already own, and soon you will have more plant babies than you know what to do with.