What if you could create Hollywood-worthy Halloween decorations that make your house the neighborhood’s must-see destination—all without spending a fortune or needing professional skills?
DIY Halloween Decorations: Complete 2025 Guide to Spine-Chilling Displays
Create spine-chilling decorations that transform your home into the neighborhood’s Halloween destination
Your house sits dark and undecorated while neighbors showcase their creative DIY Halloween displays. The regret sets in immediately. Americans spent a record $13.1 billion on Halloween in 2025, with $4.2 billion dedicated to decorations alone. Creating memorable Halloween decorations doesn’t require a massive budget or professional skills.
DIY decoration searches exploded 17,000% year-over-year, proving homeowners want handcrafted displays over generic store-bought options. With some creativity, basic materials, and the right guidance, you can craft displays that rival expensive alternatives while adding personal touches that make your home uniquely spooky.
This comprehensive guide reveals proven techniques for building impressive Halloween displays that capture attention, delight trick-or-treaters, and establish your home as the neighborhood’s Halloween headquarters. Whether you’re working with a shoestring budget or planning an elaborate haunted experience, these projects adapt to your skill level and available time.
Foundation Elements: Building Your Halloween Display Strategy
Creating captivating Halloween displays starts with understanding fundamental design principles. Successful decorations balance visual impact with practical considerations like weather resistance, safety, and budget constraints. Begin by assessing your available space, identifying focal points visible from the street, and determining which areas receive the most foot traffic.
Consider your home’s architecture when planning displays. Victorian homes naturally suit gothic themes with draped fabric and ornate details. Modern houses benefit from minimalist, geometric decorations that emphasize clean lines and dramatic lighting. Ranch-style homes provide excellent horizontal spaces for cemetery scenes or sprawling spider webs.
Essential Planning Considerations
Weather resistance remains crucial for outdoor displays. October weather varies dramatically across regions, bringing rain, wind, or early snow. Select materials that withstand moisture without deteriorating. Seal cardboard creations with waterproof spray, choose outdoor-rated fabrics, and secure lightweight decorations against wind damage.
Safety considerations protect both visitors and homeowners from accidents. Ensure pathways remain well-lit and obstacle-free. Secure electrical connections properly, using outdoor-rated extension cords and covering connections from moisture. Position animatronics and jump scares away from stairs or uneven surfaces where startled guests might trip.
Budget planning prevents overspending while maximizing impact. Allocate funds strategically, investing more in highly visible areas like front yards and entryways. Repurpose household items creatively—old sheets become ghosts, cardboard boxes transform into tombstones, and plastic bottles create eerie lighting effects. Dollar stores provide affordable supplies for many projects, while thrift shops offer unique vintage items perfect for haunted themes.
Pro Tip: Timeline Planning
Start planning Halloween displays in early September. This provides time for ordering specialty items, allows paint and adhesives to cure properly, and prevents last-minute stress. Create a project schedule listing each decoration’s construction time, drying periods, and installation date.
Storage solutions extend decoration lifespans across multiple seasons. Design displays with disassembly in mind, using removable fasteners and modular components. Label storage containers clearly, photograph assembled displays for reference, and store delicate items with protective padding. Proper storage protects your investment and simplifies next year’s setup.
What’s stopping you from creating the Halloween display you’ve always imagined? Is it budget constraints, time limitations, or uncertainty about where to start? Share your biggest challenge in the comments below—you might find others facing the same obstacles!
Graveyard Scenes: Creating Authentic Cemetery Atmospheres
Graveyard displays remain Halloween classics for good reason. They create immediate atmosphere, work in spaces ranging from tiny yards to sprawling lawns, and accommodate various skill levels. Building convincing cemetery scenes requires attention to detail, strategic placement, and understanding how real graveyards create their distinctive mood.
Crafting Realistic Tombstones
Foam insulation boards provide ideal tombstone material. These lightweight sheets cut easily with basic tools, accept paint beautifully, and withstand outdoor conditions. Purchase two-inch thick boards from home improvement stores, avoiding the metallic-backed varieties that resist painting.
Design tombstone shapes using cardboard templates first. Classic designs include rounded tops, crosses, obelisks, and broken stones suggesting age. Vary heights between 18 and 36 inches for visual interest. Cut foam using a sharp knife or hot wire cutter, creating smooth edges that paint cleanly.
Texturing transforms flat foam into weathered stone. Carve cracks using a soldering iron or wood-burning tool. Create moss effects by dabbing green paint with natural sponges. Add lichen by stippling yellow-green paint in irregular patterns. These details convince viewers they’re seeing ancient monuments rather than foam boards.
Epitaph writing adds personality while avoiding offense. Create fictional names combining historical first names with creative surnames. Include birth and death dates spanning centuries, suggesting your cemetery’s long history. Add humorous inscriptions like “I told you I was sick” or mysterious phrases like “Not gone, merely sleeping” for entertainment value.
Material List: Basic Tombstone Set
- •4-6 foam insulation boards (2″ thick)
- •Gray primer spray paint (3 cans)
- •Black and white acrylic paint for aging
- •Natural sponges for texture
- •Wooden stakes or rebar for anchoring
Ground Effects and Atmosphere
Disturbed earth suggests recent burials or restless spirits. Create mounded graves using bags of leaves covered with landscape fabric and a thin soil layer. Position these mounds strategically between tombstones, varying sizes to suggest different burial dates.
Skeleton parts emerging from soil create dramatic focal points. Purchase plastic skeleton sets during post-Halloween sales for significant savings. Bury portions underground, leaving hands, feet, or skulls partially visible. Position reaching skeleton arms near pathway edges where guests pass closely.
Spanish moss or synthetic cobwebs draped across tombstones add age and neglect. Stretch material thin enough to see through while maintaining visible strands. Avoid overdoing web effects—strategic placement creates more impact than covering everything uniformly.
Lighting transforms daytime graveyards into nighttime spectacles. Install solar-powered stake lights behind tombstones for dramatic uplighting. Use colored bulbs sparingly—too much colored light appears artificial. White and amber lights create more convincing moonlight effects. Consider adding flickering LED candles in mason jars for vintage lantern aesthetics.
Window Displays: Transforming Glass Into Ghostly Galleries
Windows offer prime decoration real estate visible both day and night. These transparent canvases support various decoration styles, from subtle silhouettes to elaborate scene compositions. Effective window displays work from both sides, entertaining trick-or-treaters outside while maintaining appeal from interior perspectives.
Silhouette Techniques
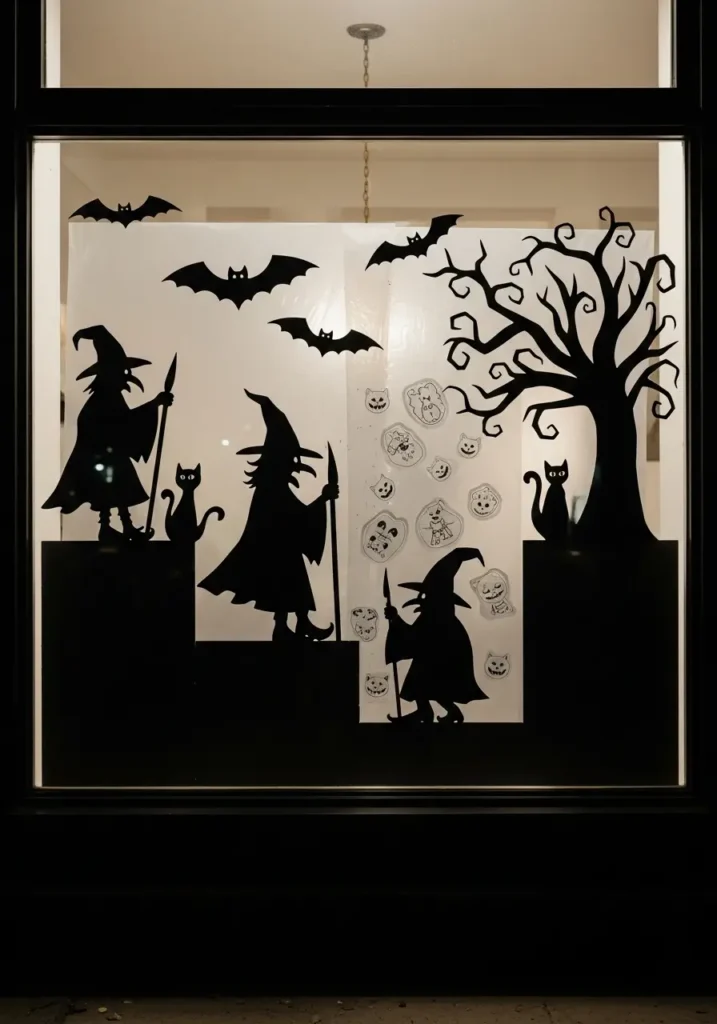
Black cardboard silhouettes create striking window displays with minimal investment. Design templates featuring witches, cats, bats, or haunted trees. Transfer designs to black poster board, cutting carefully with craft knives for clean edges. Multiple small silhouettes often create more impact than single large designs.
Positioning determines silhouette effectiveness. Place figures at varying heights to suggest movement and depth. Overlap elements slightly for dimensional effects. Consider how interior lighting will backlight silhouettes after dark—strategic placement creates dramatic shadows on exterior walls.
Window clings offer reusable alternatives to adhesive decorations. Create custom clings using clear contact paper and permanent markers. Draw designs on contact paper’s backing, cut out shapes, then apply to windows. These removable decorations store flat for future use without leaving residue.
Gel Clings and 3D Effects
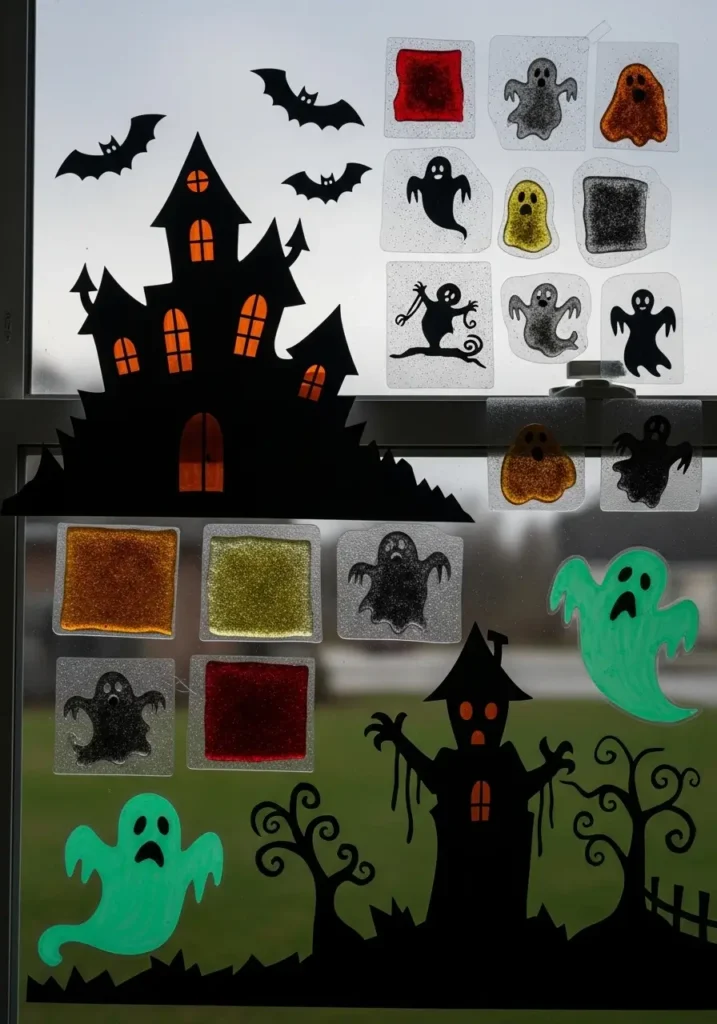
Commercial gel clings provide quick decoration options, but homemade versions offer unlimited creativity. Mix clear school glue with food coloring, adding glitter for sparkle effects. Pour mixtures onto plastic sheets in desired shapes, allowing several days for complete drying. Peel carefully and apply to clean windows where they’ll stick through static adhesion.
Layering creates sophisticated window scenes. Combine silhouettes, gel clings, and drawn elements for multi-dimensional displays. Place larger elements like haunted houses in backgrounds, medium-sized figures in middle grounds, and detailed gel clings in foregrounds. This layering mimics theatrical set designs, creating convincing depth illusions.
Glow-in-the-dark paint adds surprise elements visible only after sunset. Paint ghost figures or cryptic messages on windows using specialty paints that charge during daylight. These hidden images appear mysteriously as darkness falls, delighting observers who notice the transformation.
Window Display Safety Guidelines:
- ✓Use removable adhesives to prevent glass damage
- ✓Avoid blocking emergency exit routes
- ✓Ensure decorations don’t obstruct security systems
- ✓Test removal methods on small areas first
Projection Mapping Basics
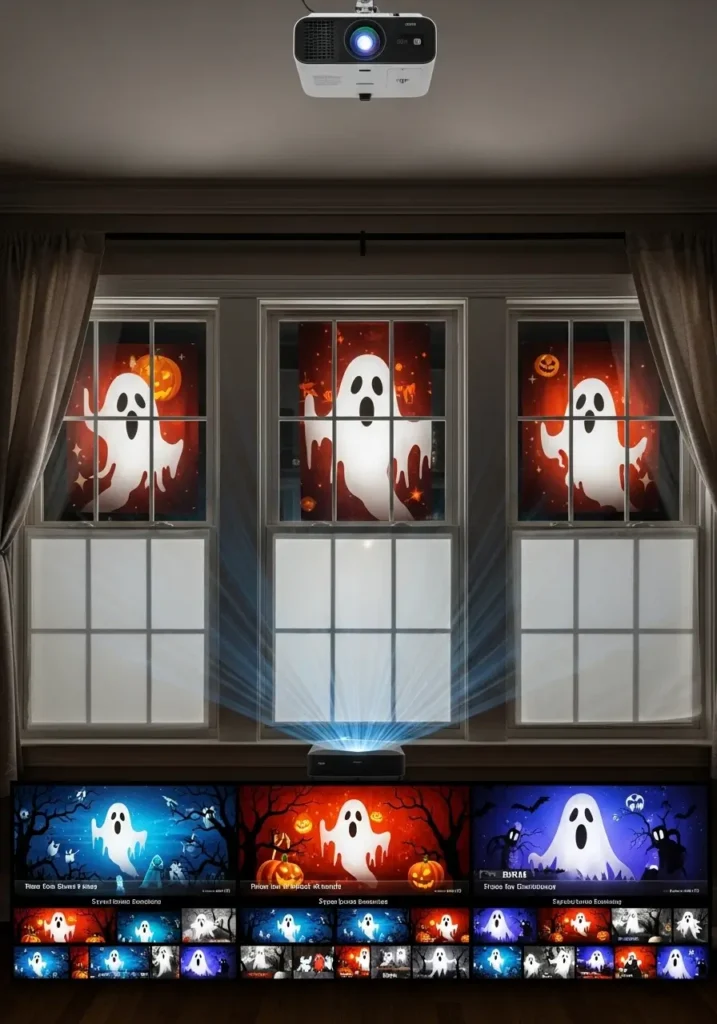
Digital projectors revolutionize window displays through animated effects. Project moving images onto sheer curtains or specialized projection screens for ghostly apparitions. Many affordable projectors include pre-loaded Halloween animations, though creative homeowners can design custom content.
Rear projection from inside creates cleaner effects than exterior projection. Hang white sheets or purchase rear-projection film for windows. Position projectors far enough back to fill window frames completely. Adjust brightness settings to balance visibility without overwhelming viewers.
Synchronize multiple windows for coordinated displays. Use video splitting devices to send single sources to multiple projectors, creating house-wide animations. Time effects with motion sensors so animations activate when guests approach, conserving projector bulb life while maximizing surprise impact.
Related Post: 11 Unique Coffee Bar Ideas To Start Your Morning Off Right
Yard Installations: Large-Scale Displays That Command Attention
Front yards provide canvases for ambitious Halloween installations. These spaces accommodate massive decorations visible from streets, creating destinations that draw visitors from surrounding neighborhoods. Large-scale displays require structural planning, weather considerations, and crowd management strategies.
Giant Spider Webs
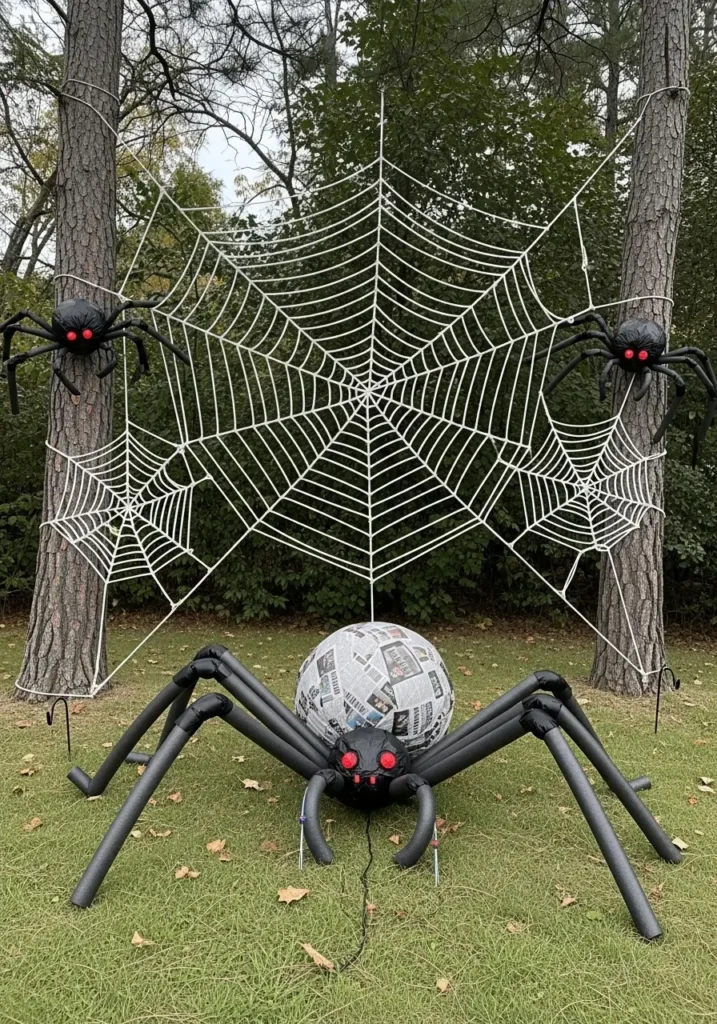
Enormous spider webs spanning trees, bushes, or entire yard sections create immediate visual impact. Construction begins with anchor points—identify sturdy attachment locations like tree trunks, fence posts, or shepherd’s hooks. Map web patterns on paper first, planning radial threads and spiral connections.
Rope serves as primary web material for large installations. Choose white or glow-in-the-dark rope for visibility. Start with radial threads extending from central points to outer anchors. Secure each connection tightly, maintaining consistent tension. Add spiral threads working outward from centers, weaving over and under radial lines.
Giant spiders complete web displays dramatically. Build bodies using black garbage bags stuffed with leaves or newspaper. Create legs from foam pipe insulation or pool noodles painted black. Add red LED eyes powered by small battery packs. Position spiders strategically where they’re visible but protected from wind damage.
Maintenance keeps webs attractive throughout October. Morning dew creates beautiful natural effects but can cause sagging. Tighten loose sections regularly. Remove accumulated leaves that obscure web patterns. Consider applying fabric stiffener spray to maintain shape during wet weather.
Inflatable Integration
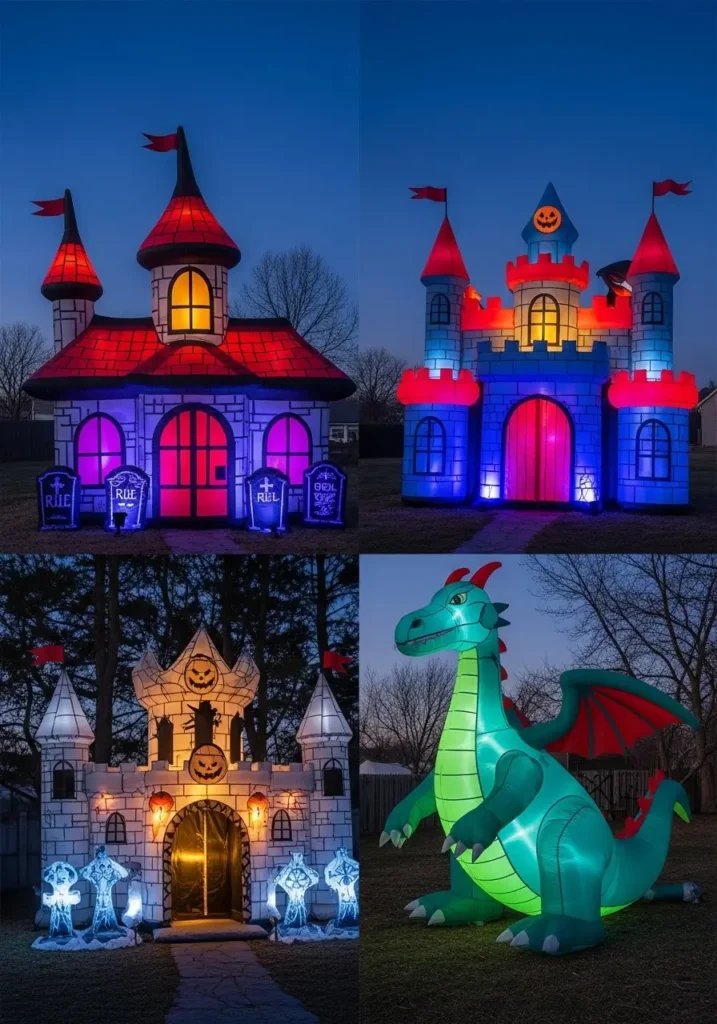
Commercial inflatables provide instant impact but often appear generic without customization. Integrate inflatables into broader scenes rather than displaying them isolation. Surround inflatable haunted houses with DIY graveyard elements. Position inflatable dragons near castle facades built from cardboard.
Lighting enhances inflatable displays significantly. Replace standard white bulbs with colored alternatives matching decoration themes. Add spotlights to highlight specific features. Install color-changing LED strips inside translucent inflatables for dynamic effects. Timer controls automate lighting changes throughout evenings.
Anchoring prevents inflatable disasters during storms. Use heavy-duty stakes designed for large tents rather than included lightweight tethers. Add sandbags around bases for extra stability. Consider partially deflating decorations when strong winds are forecast, re-inflating once conditions improve.
Weather Protection Strategies
Protect electronic components using waterproof containers with sealed cable entries. Apply dielectric grease to electrical connections preventing corrosion. Install decorations under eaves when possible, reducing direct rain exposure. Create drainage channels directing water away from display bases.
Motion-Activated Elements
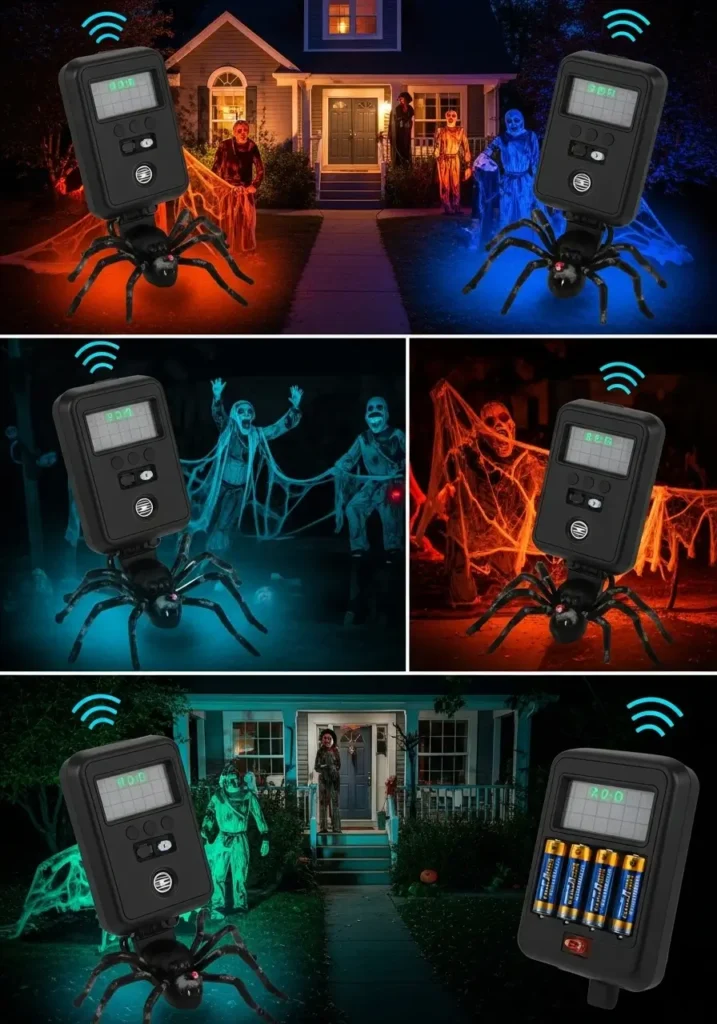
Motion sensors transform static displays into interactive experiences. Basic sensors cost under twenty dollars, triggering lights, sounds, or animatronics when guests approach. Position sensors at waist height for reliable human detection while avoiding activation from passing cars.
Sequence multiple triggers for escalating scares. Program first sensors to activate subtle effects like creaking sounds or flickering lights. Secondary triggers unleash dramatic elements like jumping spiders or screaming ghouls. This progression builds tension effectively while preventing single overwhelming shocks.
Sound effects multiply display impact without adding visual clutter. Hide weatherproof speakers in bushes, under eaves, or inside hollow decorations. Layer ambient soundtracks with triggered effects for rich audio environments. Adjust volumes considering neighbor proximity—excessive noise generates complaints regardless of holiday enthusiasm.
Test motion sensors thoroughly before Halloween night. Adjust sensitivity settings preventing false triggers from wind-blown decorations. Check detection ranges ensuring coverage of intended areas. Replace batteries in wireless units with fresh sets, keeping spares readily available for busy trick-or-treat periods.
Have you ever had a Halloween display disaster—wind damage, technical failures, or unexpected visitor reactions? What lessons did you learn that might help other decorators avoid similar mishaps? Share your stories and solutions below!
Frequently Asked Questions
What’s the ideal timeline for starting DIY Halloween display preparations?
Begin planning DIY Halloween displays in early September for optimal results. This timeline provides approximately eight weeks for project completion without rushing. Start with design conceptualization and material gathering in the first week of September. Dedicate mid-September to construction of major elements like tombstones or large props that require painting and drying time. Use late September for detail work, testing electronic components, and making adjustments. Reserve early October for installation, allowing time to address unexpected issues before peak Halloween season. This schedule accommodates weather delays, material shortages, or design modifications while preventing last-minute stress. Weekend crafters should start even earlier if limiting work to Saturdays and Sundays.
How can I make my DIY Halloween displays weather-resistant without spending a fortune?
Weatherproofing Halloween displays economically requires strategic material selection and protective treatments. Start with naturally weather-resistant materials like foam board, PVC pipe, and outdoor-rated fabrics rather than paper or untreated cardboard. Apply clear acrylic sealer spray (available for under $10) to painted surfaces preventing color bleeding and water damage. Use hot glue rather than white school glue for assembly, as it maintains adhesion despite moisture exposure. Create simple shelters using clear plastic sheeting draped over displays during storms, securing edges with rocks or stakes. Position sensitive decorations under eaves or porch overhangs providing natural protection. For electronic components, place them inside sealed plastic containers with small cable entry holes sealed using silicone caulk.
What are the best budget-friendly lighting options for Halloween displays?
LED string lights offer the most economical lighting solution for Halloween displays, consuming 80% less electricity than traditional bulbs while lasting years longer. Purchase white LED strands after Christmas when prices drop dramatically, then use colored gels or spray-painted ping pong balls as covers creating custom colors. Solar-powered stake lights eliminate electrical costs entirely while providing accent lighting for pathways or tombstones. Battery-operated LED candles create flickering effects without fire hazards, with many dollar stores offering multi-packs under $5. Create dramatic uplighting using work lights from hardware stores positioned behind decorations. Blacklight LED strips cost under $20 and make white decorations glow eerily.
How do I prevent my Halloween decorations from being stolen or vandalized?
Protecting Halloween displays from theft and vandalism requires multiple strategic approaches. Secure valuable decorations using cable locks threading through hidden anchor points, making quick removal difficult. Install motion-activated cameras or dummy cameras with blinking lights deterring potential vandals. Position expensive animatronics where they’re visible from windows allowing monitoring from inside. Use ground stakes or sandbags anchoring lightweight decorations preventing easy grabbing. Apply UV-reactive paint creating invisible identification marks only visible under blacklight for recovery purposes. Build community connections with neighbors who watch properties during absences. Remove or secure decorations during peak mischief nights like October 30th when vandalism increases.
What safety measures should I implement for trick-or-treaters visiting my Halloween display?
Ensuring trick-or-treater safety requires comprehensive hazard assessment and proactive prevention measures. Illuminate all pathways using rope lights or solar stakes eliminating dark areas where children might trip. Remove garden hoses, extension cords, and decorative elements from walking paths preventing entanglement. Secure animated decorations away from walkways where startled children might stumble backward. Mark steps and elevation changes with reflective tape or battery-powered lights highlighting transitions. Avoid strobe lights that could trigger seizures in sensitive individuals. Position jump scares away from stairs or concrete surfaces where falls cause serious injuries. Create barriers around display elements preventing children from touching electrical components or delicate decorations.
Key Takeaways:
- ✓Americans spent $13.1 billion on Halloween in 2025, with DIY decoration searches up 17,000% year-over-year
- ✓Start planning in early September for stress-free execution and proper curing times
- ✓Repurpose household items and natural materials for budget-friendly decorations
- ✓Layer lighting effects using LEDs, blacklights, and strategic shadow placement
- ✓Prioritize safety through proper electrical installation and structural stability
- ✓Create themed scenes rather than random decoration placement for cohesive impact
Your Halloween Transformation Starts Now
Creating memorable DIY Halloween displays transforms ordinary homes into extraordinary seasonal destinations. The techniques, projects, and strategies outlined throughout this guide provide foundations for displays ranging from simple weekend projects to elaborate haunted attractions. Success comes from starting early, planning thoroughly, and choosing projects matching your available time, budget, and skill level.
Remember that impressive Halloween displays develop over multiple seasons. Begin with basic elements this year, document what works, and expand gradually. Focus on creating cohesive themes rather than random decoration placement. Prioritize safety while maintaining scare factor. Most importantly, enjoy the creative process and community connections that Halloween decorating provides.
Your DIY Halloween display represents more than seasonal decoration—it creates lasting memories for neighborhood children, establishes creative traditions for your family, and transforms October into a magical month of imagination and community celebration.
Now it’s your turn: Which project from this guide will you tackle first for your 2026 Halloween display? What unique twist will you add to make it your own? Share your plans and inspire fellow decorators in the comments below—let’s build a community of creative Halloween enthusiasts together!


