Hardwood floors take a beating over the years. Scratches from pet claws, dull spots from foot traffic, and water rings from forgotten spills all accumulate. Many homeowners assume the only fix is a full replacement, which can run thousands of dollars. But refinishing offers a smarter path. The process sands away the old finish, applies fresh stain if desired, and seals the wood with a protective top coat. The result looks nearly identical to brand-new flooring, yet the price tag tells a different story.
Per square foot, homeowners typically pay between $3 and $8. A 200-square-foot living room might cost $600 to $1,600, while a 1,000-square-foot main level could run $2,000 to $5,000. These figures shift based on your location, the condition of the floor, and the complexity of the job. Understanding where that money goes helps you budget accurately and avoid surprises when the final invoice arrives.
No two flooring projects are identical. The final price depends on several concrete factors, each of which can move the needle by hundreds of dollars. Knowing these variables puts you in control during the bidding process.
Room Size and Square Footage Pricing
Larger areas cost more in total dollars but often command a lower rate per square foot. Contractors appreciate efficiency, and a single large room requires less setup and cleanup time per square foot than a tiny hallway or closet. A 4×10-foot entryway (40 square feet) might cost $80 to $280, which works out to $2 to $7 per square foot. A 20×20-foot great room (400 square feet) typically ranges from $1,000 to $2,500, or $2.50 to $6.25 per square foot. The discount for scale becomes clear when you compare a 100-square-foot bedroom at $200 to $800 ($2 to $8 per square foot) against a 2,000-square-foot medium house at $6,000 to $10,000 ($3 to $5 per square foot).
If you plan to refinish multiple rooms or an entire level, ask contractors whether they offer a volume discount. Many will reduce the per-square-foot rate for larger projects because the equipment stays on site longer and the workflow becomes more streamlined.
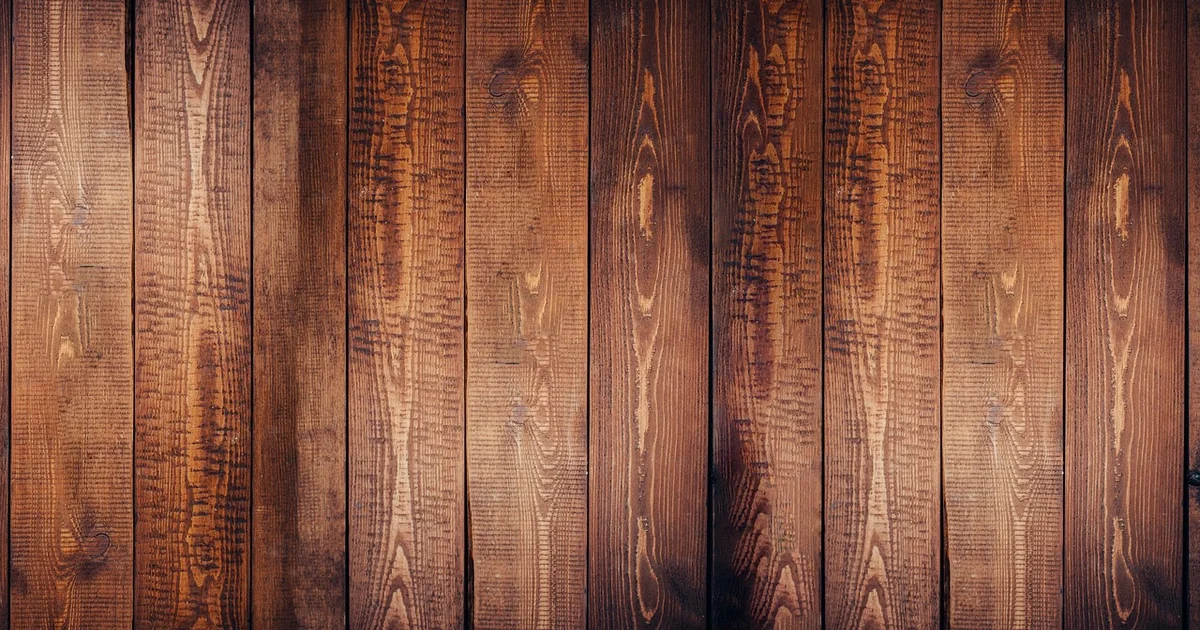
Hardwood Species and Its Minimal but Real Impact
The type of wood underfoot does shift the estimate, though not as dramatically as some homeowners expect. Oak, the most common domestic hardwood, costs $3 to $5 per square foot to refinish. Cherry and parquet fall in the same $3 to $5 range. Maple and mahogany run slightly higher at $6 to $8 per square foot, largely because these denser woods require more time to sand evenly and may need specialized abrasives. Pine, softer and more porous, lands at $4 to $7 per square foot. Bamboo, technically a grass but often grouped with hardwoods, is the most budget-friendly option at $2 to $6 per square foot. Engineered hardwood, which has a thin veneer of real wood over a plywood core, costs $3 to $5 per square foot, though it can only be sanded once or twice before the veneer becomes too thin.
The species matters most when you plan to change the stain color significantly. A dark stain on maple, for example, requires extra care to avoid blotchiness, which can add labor time and push the refinish hardwood cost toward the higher end of the species range.
Local Labor Rates and Regional Variations
Where you live exerts a powerful influence on the final price. Metropolitan areas with high demand and higher overhead costs produce steeper quotes. In New York, the typical range sits at $970 to $2,250 for a standard project. Ohio and Illinois fall around $1,100 to $2,300 and $1,100 to $2,400 respectively. Texas comes in at $1,100 to $2,600, while Florida climbs to $1,330 to $2,800. South Carolina shows the widest spread at $2,250 to $4,300, likely due to uneven contractor availability across the state and varying local economies.
These state-level figures should serve as a starting point, not a ceiling. Within any state, urban centers command higher rates than rural areas. A contractor in Charleston, South Carolina, will almost certainly charge more than one in a small Upstate town. Get at least three local bids to understand the market rate in your specific zip code.
Additional Fees That Add to the Bottom Line
Several line items can inflate the estimate beyond the base per-square-foot rate. Furniture moving is the most common surprise. Most contractors expect the room to be empty when they arrive. If you need them to move heavy pieces, they will charge extra, often $100 to $300 depending on the volume of items. Removing old carpet, vinyl, or tile that sits on top of the hardwood adds another layer of cost, typically $1 to $2 per square foot for demolition and disposal.
Minor repairs also increase the total. A few cracked boards, loose planks, or sections damaged by moisture require attention before sanding begins. Replacing individual boards costs $25 to $50 per board including labor and materials. Filling large gaps with wood filler or rope adds a smaller fee but still contributes to the final number. Cleanup at the end of the project may be included in the bid or tacked on separately. Always ask whether dust containment and final vacuuming are part of the quoted price.
The Refinishing Process: What Your Money Buys
Understanding the steps involved helps you evaluate whether a quote is fair. A thorough refinishing job follows a sequence that takes three to five days for a typical room, plus drying time for stains and sealers.
Preparation and Floor Inspection
Before any sanding begins, the contractor inspects the floor for damage. They check for loose boards, protruding nails, water stains, and areas where the finish has worn through to bare wood. Repairs happen at this stage. Damaged planks get replaced. Nail pops get set below the surface. Gaps wider than a quarter-inch may receive filler. The crew also removes the shoe molding along the baseboards so they can sand all the way to the edge. This step alone requires patience and precision; rushing it leads to visible untouch strips along the walls.
After repairs, the floor gets a deep cleaning to remove dirt, wax, and residue from previous treatments. Any remaining adhesive from old carpet must be scraped away. A clean surface ensures the sandpaper cuts evenly and the new finish bonds properly.
Sanding: The Heart of the Job
Sanding is the most labor-intensive phase and the one where contractor skill matters most. The crew uses a drum sander for the main field of the floor and an edge sander for the perimeter. They start with coarse grit paper, typically 36 or 40 grit, to remove the old finish and level the wood. Then they progress through medium grits (60 to 80) and finish with fine grits (100 to 120) to create a smooth, scratch-free surface.
You may also enjoy reading: 7 Houseplants for Your Porch to Bring Indoors This Winter.
Each pass removes a thin layer of wood. Over a lifetime, a hardwood floor can tolerate about three to five full sandings before the planks become too thin. A professional knows how to remove just enough material to eliminate blemishes without shortening the floor’s lifespan. This balance requires experience. A novice can leave swirl marks, gouges, or uneven patches that show through the new finish.
After sanding, the crew vacuums thoroughly and wipes the floor with a tack cloth to remove every particle of dust. Any debris left behind will become trapped in the finish, creating a rough texture that defeats the purpose of the entire project.
Staining and Sealing
If you want to change the color of your floor, stain gets applied after sanding. Oil-based stains penetrate deeply and offer rich, warm tones. Water-based stains dry faster and produce less odor but may raise the wood grain slightly, requiring a light sanding between coats. The stain is wiped on, allowed to sit for a few minutes, and then wiped off. A longer dwell time produces a darker result.
After the stain dries, the protective top coat goes on. Polyurethane is the most common choice. Oil-based polyurethane gives an amber hue and takes 24 to 48 hours to dry between coats. Water-based polyurethane dries clear and cures in about four to six hours per coat, allowing the project to finish faster. Most professionals apply two to three coats, lightly sanding between each coat to ensure adhesion and a smooth finish.
The curing process takes patience. While the floor feels dry to the touch after a day, it remains vulnerable to scuffs and indentations for about a week. Heavy furniture should not be placed on it for at least seven days, and area rugs can wait two to three weeks to allow full off-gassing of solvents.
How to Get an Accurate Estimate for Your Project
Armed with knowledge about averages, variables, and process, you can approach contractors with confidence. Start by measuring the square footage of the rooms you plan to refinish. Include closets and hallways if they are part of the same continuous floor. Write down the wood species if you know it, or take a photo of a floor vent where the wood edge is visible for identification.
When you call for estimates, mention the square footage, the species, and whether you want to change the stain color or keep the natural tone. Ask each contractor to provide a written breakdown that includes sanding, staining (if applicable), sealing, furniture moving, repairs, and cleanup. Compare the line items, not just the total. A low bid may omit essential steps like edge sanding or dust containment, leading to a subpar result that costs more to fix later.
Check that the contractor carries liability insurance and workers compensation coverage. A refinishing crew uses heavy equipment and generates fine dust that can trigger allergies or respiratory issues. Professional-grade dust containment systems, which attach a vacuum directly to the sander, reduce airborne particles by about 90 percent compared to older methods. Ask whether the crew uses this equipment. The cleaner the sanding process, the less dust settles on your walls, curtains, and furniture in adjacent rooms.
Finally, read the contract carefully before signing. Look for the start date, estimated duration, payment schedule, and warranty information. Many reputable contractors offer a one-year warranty on labor, covering issues like peeling finish or raised grain that appears soon after the job. A written warranty protects both you and the contractor by setting clear expectations for the quality of the finished work.
Refinishing your hardwood floors represents one of the highest-ROI home improvement projects available. The refinish hardwood cost typically runs 30 to 50 percent less than installing new flooring, yet the visual transformation rivals a full replacement. By understanding the factors that shape the price and knowing what to ask during the bidding process, you set yourself up for a smooth project and a floor that looks beautiful for another decade or more.


