You scout seed catalogs all winter. You sketch layouts on graph paper. You haul lumber, screw in brackets, and fill the frame with glorious soil. Then summer arrives, and something feels off. The tomatoes struggle. The boards bulge. The water bill climbs. If this sounds familiar, you are not alone. Many gardeners build raised beds with the best intentions, only to discover that a few small raised bed mistakes can turn a dream garden into a frustrating chore. The good news is that these problems are completely fixable. Whether you are building from scratch or adjusting an existing setup, understanding these five common errors will save you time, money, and heartache.
Mistake Number One: Building Your Raised Bed Too Wide
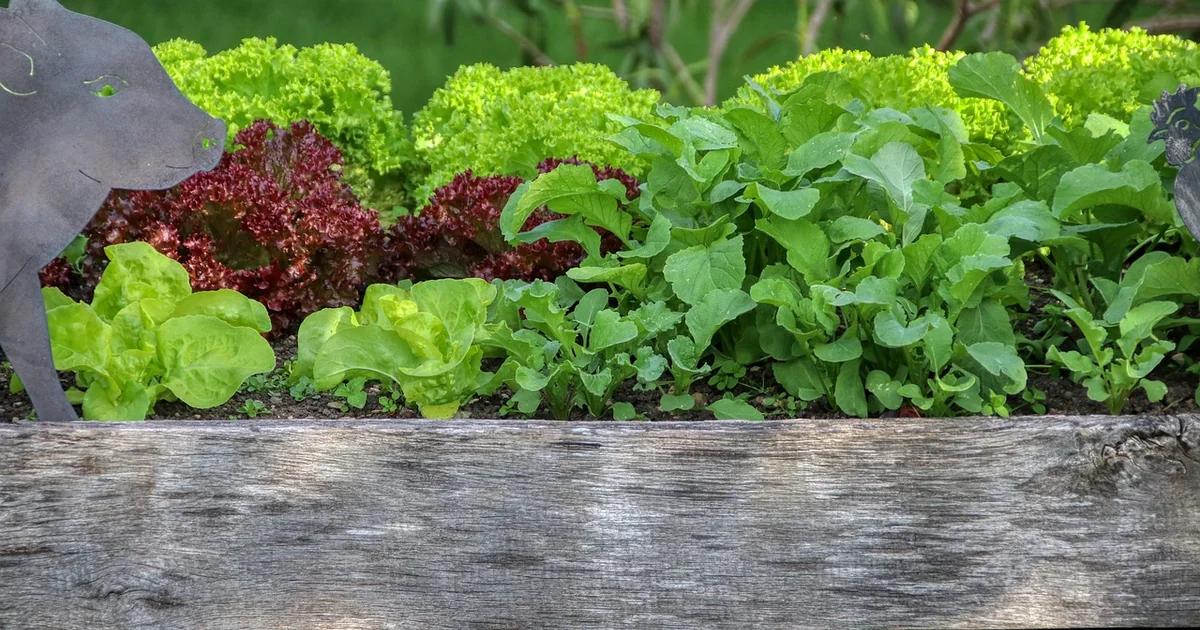
A raised bed that is too wide is perhaps the most frequent oversight in backyard gardening. The logic seems simple: a wider bed holds more plants, so why not maximize the space? The problem is that human arms only stretch so far. About 4 feet (1.2 meters) is the comfortable reach of an average adult from either side. Any wider than that, and the center of the bed becomes unreachable without stepping into it.
Stepping into a raised bed is not just inconvenient. It is destructive. Foot traffic compacts the soil, crushing the air pockets that roots need to breathe. Those air pockets are exactly what make raised beds superior to in-ground plots in the first place. One hard stomp can undo months of careful soil building. Compaction also reduces drainage and makes it harder for tender seedlings to push through the surface.
How to Fix a Bed That Is Too Wide
For new builds, the rule is simple. Keep the width at 4 feet (1.2 meters) or less. If your garden space calls for something longer, build two narrower beds with a path between them. A 4-foot-wide bed is easy to tend from both sides, and you never need to step onto the growing area.
If you already have a bed that is too wide, do not tear it down. You can add a sturdy center plank or a series of flat stepping stones right down the middle. These distribute your weight without compacting the soil underneath. You lose a small amount of planting space, but you gain access to the entire bed without damaging the soil structure. Another option is to install a narrow wooden walkway that sits just above the soil level, allowing you to kneel or step without pressing down on the growing medium.
Mistake Number Two: Not Bracing Your Raised Bed
A raised bed looks solid when it is empty. Fill it with wet soil, however, and the pressure changes everything. Saturated growing mix is surprisingly heavy. It pushes against the side boards with steady force, especially on beds longer than 6 feet (1.8 meters). The wood does not fail all at once. Instead, over a season or two, the boards begin to bow outward. The joints loosen. The corners pull apart. Eventually, the whole structure gives out, spilling soil onto the path.
This is one of those raised bed mistakes that sneaks up on you. The bed looks fine in spring. By midsummer, you notice a slight curve in the long side. By fall, the curve is obvious. The next year, the gap between the boards and the soil is wide enough to let weeds in and water out.
Adding Internal Cross-Bracing
The solution is internal cross-bracing. Install a metal tie or a short length of lumber across the width of the bed every 4 to 6 feet (1.2 to 1.8 meters). These braces hold the side boards in place and distribute the pressure evenly across the frame. Galvanized corner brackets or purpose-made bed braces work well and require minimal carpentry skills. You can find them at most hardware stores or online.
For new builds, plan the bracing before you fill the bed. Attach the braces to the inside of the frame at the same height as the soil line. For an existing bed that is already starting to bow, add bracing as soon as you notice the curve. It will not fully reverse the damage that has already happened, but it will stop further movement. In extreme cases, you can also drive a metal stake into the ground outside the bowed board and screw it into the wood to pull it back into position.
Mistake Number Three: Filling Your Bed With Only Potting Soil
It is tempting to fill a deep raised bed entirely with bagged potting mix. The bags are convenient, and the product looks perfect. But this approach is both expensive and ineffective. A 2-foot-deep (60-centimeter-deep) bed filled entirely with potting mix costs a small fortune. Worse, the roots of most vegetables do not reach all the way to the bottom in a single growing season. The lower half of the bed is essentially wasted money.
Potting mix also compresses over time. As the organic matter breaks down, the soil level drops. You end up topping off the bed every spring, which means buying more bags year after year. This cycle is unsustainable for both your wallet and your garden.
The Hugelkultur Alternative
A better approach is the hugelkultur method. Fill the bottom half of a deep bed with logs, branches, wood scraps, and coarse organic matter before adding any soil. As the wood decomposes, it creates long-term aeration channels. It holds moisture during dry spells, releasing it slowly to plant roots. It also contributes nutrients as it breaks down over several years.
For the top 10 to 12 inches (25 to 30 centimeters) of your raised beds, use a high-quality organic raised bed mix. This is where the investment truly matters. The top layer is where roots actively feed and where seedlings establish themselves. A good mix contains compost, vermiculite or perlite for drainage, and peat moss or coconut coir for moisture retention. You can blend your own or buy a pre-mixed product from a reputable supplier. Either way, reserve the expensive stuff for the top. Let the logs and branches handle the bottom.
Mistake Number Four: Not Watering When Your Plants Need It
Raised beds drain faster than in-ground plots. That is part of their appeal. Good drainage prevents root rot and keeps soil warm in spring. But it also means raised beds dry out faster, especially during hot summer weeks. Watering on a fixed schedule, regardless of actual soil conditions, can go wrong in both directions. Too much water drowns roots and promotes fungal disease. Too little water stresses plants, reduces yield, and makes vegetables bitter or tough.
Many gardeners fall into the trap of watering every day because the surface of the soil looks dry. But surface dryness does not always mean the deeper soil is dry. Conversely, a quick sprinkle that barely wets the top inch encourages shallow root growth, making plants more vulnerable to heat stress.
You may also enjoy reading: 9 Veggies to Succession Sow for Endless Harvests.
How to Check Soil Moisture Properly
The simplest way to know if your plants need water is to use your finger. Push it 2 inches (5 centimeters) into the soil. If the soil feels dry at that depth, it is time to water. If it feels cool and moist, wait another day. This finger test is more reliable than any schedule because it accounts for weather, soil composition, and plant stage.
For spots that dry out fast and consistently, consider drip irrigation. A soaker hose or drip line delivers water directly to the root zone without wetting the foliage. This reduces evaporation and keeps leaves dry, which lowers the risk of powdery mildew and other foliar diseases. A simple timer can automate the process, but always check the soil manually at least once a week. Automated systems can malfunction or become misaligned, and your finger never lies.
Mistake Number Five: Putting Your Raised Bed in the Wrong Spot
Location matters more than almost any other factor in raised bed gardening. A bed placed in a spot that receives fewer than 6 hours of direct sun daily is going to underperform for most vegetables, no matter how good the soil is. Tomatoes, peppers, cucumbers, squash, and beans all need full sun to produce well. Even root crops like carrots and beets prefer at least 6 hours of direct light.
Shade is not entirely useless. Lettuce, spinach, kale, and herbs like parsley and mint can tolerate partial shade, especially in hot climates where afternoon shade prevents bolting. But if your goal is a diverse vegetable garden, you need sunlight. Many gardeners underestimate the shade cast by nearby trees, fences, or buildings. They place their beds in what looks like a sunny spot in early spring, only to discover in June that the neighbor’s oak tree casts a long afternoon shadow.
Choosing the Best Location
Before you build, observe your yard for a full day. Note where the sun rises and sets. Mark the areas that receive continuous direct sunlight from late morning through late afternoon. If possible, choose a spot that gets full sun for at least 6 to 8 hours daily. South-facing locations are ideal in the Northern Hemisphere. East-facing spots receive morning sun, which is gentler and helps dry dew from leaves, reducing disease pressure.
If your only available space is partially shaded, adjust your plant selection accordingly. Grow leafy greens and herbs in the shadier spots and reserve the sunniest areas for fruiting vegetables. You can also use reflective mulches or white landscape fabric to bounce light upward, but nothing replaces genuine direct sunlight. Moving an existing bed is a lot of work, but if your current location is producing weak, leggy plants, the effort is worth it.
Putting It All Together
These five raised bed mistakes share a common theme: they are all easy to overlook during the planning phase. A bed that is too wide seems generous until you realize you cannot reach the middle. A bed without bracing looks fine until the boards start to bow. Filling with only potting soil feels efficient until the cost adds up. Watering on a schedule seems responsible until your plants show signs of stress. And placing the bed in the wrong spot feels permanent until you see the results.
The good news is that every one of these problems has a straightforward fix. Keep your beds narrow, brace them well, fill them smartly, water by touch, and choose your location with care. A raised bed built with these principles in mind will serve you well for years. It will produce abundant vegetables, require less maintenance, and bring you the satisfaction that comes from growing food in a space designed to work with nature, not against it.
Whether you are starting fresh or troubleshooting an existing setup, addressing these five areas will transform your raised bed from a container full of potential problems into one of the most productive and enjoyable parts of your garden.


