Why Lemon Balm Deserves a Place in Your Soap Making Routine
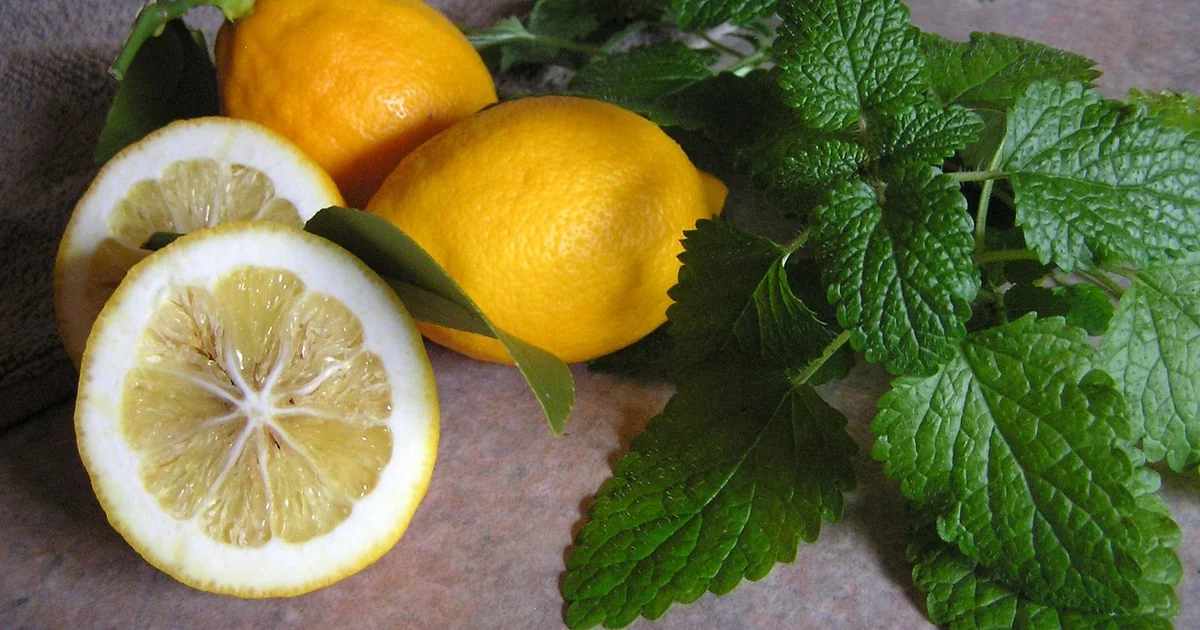
Picture a sprawling garden patch where lemon balm has decided to take over. The leaves release a bright, citrusy-mint scent every time you brush against them. If you grow this herb, you know it spreads with enthusiasm. Rather than letting the excess go to waste, many gardeners look for creative ways to use it. Infusing oil with fresh lemon balm leaves is one of the most rewarding methods. That infused oil becomes the heart of a cold process soap that cleanses without stripping moisture from your skin.
Making lemon balm soap from scratch does come with specific challenges. Fresh herb infusions spoil faster than dried ones. The fragrance that fills your garden is surprisingly subtle once it goes through the saponification process. And balancing a high-olive-oil recipe so the bar is both moisturizing and firm enough to last takes some know-how. The five cold process secrets below address each of these hurdles directly.
Cold Process Secret 1: Infuse Oil With Fresh Lemon Balm the Right Way
Why Fresh Leaves Work Better Than Dried
Many soap makers assume dried herbs are safer for infusions because they contain less moisture. That is generally true for most botanicals. But lemon balm behaves differently. The fresh leaves carry volatile compounds that give the plant its characteristic lemon-mint personality. Those compounds degrade significantly during drying. A dried leaf infusion yields a much fainter herbal presence in the final soap.
When you use fresh leaves, you capture more of the plant’s natural chemistry. The trade-off is a shorter window for using the oil. Moisture from the fresh leaves creates an environment where microbes can multiply. This means you need to work quickly once the infusion is complete. Plan your soap making session within one to two weeks after straining the oil.
The Wilting Step That Reduces Spoilage Risk
Pick your lemon balm leaves before the plant flowers. At that stage, the essential oil content in the leaves is at its peak. Spread the leaves on a clean towel in a cool, dry room. Let them wilt for about 24 hours. This step removes some surface moisture without fully drying the leaves. The result is an infusion that carries a stronger herbal character while having a slightly lower risk of spoilage than using completely fresh, wet leaves.
After wilting, chop the leaves roughly and submerge them in a carrier oil. Olive oil is the ideal choice because its mild flavor and high stability pair well with herbal infusions. Use a gentle heat method or a room-temperature steep for several days. Once the oil takes on a green tint and a light herbal aroma, strain out the plant material. Store the infused oil in a cool, dark place and use it within seven to fourteen days.
Cold Process Secret 2: Balance the High Olive Oil Percentage for a Bar That Lasts
The Softness Problem With Olive Oil Soap
Olive oil produces a bar that is exceptionally gentle and moisturizing. The downside is that a high-olive-oil soap takes longer to harden and stays softer than recipes with harder oils. If you have ever made a castile-style soap, you know it can feel almost slimy when wet unless it cures for many months. For a lemon balm soap meant for kitchen or garden use, that level of softness is impractical. Hands that have been digging in soil or washing dishes need a bar that holds its shape.
The solution is to balance the olive oil with coconut oil. Coconut oil contributes hardness and boosts lather. A typical ratio for this recipe uses about 70 percent olive oil and 30 percent coconut oil. That split preserves the moisturizing feel of the olive oil while giving the bar enough structure to survive daily use. The coconut oil also helps create a bubbly lather that olive oil alone cannot produce.
Curing Time Matters More Than You Think
Even with coconut oil in the formula, a high-olive-oil soap needs a proper cure. Six weeks on a wire rack in a cool, dark space allows excess water to evaporate and the bar to harden. Cutting the curing time short results in a bar that dissolves too quickly in the shower or sinks into a mushy puddle on the soap dish. Patience during this phase transforms a soft, fragile log into a firm, long-lasting bar.
Store the curing bars with enough space between them so air circulates freely. Turn them once a week to ensure even drying. After six weeks, test one bar by leaving it in a dry soap dish for a few days. If it stays firm and does not develop a soft layer on the bottom, the cure is complete.
Cold Process Secret 3: Boost the Fragrance Without Breaking Your Budget
Why Lemon Balm Scent Fades in Cold Process Soap
The bright lemon-mint aroma you smell when you crush a fresh leaf is largely lost during saponification. The chemical reaction between lye and oils generates heat, and that heat destroys many of the volatile compounds responsible for scent. Even a strong herbal infusion does not guarantee a fragrant finished bar. If you rely solely on the infused oil for fragrance, your soap may smell mostly like olive oil with only a whisper of lemon balm.
This is a common disappointment for first-time makers. They expect the soap to smell like the garden, but the reality is much more subtle. Knowing this ahead of time lets you plan a strategy for boosting the scent profile.
The Lemon and Mint Essential Oil Duo
Genuine lemon balm essential oil, also called Melissa oil, is one of the most expensive essential oils on the market. It takes a vast quantity of plant material to produce a small amount of oil, which drives the price upward. For most home soap makers, using Melissa oil in a batch of cold process soap is not cost-effective. A much more practical alternative is a blend of lemon essential oil and mint essential oil.
Lemon essential oil provides the bright citrus note you associate with lemon balm. Peppermint or spearmint essential oil adds the cool, herbaceous undertone that mimics the plant’s natural complexity. Together, they create a fragrance profile that closely resembles fresh lemon balm at a fraction of the cost. Use about 0.25 to 0.5 ounces of the blend per pound of soap base. Add the essential oils at light trace to minimize evaporation during mixing.
Cold Process Secret 4: Use Turmeric and Green Mica for Natural, Stable Color
Why Synthetic Colorants Aren’t Necessary Here
Many cold process soap recipes rely on synthetic colorants because they are predictable. They produce the same shade every time, batch after batch. Natural colorants, on the other hand, can shift depending on the pH of the soap and the temperature during saponification. Turmeric is a natural colorant that behaves reliably in cold process soap. It gives a warm yellow-green hue that complements the herbal theme of lemon balm soap beautifully.
The ratio of turmeric to green mica matters. Using two parts turmeric to one part green mica creates a yellow-green background that looks like the plant itself. The green mica adds a subtle shimmer without overwhelming the natural tone. Mica is a mineral-based colorant that stays stable in soap. It does not morph or fade the way some botanical colorants do.
Avoiding Turmeric Stains on Skin
One concern with turmeric is that it can stain fabric and skin. In soap, the amount used is small enough that staining is rarely an issue during normal use. However, if you are making this soap as a gift, mention to the recipient that turmeric is the colorant. Some people are sensitive to turmeric on their skin, though reactions are uncommon. The yellow tint in the soap fades slightly during the cure, settling into a soft, earthy pastel rather than a bright neon yellow.
You may also enjoy reading: 13 Chic Air Plant Holders to Show Off Your Collection.
Cold Process Secret 5: Master the Green Mica Swirl for a Surprise Every Time
The Unpredictable Beauty of the Pull-Through Technique
Adding a swirl to cold process soap is one of the most satisfying parts of the process. The technique described here involves setting aside a small portion of the batter and mixing it with additional green mica powder. That dark green batter is then spooned back into the main pot and pulled through with a spatula. Three pulls in different directions create a marbled pattern that is never the same twice.
Cutting the cured loaf is like opening a present. You never know exactly how the swirl will look on the inside. Some slices show bold green veins running through the yellow-green base. Others reveal delicate streaks that look like ferns pressed into stone. That element of surprise keeps soap making interesting batch after batch.
When to Add the Swirl Batter
Timing matters for a clean swirl. Add the reserved colored batter when the main batter is at a medium trace. If the batter is too thin, the green portion will sink to the bottom instead of staying suspended. If the batter is too thick, the pull-through motion will create chunky blobs rather than smooth lines. Practice reading the trace of your batter. When it looks like thin pudding, that is the ideal moment for the swirl technique.
After pouring the batter into the loaf mould, give the mould a few gentle taps on the counter to release air bubbles. Do not overwork the surface. Any manipulation after the pour will distort the swirl pattern you worked to create. Let the mould sit undisturbed for a few minutes before moving it to the insulation box.
Putting It All Together: A Step-by-Step Overview
If you are ready to make your own lemon balm soap, here is a quick walkthrough of the complete process. This overview assumes you have basic cold process soap making experience and the necessary safety equipment.
Weigh all ingredients before you begin. Protect your skin, eyes, and clothing with gloves and safety goggles. Gently heat the lemon balm infused olive oil and coconut oil in a double boiler until they reach 115°F. In a well-ventilated area, combine water and lye in a heat-resistant container. Stir until the lye dissolves completely. Cool the lye solution in an ice bath until it also reaches 115°F.
Slowly pour the lye solution into the oils while blending with an immersion blender. Blend until the batter reaches a light trace. Add the lemon and mint essential oils, the turmeric powder, and half of the green mica. Blend again until the color is evenly distributed. Remove a few tablespoons of batter and mix with the remaining green mica to create a darker green paste. Return that paste to the main pot and use a spatula to pull it through three times in different directions.
Pour the batter into a loaf-style mould. Place the mould inside a cardboard box and wrap it with towels to insulate. Leave it in a warm spot, such as the top of the refrigerator, for 48 hours. After that period, unmold the soap and slice it into bars. Arrange the bars on a wire rack in a cool, dark place and let them cure for six weeks.
Caring for Your Lemon Balm Soap After the Cure
Once the six-week cure is complete, store the bars in a dry location. Because this recipe contains a high percentage of olive oil, the bars are softer than commercial soaps. Keep them on a well-draining soap dish between uses. A dish with ridges or a slatted wooden base allows air to circulate beneath the bar, preventing it from sitting in a puddle of water.
Use this soap in the kitchen after chopping garlic or handling fish. The mild lemon-mint scent does not clash with food aromas the way heavier floral or spice scents can. In the potting shed, it cuts through garden dirt and leaves hands feeling soft rather than stripped. The moisturizing properties make it a good choice for anyone who washes their hands many times a day.
Making lemon balm soap with fresh herb infusions takes a bit more planning than using dried herbs or simple oils. But the result is a bar that carries the character of the plant from garden to skin. Each slice reveals a unique swirl. Each use releases a gentle reminder of summer leaves brushing against your fingertips.