You might think a plant that drives cats wild would be fussy and difficult to keep alive. The truth is quite the opposite. Catnip is one of the most forgiving herbs you can welcome into your garden. It thrives on a bit of neglect and rewards you with fragrant leaves, delicate blooms, and a yard full of happy pollinators. If you have struggled with herbs that wilt or rot, growing catnip could be the confidence boost your gardening journey needs.
Why Most Catnip Plants Fail (And How to Fix It)
The number one mistake people make with this herb is loving it too much. Catnip is native to dry, rocky regions of Europe and Asia. It evolved to survive on sparse rainfall and lean soil. When gardeners water it like a thirsty tomato plant or plant it in heavy clay, the roots suffocate. The plant turns yellow, droops, and eventually dies.
The second common problem is poor light. Catnip needs a solid six hours of direct sun each day. Without it, the stems stretch out thin and weak. The plant looks leggy and produces fewer of the aromatic oils that cats and people love.
The third issue is unchecked spreading. Catnip self-seeds aggressively. If you let it go to seed, you will find baby plants popping up all over your garden beds next spring. Containment is not just about neatness — it is about keeping your garden balanced.
Tip 1: Start Seeds at the Right Time
Timing matters more than most beginners realize. Catnip seeds need a head start indoors if you want robust plants by midsummer. Begin the process about six weeks before your area’s final spring frost. This gives the seedlings time to develop strong root systems before they face the outdoor elements.
How to Start Seeds Indoors
Fill small pots or seed trays with a lightweight seed-starting mix. Sprinkle the tiny seeds on top and cover them with a very thin layer of soil — no more than one-eighth of an inch deep. Mist the surface gently so the seeds settle into the soil without washing away.
Place the trays in a warm spot where temperatures stay between 65°F and 70°F. A sunny windowsill works well, but a grow light set just a few inches above the tray gives more consistent results. Keep the soil lightly moist but never soggy. Germination typically takes seven to fourteen days.
Once the seedlings develop two sets of true leaves, thin them out. Keep only the strongest plant in each pot. This prevents overcrowding and gives each young plant room to grow a sturdy stem.
Hardening Off Before Transplanting
Do not rush your seedlings straight from the indoors into the garden. They need a gradual adjustment period called hardening off. About a week before your planned transplant date, set the pots outside in a shaded, sheltered spot for a few hours each day. Gradually increase their exposure to sun and wind over the course of the week. This simple step prevents transplant shock and sets the stage for vigorous growth.
Tip 2: Choose the Perfect Planting Spot
Location determines about 80 percent of your success with growing catnip. The plant demands full sun — at least six hours of direct light daily. In cooler northern climates, more sun is always better. In southern regions where summer temperatures regularly exceed 90°F, a spot with light afternoon shade can prevent the leaves from scorching.
Soil Drainage Is Non-Negotiable
Catnip will tolerate poor soil, rocky soil, and even slightly alkaline soil. It will not tolerate wet feet. The roots need oxygen as much as they need water. If your garden has heavy clay that holds water after rain, build a raised bed or plant on a slight slope. Amending the soil with sand or fine gravel improves drainage dramatically. A sandy loam with a pH between 6.1 and 7.8 is the ideal environment.
Containment from the Start
Catnip spreads through both underground runners and prolific self-seeding. If you plant it directly in the ground without barriers, you will be pulling volunteers for years. A simple solution is to sink a bottomless bucket or a ring of landscape edging around the planting hole. Better yet, grow it in a container from the beginning. More on that later.
Tip 3: Space Plants Correctly for Healthy Growth
Crowding is a subtle but serious problem. When catnip plants are packed too tightly, air cannot circulate between them. In humid weather, this stagnant air invites powdery mildew and other fungal diseases.
Space your plants 18 to 24 inches apart. This distance gives each plant enough room to reach its full size of two to three feet tall and wide. It also allows sunlight to reach the lower leaves, which keeps the whole plant productive.
When transplanting nursery plants or your homegrown seedlings, set them at the same depth they were in their previous container. Burying the stem too deep can cause it to rot. Planting too shallow leaves the roots exposed to drying air.
Tip 4: Water the Right Way (Less Is More)
This is the most counterintuitive tip for new gardeners. Catnip is a drought-tolerant plant. In fact, it performs best when the soil dries out between waterings. Overwatering is the fastest way to kill it.
Watering Young Plants vs. Mature Plants
Seedlings and newly transplanted catnip need consistent moisture while they establish roots. Water them lightly whenever the top inch of soil feels dry. Be careful not to create puddles.
Once the plants are established — usually after about three to four weeks in the ground — you can cut back drastically. Mature catnip likely needs water only during extended dry spells. If the foliage starts to wilt in the heat of the afternoon, that is your cue to give it a deep, thorough soak. Water at the base of the plant, not overhead, to keep the leaves dry and reduce the risk of fungal spots.
The Morning Watering Rule
Whenever you do water, do it early in the morning. This gives the soil time to absorb the moisture before the sun gets high. It also lets any water that splashed onto the leaves evaporate during the day, which prevents overnight rot.
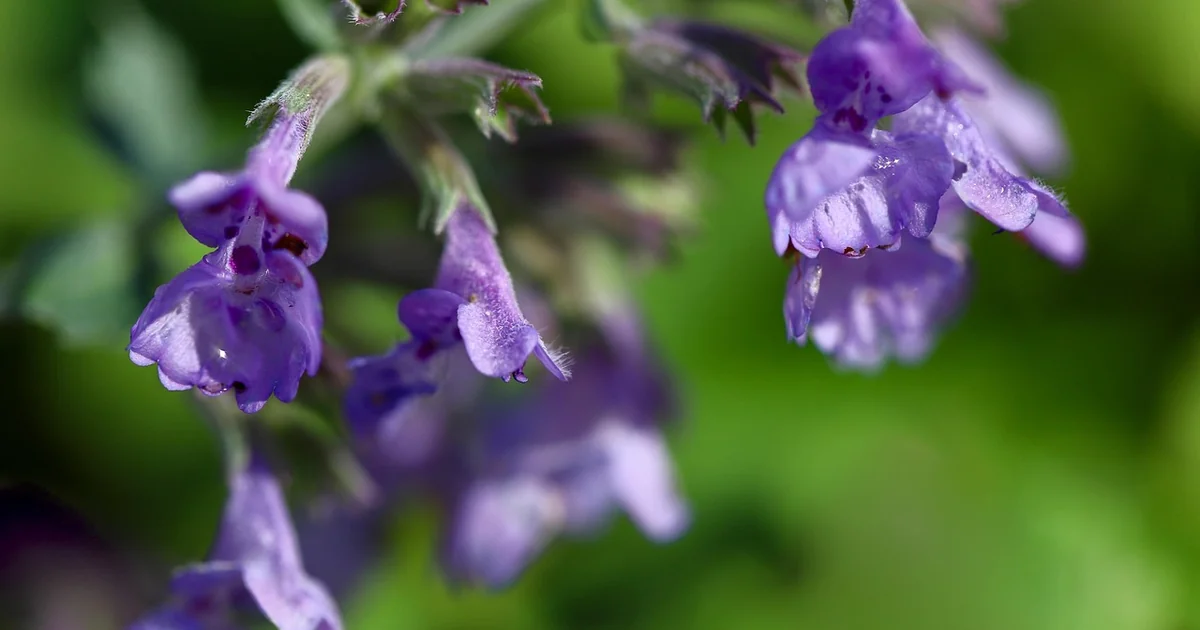
Tip 5: Harvest at Peak Potency
The timing of your harvest directly affects the quality of the leaves and flowers. Catnip contains a compound called nepetalactone, which is what attracts cats and gives the herb its calming properties. Nepetalactone levels are highest when the plant is in full bloom.
When and How to Harvest
Plan your harvest for late morning on a sunny day. By this time, the morning dew has evaporated, but the heat of the afternoon has not yet stressed the plant. Cut entire stems at the base using clean, sharp scissors or pruning shears.
If you want a large quantity, you can cut the whole plant down to about four inches above the soil. Do not worry — catnip is a perennial that will regrow from the crown. In many climates, you can get two or even three harvests in a single growing season.
Drying and Storing
Gather the cut stems into small bundles and tie them with twine. Hang each bundle upside down in a dark, dry, well-ventilated space. A spare closet, an attic, or a covered porch works perfectly. The drying process takes about two to three weeks.
Once the leaves crumble easily between your fingers, strip them from the stems. Store the dried leaves and flowers in an airtight glass jar away from direct light. Properly dried catnip retains its potency for up to a year. Use it to stuff cat toys, brew a calming tea, or sprinkle it on scratching posts.
Tip 6: Grow in Containers for Total Control
If you have limited garden space or simply want to avoid an invasion, containers are the smartest approach to growing catnip. A pot gives you complete control over soil quality, drainage, and spread.
You may also enjoy reading: 7 Low-Maintenance Shade Perennials That Thrive in the Dark.
Choosing the Right Pot
Select a container at least 12 inches in diameter. This gives the root system enough room to develop without becoming root-bound. Unglazed clay pots are ideal because the porous material allows excess moisture to evaporate through the sides. Make sure the pot has at least one large drainage hole at the bottom.
Potting Mix and Placement
Fill the container with a well-draining potting mix. Avoid garden soil, which compacts in pots and holds too much water. You can mix in a handful of perlite or coarse sand to improve drainage further.
Place the pot in a spot that receives full sun. If you live in a hot climate, give the pot a location with afternoon shade. Container plants dry out faster than in-ground plants, so check the soil moisture every few days during summer. Stick your finger about an inch into the soil — if it feels dry, water deeply until water runs out the drainage hole.
Indoor Catnip Possibilities
You can grow catnip indoors year-round if you have a sunny windowsill that gets at least six hours of direct light. A south-facing window is best. If your home does not have enough natural light, supplement with a small grow light. Indoor catnip tends to be less potent than outdoor plants, but it still delights your feline friends and adds greenery to your living space.
Tip 7: Prune Strategically for Bushier Plants and More Blooms
Pruning is not just about keeping the plant tidy. It directly influences how much catnip you can harvest and how long the plant stays productive.
Pinching Back Young Plants
When your catnip seedlings reach about six inches tall, pinch off the top set of leaves. This simple action encourages the plant to branch out from the sides. Instead of one tall, spindly stem, you get a bushy, compact plant with multiple stems. Each of those stems will produce flowers, which means more material for harvest.
Deadheading for Continuous Bloom
Catnip blooms from late spring through fall. As soon as the flowers fade and start to turn brown, snip them off. This process, called deadheading, prevents the plant from putting energy into seed production. Instead, it channels that energy into producing more flowers. You can extend the blooming period by several weeks with regular deadheading.
Cutting Back After Frost
After the first hard frost of autumn, the foliage will die back. Cut the entire plant down to about two to three inches above the ground. This cleanup prevents pests and diseases from overwintering in the dead material. Mulch the crown lightly with straw or shredded leaves if you live in a zone 3 or 4 winter climate. The plant will come back from the roots next spring.
Controlling Runners
Catnip spreads through underground stems called runners. If you see new sprouts popping up several inches away from the main plant, dig them out promptly. You can transplant these runners to new pots or give them away to friends. If left unchecked, a single plant can colonize a large area within two seasons.
Pollinators Love Catnip
While cats get all the attention, bees are the real beneficiaries of a catnip patch. The plant is self-pollinating, which means it does not rely on insects to reproduce. However, its nectar-rich flowers attract a wide range of pollinators. Honeybees, bumblebees, and even some species of butterflies visit the blooms regularly.
In a study conducted at the University of Sussex in the United Kingdom, researchers observed that catnip ranked among the top ten plants for attracting bees in urban gardens. The plant’s long blooming season provides a steady food source from late spring through early fall. By adding catnip to your garden, you support local pollinator populations while enjoying the antics of your neighborhood cats.
Varieties Worth Exploring
Standard catnip (Nepeta cataria) is the most common variety, but several relatives offer unique twists. Lemon catnip (Nepeta citriodora) has a bright, citrusy fragrance that many people find more pleasant than the typical musky scent. It grows slightly smaller than the standard type, reaching about 18 inches tall.
Camphor catnip (Nepeta camphorata) stays under two feet tall and wide. Its leaves have a subtle medicinal aroma reminiscent of camphor. Greek catnip (Nepeta parnassica) is another compact option with delicate light pink flowers. These smaller varieties work well in containers or small garden spaces where standard catnip might overwhelm the area.
Common Pests and Problems
Catnip is remarkably pest-resistant. Its strong aroma deters most insects, including aphids and squash bugs. In fact, some gardeners plant catnip near vegetables as a natural repellent. The main threats are fungal diseases caused by excessive moisture.
Powdery mildew appears as a white, powdery coating on the leaves. It thrives in humid conditions with poor air circulation. To prevent it, space your plants properly and water at the base rather than overhead. If you spot mildew early, remove the affected leaves and improve airflow around the plant.
Root rot is more serious and usually fatal. It happens when the soil stays wet for too long. The roots turn brown and mushy, and the plant collapses. Prevention is the only reliable cure — plant in well-draining soil and resist the urge to overwater.


